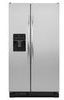

Use and Care
Page 2
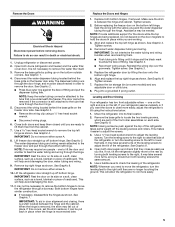
...All safety messages will follow instructions. Always read and obey all parts and panels before operating. ■ Remove doors from your old refrigerator. ■ Keep flammable materials and vapors, such as gasoline, away from refrigerator. ■ Use two or more chemicals known to the State... you how to cause birth defects or other reproductive harm. 2 We have provided many important safety messages in this manual and on your refrigerator, follow instructions. These words mean: DANGER You can be killed or seriously injured if you don't follow these basic precautions: ■...
...All safety messages will follow instructions. Always read and obey all parts and panels before operating. ■ Remove doors from your old refrigerator. ■ Keep flammable materials and vapors, such as gasoline, away from refrigerator. ■ Use two or more chemicals known to the State... you how to cause birth defects or other reproductive harm. 2 We have provided many important safety messages in this manual and on your refrigerator, follow instructions. These words mean: DANGER You can be killed or seriously injured if you don't follow these basic precautions: ■...

Use and Care
Page 4
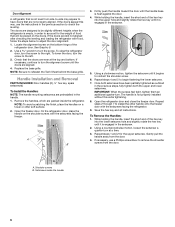
... Water Dispenser Tubing Connection A A A. TOOLS NEEDED: Bubble level; If door removal is necessary, see whether you begin, turn the refrigerator control OFF or turn cooling off. Wiring Plugs B. Do Not Remove Screws. 7 Bottom Hinges (Left and Right) A Do Not ... models) 8 Leveling Raise Lower A A. Alignment Screw 4 Unplug refrigerator or disconnect power. Do Not Remove Screws. 3 Wiring Connection A BC A. Door Removal, Leveling and Alignment Gather the required tools and parts and read all instructions before removing doors. Save these instructions for future...
... Water Dispenser Tubing Connection A A A. TOOLS NEEDED: Bubble level; If door removal is necessary, see whether you begin, turn the refrigerator control OFF or turn cooling off. Wiring Plugs B. Do Not Remove Screws. 7 Bottom Hinges (Left and Right) A Do Not ... models) 8 Leveling Raise Lower A A. Alignment Screw 4 Unplug refrigerator or disconnect power. Do Not Remove Screws. 3 Wiring Connection A BC A. Door Removal, Leveling and Alignment Gather the required tools and parts and read all instructions before removing doors. Save these instructions for future...
Use and Care
Page 5
...the right. Replace the Doors and Hinges 1. Tighten screws. 4. Move the refrigerator into fitting until you should turn the leveling screw to the left hinge as you are part of the refrigerator or turn both leveling screws to remove the water filter itself. 3. Disconnect the... wiring located behind the base grille on the freezer door side. Unplug refrigerator or disconnect power. 2. See Graphic 4. See Graphic...
...the right. Replace the Doors and Hinges 1. Tighten screws. 4. Move the refrigerator into fitting until you should turn the leveling screw to the left hinge as you are part of the refrigerator or turn both leveling screws to remove the water filter itself. 3. Disconnect the... wiring located behind the base grille on the freezer door side. Unplug refrigerator or disconnect power. 2. See Graphic 4. See Graphic...
Use and Care
Page 6
...Open the freezer door. While holding the handle, insert the short end of the refrigerator door. If necessary, continue to begin fastening the lower setscrew. 7. Handle Installation and Removal PARTS INCLUDED: Door handles (2 hex key, spare setscrew(s) To Install the Handles: NOTE:... The handle mounting setscrews are not properly aligned. Setscrews inside the refrigerator. NOTE: To avoid scratching the finish, place the...
...Open the freezer door. While holding the handle, insert the short end of the refrigerator door. If necessary, continue to begin fastening the lower setscrew. 7. Handle Installation and Removal PARTS INCLUDED: Door handles (2 hex key, spare setscrew(s) To Install the Handles: NOTE:... The handle mounting setscrews are not properly aligned. Setscrews inside the refrigerator. NOTE: To avoid scratching the finish, place the...

Use and Care
Page 7
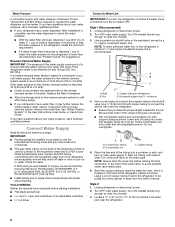
... electrical supply is required, so a total cabinet opening width of space behind the refrigerator. Do not use an extension cord. Water Supply Requirements Gather the required tools and parts before starting installation. TOOLS NEEDED: ■ Flat-blade screwdriver Nut driver and ¹...;⁄₂" Open-end or two adjustable wrenches Drill bit ■ Cordless drill NOTE: Your refrigerator dealer has a kit available with ...
... electrical supply is required, so a total cabinet opening width of space behind the refrigerator. Do not use an extension cord. Water Supply Requirements Gather the required tools and parts before starting installation. TOOLS NEEDED: ■ Flat-blade screwdriver Nut driver and ¹...;⁄₂" Open-end or two adjustable wrenches Drill bit ■ Cordless drill NOTE: Your refrigerator dealer has a kit available with ...
Use and Care
Page 8
... longer than 8 seconds to dispense 1 cup of water. 3. Leave a coil of copper tubing to allow sufficient water flow to the refrigerator, a minimum ¹⁄₂" size copper household supply line is recommended. Style 2 1. Turn ON nearest faucet long enough to clear... dispensed in your ice or water. Remove the water filter. Unplug refrigerator or disconnect power. 2. Bulb B. Nut D C. Household supply line (½" minimum) 4. Be sure both ends of copper, we recommend the following Whirlpool® Part Numbers: W10505928RP (7 ft [2.14 m] jacketed PEX), 8212547RP (5 ft...
... longer than 8 seconds to dispense 1 cup of water. 3. Leave a coil of copper tubing to allow sufficient water flow to the refrigerator, a minimum ¹⁄₂" size copper household supply line is recommended. Style 2 1. Turn ON nearest faucet long enough to clear... dispensed in your ice or water. Remove the water filter. Unplug refrigerator or disconnect power. 2. Bulb B. Nut D C. Household supply line (½" minimum) 4. Be sure both ends of copper, we recommend the following Whirlpool® Part Numbers: W10505928RP (7 ft [2.14 m] jacketed PEX), 8212547RP (5 ft...

Use and Care
Page 9
... copper tubing. Turn shutoff valve ON. 6. Style 2 1. Remove and discard the plastic part that is equipped with a built-in water strainer. Attach the copper tube to the tubing when the refrigerator is clear. Tighten the compression nut. Tube clamp B. Compression nut E. NOTE: Tighten the...copper tubing does not touch the cabinet's side wall or other parts inside the cabinet. 5. Tighten any connections (including connections at the valve) or nuts that leak. Check for leaks. Style 3 1. Unplug refrigerator or disconnect power. 2. Check for leaks. Fasten the shutoff ...
... copper tubing. Turn shutoff valve ON. 6. Style 2 1. Remove and discard the plastic part that is equipped with a built-in water strainer. Attach the copper tube to the tubing when the refrigerator is clear. Tighten the compression nut. Tube clamp B. Compression nut E. NOTE: Tighten the...copper tubing does not touch the cabinet's side wall or other parts inside the cabinet. 5. Tighten any connections (including connections at the valve) or nuts that leak. Check for leaks. Style 3 1. Unplug refrigerator or disconnect power. 2. Check for leaks. Fasten the shutoff ...
Use and Care
Page 12
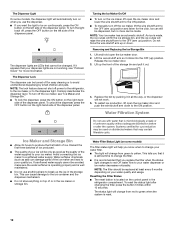
...working, see "Ice Maker and Storage Bin." ■ To lock the dispenser, press the ON button on the left side of or in the refrigerator compartment. Lift the wire shutoff arm so it in the storage bin. This can be dispensed, but no more information. It simply deactivates the ...OFF button on the right-hand side of the storage bin and pull it out. 4. Ice can still be turned off for more can damage parts of the water supplied to your water dispenser or ice maker decreases noticeably. Removing and Replacing the Ice Storage Bin 1. Lift up ) position. ...
...working, see "Ice Maker and Storage Bin." ■ To lock the dispenser, press the ON button on the left side of or in the refrigerator compartment. Lift the wire shutoff arm so it in the storage bin. This can be dispensed, but no more information. It simply deactivates the ...OFF button on the right-hand side of the storage bin and pull it out. 4. Ice can still be turned off for more can damage parts of the water supplied to your water dispenser or ice maker decreases noticeably. Removing and Replacing the Ice Storage Bin 1. Lift up ) position. ...
Use and Care
Page 13
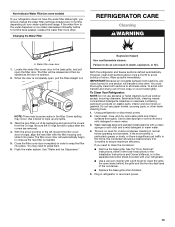
... both sections, any spills. 3. There is significant pet traffic in the home, the condenser should be some models) If your refrigerator does not have passed, replace the water filter more often. IMPORTANT: Because air circulates between both sections to the water dispenser or... containing petroleum products on plastic parts, interior and door liners or gaskets. Hand wash, rinse, and dry removable parts and interior surfaces thoroughly. See "Water and Ice Dispensers." Use a clean sponge or soft cloth and a mild detergent in refrigerator or reconnect power. 13 The...
... both sections, any spills. 3. There is significant pet traffic in the home, the condenser should be some models) If your refrigerator does not have passed, replace the water filter more often. IMPORTANT: Because air circulates between both sections to the water dispenser or... containing petroleum products on plastic parts, interior and door liners or gaskets. Hand wash, rinse, and dry removable parts and interior surfaces thoroughly. See "Water and Ice Dispensers." Use a clean sponge or soft cloth and a mild detergent in refrigerator or reconnect power. 13 The...
Use and Care
Page 14
... ice bin. See "Using the Controls" in the User Instructions, User Guide, or Use & Care Guide. 5. Empty the ice bin. 4. Unplug refrigerator. 6. Take out all removable parts, wrap them well, and tape them open far enough for air to get to your new home, put everything back and refer to the...to OFF (right). 4. Property damage can occur if the water supply is connected to the household water supply, turn off the water supply to the refrigerator. When you have an automatic ice maker, turn off the ice maker. Depending on your model, raise the wire shutoff arm to OFF (up) ...
... ice bin. See "Using the Controls" in the User Instructions, User Guide, or Use & Care Guide. 5. Empty the ice bin. 4. Unplug refrigerator. 6. Take out all removable parts, wrap them well, and tape them open far enough for air to get to your new home, put everything back and refer to the...to OFF (right). 4. Property damage can occur if the water supply is connected to the household water supply, turn off the water supply to the refrigerator. When you have an automatic ice maker, turn off the ice maker. Depending on your model, raise the wire shutoff arm to OFF (up) ...
Use and Care
Page 19
...°F (10°C). ■ New installation - In Canada, call 1-800-442-9991 and ask for your authorized Amana dealer. Make sure all connections are available for the part number listed below or contact your refrigerator. The first glass of water - See "Water and Ice Dispensers." ■ Residual ice in the water lines. affresh...
...°F (10°C). ■ New installation - In Canada, call 1-800-442-9991 and ask for your authorized Amana dealer. Make sure all connections are available for the part number listed below or contact your refrigerator. The first glass of water - See "Water and Ice Dispensers." ■ Residual ice in the water lines. affresh...

Use and Care
Page 21
...the Use and Care Guide. 13. YOUR SOLE AND EXCLUSIVE REMEDY UNDER THIS LIMITED WARRANTY SHALL BE PRODUCT REPAIR AS PROVIDED HEREIN. Replacement parts or repair labor if this major appliance is used in the country in a remote area where service by the customer. ITEMS EXCLUDED ... determined. 12. Some states and provinces do not allow limitations on major appliances with any marker to refrigerator surfaces that vary from state to state or province to Amana within 30 days from the date of stainless steel surfaces. Please keep all provided instructions and your model...
...the Use and Care Guide. 13. YOUR SOLE AND EXCLUSIVE REMEDY UNDER THIS LIMITED WARRANTY SHALL BE PRODUCT REPAIR AS PROVIDED HEREIN. Replacement parts or repair labor if this major appliance is used in the country in a remote area where service by the customer. ITEMS EXCLUDED ... determined. 12. Some states and provinces do not allow limitations on major appliances with any marker to refrigerator surfaces that vary from state to state or province to Amana within 30 days from the date of stainless steel surfaces. Please keep all provided instructions and your model...
Warranty
Page 1
... abuse, fire, flood, acts of God, improper installation, installation not in accordance with any marker to refrigerator surfaces that are excluded from warranty coverage. 4. Pickup and delivery. AMANA SHALL NOT BE LIABLE FOR INCIDENTAL OR CONSEQUENTIAL DAMAGES. Some states and provinces do not allow limitations on how... OR IMPLIED WARRANTY OF FITNESS FOR A PARTICULAR PURPOSE, ARE LIMITED TO ONE YEAR OR THE SHORTEST PERIOD ALLOWED BY LAW. Consumable parts are not designated as dry-erase surfaces. 14. The removal and reinstallation of your major appliance if it is installed in an...
... abuse, fire, flood, acts of God, improper installation, installation not in accordance with any marker to refrigerator surfaces that are excluded from warranty coverage. 4. Pickup and delivery. AMANA SHALL NOT BE LIABLE FOR INCIDENTAL OR CONSEQUENTIAL DAMAGES. Some states and provinces do not allow limitations on how... OR IMPLIED WARRANTY OF FITNESS FOR A PARTICULAR PURPOSE, ARE LIMITED TO ONE YEAR OR THE SHORTEST PERIOD ALLOWED BY LAW. Consumable parts are not designated as dry-erase surfaces. 14. The removal and reinstallation of your major appliance if it is installed in an...

Installation Instruction
Page 2
...not use an adapter. ■ Do not use an extension cord. ■ Disconnect power before servicing. ■ Replace all safety messages. REFRIGERATOR SAFETY Your safety and the safety of others . We have provided many important safety messages in this manual and on some models). ■ ...Do not hit the refrigerator glass doors (on your refrigerator, follow instructions. Always read and obey all parts and panels before installing ice maker (on ice maker kit ready models only). ■ Use a sturdy...
...not use an adapter. ■ Do not use an extension cord. ■ Disconnect power before servicing. ■ Replace all safety messages. REFRIGERATOR SAFETY Your safety and the safety of others . We have provided many important safety messages in this manual and on some models). ■ ...Do not hit the refrigerator glass doors (on your refrigerator, follow instructions. Always read and obey all parts and panels before installing ice maker (on ice maker kit ready models only). ■ Use a sturdy...

Installation Instruction
Page 4
.... Remove food, the ice storage bin (on some models), and any adjustable door or utility bins from doors. Wiring Plugs B. Unplug refrigerator or disconnect power. Face of your home, measure the doorway of Fitting 1 Base Grille Do Not Remove Screw A (present on some models...power before starting installation. Grommets 2 Water Dispenser Tubing Connection A A A. Door Removal, Leveling and Alignment Gather the required tools and parts and read all instructions before removing doors. Save these instructions for future reference. IMPORTANT: Before you need to do so can result ...
.... Remove food, the ice storage bin (on some models), and any adjustable door or utility bins from doors. Wiring Plugs B. Unplug refrigerator or disconnect power. Face of your home, measure the doorway of Fitting 1 Base Grille Do Not Remove Screw A (present on some models...power before starting installation. Grommets 2 Water Dispenser Tubing Connection A A A. Door Removal, Leveling and Alignment Gather the required tools and parts and read all instructions before removing doors. Save these instructions for future reference. IMPORTANT: Before you need to do so can result ...
Installation Instruction
Page 5
...4. See Graphic 5. See Graphic 6. IMPORTANT: Rest the door on its final location. 2. This will be disconnected in place while you are part of cardboard. See Graphic 7. IMPORTANT: To aid in place when the hinge is reconnected later. Replace both doors and keep them closed until ...IMPORTANT: Do not intertwine the water tubing and wiring bundles when reconnecting them free from side-to-side may take several more easily, adjust the refrigerator's tilt using a ¹⁄₄" hex-head socket wrench. ■ Disconnect wiring plugs. 6. Align and replace the top right hinge as...
...4. See Graphic 5. See Graphic 6. IMPORTANT: Rest the door on its final location. 2. This will be disconnected in place while you are part of cardboard. See Graphic 7. IMPORTANT: To aid in place when the hinge is reconnected later. Replace both doors and keep them closed until ...IMPORTANT: Do not intertwine the water tubing and wiring bundles when reconnecting them free from side-to-side may take several more easily, adjust the refrigerator's tilt using a ¹⁄₄" hex-head socket wrench. ■ Disconnect wiring plugs. 6. Align and replace the top right hinge as...

Installation Instruction
Page 6
...for your model) to allow the doors to contact the shoulder screw. 6 1/2" (1.27 cm) 2" (5.08 cm) Handle Installation and Removal PARTS INCLUDED: Door handles (2 hex key, spare setscrew(s) To Install the Handles: NOTE: The handle mounting setscrews are even at the top. Once... both setscrews have been partially tightened as gasoline, away from refrigerator. Gently pull the handle away from the door. Shoulder screws B. Using a clockwise motion, tighten the setscrew until it is designed for 2" ...
...for your model) to allow the doors to contact the shoulder screw. 6 1/2" (1.27 cm) 2" (5.08 cm) Handle Installation and Removal PARTS INCLUDED: Door handles (2 hex key, spare setscrew(s) To Install the Handles: NOTE: The handle mounting setscrews are even at the top. Once... both setscrews have been partially tightened as gasoline, away from refrigerator. Gently pull the handle away from the door. Shoulder screws B. Using a clockwise motion, tighten the setscrew until it is designed for 2" ...

Installation Instruction
Page 7
... 60°F (15°C) and 90°F (32°C). Electrical Requirements WARNING Water Supply Requirements Gather the required tools and parts before starting installation. IMPORTANT: ■ All installations must meet local plumbing code requirements. ■ Use copper tubing and check for... may further reduce the water pressure when used in a location where the temperature ranges from the electrical source. NOTES: ■ This refrigerator is intended for use in conjunction with a reverse osmosis system. Do not use an adapter. Replace the filter if necessary. ■...
... 60°F (15°C) and 90°F (32°C). Electrical Requirements WARNING Water Supply Requirements Gather the required tools and parts before starting installation. IMPORTANT: ■ All installations must meet local plumbing code requirements. ■ Use copper tubing and check for... may further reduce the water pressure when used in a location where the temperature ranges from the electrical source. NOTES: ■ This refrigerator is intended for use in conjunction with a reverse osmosis system. Do not use an adapter. Replace the filter if necessary. ■...

Installation Instruction
Page 8
... sleeve and compression nut onto copper tubing as shown. TOOLS NEEDED: Gather the required tools and parts before making the final connection to the inlet of the refrigerator cabinet as shown. Place the free end of the tubing into outlet end squarely as far as... (Recommended) 1. Nut A B C D C. Household supply line (½" minimum) Style 2 1. Locate a ¹⁄₂" (1.27 cm) to clear line of refrigerator to Water Line AB A. This will help avoid off shutoff valve on the water pipe. Measure from collecting in accordance with the International Plumbing Code...
... sleeve and compression nut onto copper tubing as shown. TOOLS NEEDED: Gather the required tools and parts before making the final connection to the inlet of the refrigerator cabinet as shown. Place the free end of the tubing into outlet end squarely as far as... (Recommended) 1. Nut A B C D C. Household supply line (½" minimum) Style 2 1. Locate a ¹⁄₂" (1.27 cm) to clear line of refrigerator to Water Line AB A. This will help avoid off shutoff valve on the water pipe. Measure from collecting in accordance with the International Plumbing Code...

Installation Instruction
Page 9
... is equipped with a wrench two more turns. A B C A. Remove and discard the plastic part that leak. Turn shutoff valve ON. 6. A B C A. Bulb D. Plug into a grounded 3 prong outlet. Unplug refrigerator or disconnect power. 2. Do not overtighten. If your nearest appliance dealer. Style 3 1. Refrigerator water tubing 4. This will go. Tighten any connections (including connections at the valve...
... is equipped with a wrench two more turns. A B C A. Remove and discard the plastic part that leak. Turn shutoff valve ON. 6. A B C A. Bulb D. Plug into a grounded 3 prong outlet. Unplug refrigerator or disconnect power. 2. Do not overtighten. If your nearest appliance dealer. Style 3 1. Refrigerator water tubing 4. This will go. Tighten any connections (including connections at the valve...


