User Manual
Page 2
Connect to -Peer Wireless Networks 30 5.8 About ...32 Appendix A - Introduction ...2 1.1 Package Contents...2 1.2 Features...2 2. Install the Driver/Utility on Mac OSX 7 4. Configure Wireless Monitor 15 5.1 General...15 5.2 Profile Settings ...16 5.3 Available Network...18 5.4 Status ...19 5.6 Configuring Wireless Security 25 5.7 Ad-hoc and Peer-to the Wireless Network 10 5. Specification ...33 Technical Support...34 1 Install the Wireless Adapter ...3 3. Table of Contents 1.
Connect to -Peer Wireless Networks 30 5.8 About ...32 Appendix A - Introduction ...2 1.1 Package Contents...2 1.2 Features...2 2. Install the Driver/Utility on Mac OSX 7 4. Configure Wireless Monitor 15 5.1 General...15 5.2 Profile Settings ...16 5.3 Available Network...18 5.4 Status ...19 5.6 Configuring Wireless Security 25 5.7 Ad-hoc and Peer-to the Wireless Network 10 5. Specification ...33 Technical Support...34 1 Install the Wireless Adapter ...3 3. Table of Contents 1.
User Manual
Page 3
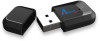
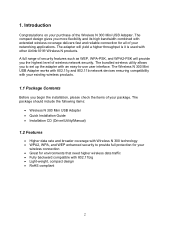
... other Airlink101® Wireless N products. The package should include the following items: • Wireless N 300 Mini USB Adapter • Quick Installation Guide • Installation CD (Driver/Utility/Manual) 1.2 Features • Higher data rate and broader coverage with Wireless N 300 technology • WPA2, WPA, and WEP enhanced security to set up the...
... other Airlink101® Wireless N products. The package should include the following items: • Wireless N 300 Mini USB Adapter • Quick Installation Guide • Installation CD (Driver/Utility/Manual) 1.2 Features • Higher data rate and broader coverage with Wireless N 300 technology • WPA2, WPA, and WEP enhanced security to set up the...

User Manual
Page 5
Windows 7 / Vista Users: When you get a warning message make sure you click Allow to give permission to finish installation. 4 Step 2.5 Click Next and follow the instructions on the window to continue with the installation of the driver software. Step 2.4 The Autorun screen will pop up. Note: If the Autorun screen doesn't appear automatically, go to My Computer, double click your CD ROM drive. Select Install Utility and Driver from the menu. Step 2.3 Insert the Installation CD in the CD drive.
Windows 7 / Vista Users: When you get a warning message make sure you click Allow to give permission to finish installation. 4 Step 2.5 Click Next and follow the instructions on the window to continue with the installation of the driver software. Step 2.4 The Autorun screen will pop up. Note: If the Autorun screen doesn't appear automatically, go to My Computer, double click your CD ROM drive. Select Install Utility and Driver from the menu. Step 2.3 Insert the Installation CD in the CD drive.

User Manual
Page 6
Step 2.6 Give Permission to Window to install the driver software. Windows 7 / Vista Users: Click the Install this driver software anyway. Windows XP Users: Click Continue Anyway at the Windows Logo Screen. 5
Step 2.6 Give Permission to Window to install the driver software. Windows 7 / Vista Users: Click the Install this driver software anyway. Windows XP Users: Click Continue Anyway at the Windows Logo Screen. 5
User Manual
Page 7
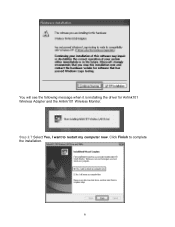
You will see the following message when it is installing the driver for Airlink101 Wireless Adapter and the Airlink101 Wireless Monitor. Step 2.7 Select Yes, I want to complete the installation. 6 Click Finish to restart my computer now.
You will see the following message when it is installing the driver for Airlink101 Wireless Adapter and the Airlink101 Wireless Monitor. Step 2.7 Select Yes, I want to complete the installation. 6 Click Finish to restart my computer now.

User Manual
Page 8
The driver and utility have been installed successfully. Step 3.1 Insert the USB adapter into an available USB slot on how to the next chapter. 3. Step 3.2 Locate and open the .pkg file in the MAC folder. Please continue to install the Wireless N Ultra Mini USB Adapter on the OSX platform. The AWLL6086 supports OSX 10.4 through the menu till you reach the License section. 7 Step 3.3 Continue through 10.9. Install the Driver/Utility on Mac OSX This section provides instructions on your computer.
The driver and utility have been installed successfully. Step 3.1 Insert the USB adapter into an available USB slot on how to the next chapter. 3. Step 3.2 Locate and open the .pkg file in the MAC folder. Please continue to install the Wireless N Ultra Mini USB Adapter on the OSX platform. The AWLL6086 supports OSX 10.4 through the menu till you reach the License section. 7 Step 3.3 Continue through 10.9. Install the Driver/Utility on Mac OSX This section provides instructions on your computer.
User Manual
Page 33
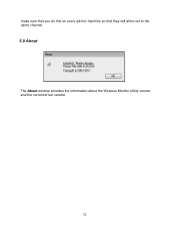
make sure that you do this on every ad-hoc machine so that they will all be set to the same channel. 5.8 About The About window provides the information about the Wireless Monitor Utility version and the current driver version. 32
make sure that you do this on every ad-hoc machine so that they will all be set to the same channel. 5.8 About The About window provides the information about the Wireless Monitor Utility version and the current driver version. 32
Quick Installation Guide
Page 1
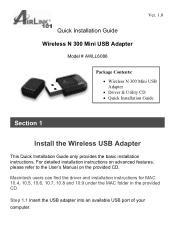
For detailed installation instructions on advanced features, please refer to the User's Manual on the provided CD. Macintosh users can find the driver and installation instructions for MAC 10.4, 10.5, 10.6, 10.7, 10.8 and 10.9 under the MAC folder in the provided CD. Ver.... 1.0 Quick Installation Guide Wireless N 300 Mini USB Adapter Model # AWLL6086 Package Contents: • Wireless N 300 Mini USB Adapter • Driver & Utility CD • Quick Installation Guide Section 1 Install the Wireless USB Adapter This Quick Installation Guide only provides ...
For detailed installation instructions on advanced features, please refer to the User's Manual on the provided CD. Macintosh users can find the driver and installation instructions for MAC 10.4, 10.5, 10.6, 10.7, 10.8 and 10.9 under the MAC folder in the provided CD. Ver.... 1.0 Quick Installation Guide Wireless N 300 Mini USB Adapter Model # AWLL6086 Package Contents: • Wireless N 300 Mini USB Adapter • Driver & Utility CD • Quick Installation Guide Section 1 Install the Wireless USB Adapter This Quick Installation Guide only provides ...

Quick Installation Guide
Page 3
Step 1.4 The Autorun screen will pop up. Windows 8 / 7 / Vista Users: When you get warning message(s), make sure that you give permission to continue with the installation of software. Select Install Utility and Driver from the menu. Step 1.3 Insert the Installation CD in the CD drive.
Step 1.4 The Autorun screen will pop up. Windows 8 / 7 / Vista Users: When you get warning message(s), make sure that you give permission to continue with the installation of software. Select Install Utility and Driver from the menu. Step 1.3 Insert the Installation CD in the CD drive.

Quick Installation Guide
Page 4
Windows 7 / Vista Users: Click the Install this driver software anyway. Step 1.6 Give Permission to Window to finish installation. Step 1.5 Click Next and follow the instructions on the window to install the driver software.
Windows 7 / Vista Users: Click the Install this driver software anyway. Step 1.6 Give Permission to Window to finish installation. Step 1.5 Click Next and follow the instructions on the window to install the driver software.
Quick Installation Guide
Page 6
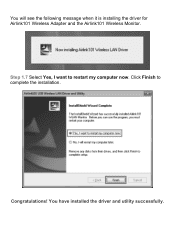
Click Finish to restart my computer now. Congratulations! You have installed the driver and utility successfully. You will see the following message when it is installing the driver for Airlink101 Wireless Adapter and the Airlink101 Wireless Monitor. Step 1.7 Select Yes, I want to complete the installation.
Click Finish to restart my computer now. Congratulations! You have installed the driver and utility successfully. You will see the following message when it is installing the driver for Airlink101 Wireless Adapter and the Airlink101 Wireless Monitor. Step 1.7 Select Yes, I want to complete the installation.


