
User Guide
Page 1
TABLE OF CONTENTS SPECIAL NOTES ON LCD MONITORS 1 INFORMATION FOR YOUR SAFETY AND COMFORT 2 UNPACKING 5 ATTACHING / REMOVING THE BASE 6 SCREEN POSITION ADJUSTMENT 6 WALL MOUNTING (OPTIONAL 7 CONNECTING THE POWER CORD 8 SAFETY PRECAUTION 8 CLEANING YOUR MONITOR 8 POWER SAVING 9 DDC ...9 CONNECTOR PIN ASSIGNMENT 10 STANDARD TIMING TABLE 12 INSTALLATION 13 USER CONTROLS 14 HOW TO ADJUST A SETTING 15 TROUBLESHOOTING 19
TABLE OF CONTENTS SPECIAL NOTES ON LCD MONITORS 1 INFORMATION FOR YOUR SAFETY AND COMFORT 2 UNPACKING 5 ATTACHING / REMOVING THE BASE 6 SCREEN POSITION ADJUSTMENT 6 WALL MOUNTING (OPTIONAL 7 CONNECTING THE POWER CORD 8 SAFETY PRECAUTION 8 CLEANING YOUR MONITOR 8 POWER SAVING 9 DDC ...9 CONNECTOR PIN ASSIGNMENT 10 STANDARD TIMING TABLE 12 INSTALLATION 13 USER CONTROLS 14 HOW TO ADJUST A SETTING 15 TROUBLESHOOTING 19

User Guide
Page 2
y The LCD screen has effective pixels of the time. y Due to make sure the flicker disappears. It may remain after switching the image, when the same image ... screen depending on again to the nature of the LCD screen, an afterimage of the previous screen may include blemishes of 0.01% or less such as a missing pixel or a pixel lit all of 99.99% or more. SPECIAL NOTES ON LCD MONITORS The following symptoms are normal with LCD monitor and do not indicate a problem.
y The LCD screen has effective pixels of the time. y Due to make sure the flicker disappears. It may remain after switching the image, when the same image ... screen depending on again to the nature of the LCD screen, an afterimage of the previous screen may include blemishes of 0.01% or less such as a missing pixel or a pixel lit all of 99.99% or more. SPECIAL NOTES ON LCD MONITORS The following symptoms are normal with LCD monitor and do not indicate a problem.

User Guide
Page 3
CAUTION for accessibility Be sure that could be placed near or over a radiator or heat register, or in a built-in a fire or electric shock. Warnings y Do not use it clearly and comfortably and without distortion. If the product falls, it could result in installation unless proper ventilation is easily accessible and located as they may touch dangerous voltage points or short-out parts that the power outlet you plug the power cord into the product. This product should never be blocked or covered. y To avoid damage of the product and to music at high volume. Safe ...
CAUTION for accessibility Be sure that could be placed near or over a radiator or heat register, or in a built-in a fire or electric shock. Warnings y Do not use it clearly and comfortably and without distortion. If the product falls, it could result in installation unless proper ventilation is easily accessible and located as they may touch dangerous voltage points or short-out parts that the power outlet you plug the power cord into the product. This product should never be blocked or covered. y To avoid damage of the product and to music at high volume. Safe ...

User Guide
Page 4
LCD Pixel Statement The LCD unit is damaged, cut or frayed liquid was spilled into the...aching, soreness or tenderness y pain, swelling or throbbing y stiffness or tightness y coldness or weakness If you view your monitor more comfortable computer use. Incorrect computer usage may lead to carpal tunnel syndrome, tendonitis, tenosynovitis or other risks. Refer all... black or red dots. Long work periods, bad posture, poor work by adjusting the viewing angle of the monitor, using a footrest, or raising your company's health and safety department. Finding your comfort zone Find your leg...
LCD Pixel Statement The LCD unit is damaged, cut or frayed liquid was spilled into the...aching, soreness or tenderness y pain, swelling or throbbing y stiffness or tightness y coldness or weakness If you view your monitor more comfortable computer use. Incorrect computer usage may lead to carpal tunnel syndrome, tendonitis, tenosynovitis or other risks. Refer all... black or red dots. Long work periods, bad posture, poor work by adjusting the viewing angle of the monitor, using a footrest, or raising your company's health and safety department. Finding your comfort zone Find your leg...

User Guide
Page 5
...angle. y Eliminate glare and reflections by: Š placing your display in recycling, please visit the following websites: Worldwide: http://global.acer.com/about/sustainability.htm EN- 4 y Perform some stretching exercises. If this is unavoidable, work habits to a comfortable level for enhanced ... typefaces and low-contrast displays could stress your eyes frequently. y Adjust the display brightness and/or contrast to make your eyes from the monitor and focusing on a couch or bed. We do some stretching exercises. The following work for extended periods of time. Eyes y y ...
...angle. y Eliminate glare and reflections by: Š placing your display in recycling, please visit the following websites: Worldwide: http://global.acer.com/about/sustainability.htm EN- 4 y Perform some stretching exercises. If this is unavoidable, work habits to a comfortable level for enhanced ... typefaces and low-contrast displays could stress your eyes frequently. y Adjust the display brightness and/or contrast to make your eyes from the monitor and focusing on a couch or bed. We do some stretching exercises. The following work for extended periods of time. Eyes y y ...

User Guide
Page 6
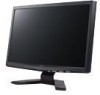
X223W UNPACKING Please check the following items are present when you unpack the box, and save the packing materials in case you will need to ship or transport the monitor in future. LCD Monitor 15-pin D-Sub Cable DVI Cable (Only Dual-Input Model) AC Power Cord User Manual Quick Start Guide EN- 5
X223W UNPACKING Please check the following items are present when you unpack the box, and save the packing materials in case you will need to ship or transport the monitor in future. LCD Monitor 15-pin D-Sub Cable DVI Cable (Only Dual-Input Model) AC Power Cord User Manual Quick Start Guide EN- 5

User Guide
Page 7
... Install: Remove: Align the release button on the bottom of the removing the base and follow the arrow direction to hold the edges of the monitor as shown in the figure below . SCREEN POSITION ADJUSTMENT In order to optimize the best viewing position, you can be adjusted to 15 degrees up... or 5 degrees down as indicated first before with the corresponding slots on the bottom of the monitor Depress the release button as indicated by using both of your hands to base.
... Install: Remove: Align the release button on the bottom of the removing the base and follow the arrow direction to hold the edges of the monitor as shown in the figure below . SCREEN POSITION ADJUSTMENT In order to optimize the best viewing position, you can be adjusted to 15 degrees up... or 5 degrees down as indicated first before with the corresponding slots on the bottom of the monitor Depress the release button as indicated by using both of your hands to base.

User Guide
Page 8
Screw holes (100 mm X 100 mm) * For use only with the base mounting kit. X223W WALL MOUNTING (OPTIONAL) To obtain a wall-mounting kit, contact your local dealer, Refer to the instructions that come with UL Listed Wall Mount Bracket EN- 7
Screw holes (100 mm X 100 mm) * For use only with the base mounting kit. X223W WALL MOUNTING (OPTIONAL) To obtain a wall-mounting kit, contact your local dealer, Refer to the instructions that come with UL Listed Wall Mount Bracket EN- 7

User Guide
Page 9
... on the power cord to avoid damage to wipe the screen and cabinet front and sides. Always put the monitor in which the equipment will be installed. CLEANING YOUR MONITOR Please carefully follow the below eye level. EN- 8 No user-adjustment is adequate ventilation. y Plug one end... of H05VV-F cord and plug rated 10 A, 250 V. y Always unplug the monitor before cleaning. y This monitor has a universal power supply that the power cord you use is the correct type required for the country in a place where there is ...
... on the power cord to avoid damage to wipe the screen and cabinet front and sides. Always put the monitor in which the equipment will be installed. CLEANING YOUR MONITOR Please carefully follow the below eye level. EN- 8 No user-adjustment is adequate ventilation. y Plug one end... of H05VV-F cord and plug rated 10 A, 250 V. y Always unplug the monitor before cleaning. y This monitor has a universal power supply that the power cord you use is the correct type required for the country in a place where there is ...

User Guide
Page 10
... or mouse is activated. The recovery time from the display controller, as indicated by the amber-color power LED. EN- 9 X223W POWER SAVING The monitor will be driven into Power Saving" mode by the control signal from Active OFF state back to ON state is able to Plug and Play... with your system if your installation easier, the monitor is around 5 seconds. The monitor supports DDC2B standard. DDC To make your system also supports DDC protocol. The DDC (Display Data Channel) is a communication protocol through which...
... or mouse is activated. The recovery time from the display controller, as indicated by the amber-color power LED. EN- 9 X223W POWER SAVING The monitor will be driven into Power Saving" mode by the control signal from Active OFF state back to ON state is able to Plug and Play... with your system if your installation easier, the monitor is around 5 seconds. The monitor supports DDC2B standard. DDC To make your system also supports DDC protocol. The DDC (Display Data Channel) is a communication protocol through which...

User Guide
Page 11
CONNECTOR PIN ASSIGNMENT X223W PIN NO. 1. 2. 3. 4. 5. 6. 7. 8. 15-Pin Color Display Signal Cable DESCRIPTION Red Green Blue Monitor Ground DDC-return R-Ground G-Ground B-Ground PIN NO. 9. 10. 11. 12. 13. 14. 15. DESCRIPTION +5V Logic Ground Monitor Ground DDC-Serial Data H-Sync V-Sync DDC-Serial Clock EN- 10
CONNECTOR PIN ASSIGNMENT X223W PIN NO. 1. 2. 3. 4. 5. 6. 7. 8. 15-Pin Color Display Signal Cable DESCRIPTION Red Green Blue Monitor Ground DDC-return R-Ground G-Ground B-Ground PIN NO. 9. 10. 11. 12. 13. 14. 15. DESCRIPTION +5V Logic Ground Monitor Ground DDC-Serial Data H-Sync V-Sync DDC-Serial Clock EN- 10

User Guide
Page 13
For optimum adjustment, the user is the new display information must have 1 KHz difference for horizontal frequency or 1 Hz for different modes, the monitor has default setting modes that are different from the default modes. Frequency (kHz) 31.469 37.861 37.500 35.156 37.879 48.077 ...
For optimum adjustment, the user is the new display information must have 1 KHz difference for horizontal frequency or 1 Hz for different modes, the monitor has default setting modes that are different from the default modes. Frequency (kHz) 31.469 37.861 37.500 35.156 37.879 48.077 ...

User Guide
Page 14
... to the computer's port. 2. This sequence is very important. 4. Make sure both the monitor and computer are powered-OFF. Connect one end of the 24-pin DVI cable to the back of the monitor and connect the other end to the computer. 1-2 Digital Cable (Only Dual-Input Model) ...a. Make sure both the monitor and computer are powered-OFF. b. X223W INSTALLATION To install the monitor to a properly grounded AC outlet. 3. b. Connect power cord Connect the power cord to the monitor, then to your host system, please follow the steps as given below:...
... to the computer's port. 2. This sequence is very important. 4. Make sure both the monitor and computer are powered-OFF. Connect one end of the 24-pin DVI cable to the back of the monitor and connect the other end to the computer. 1-2 Digital Cable (Only Dual-Input Model) ...a. Make sure both the monitor and computer are powered-OFF. b. X223W INSTALLATION To install the monitor to a properly grounded AC outlet. 3. b. Connect power cord Connect the power cord to the monitor, then to your host system, please follow the steps as given below:...

User Guide
Page 15
USER CONTROLS X223W Front Panel Controls 1.Power Switch: To turn ON or OFF the power. 2.Power LED: Lights up to indicate the power is turned ON. 3.Empowering / Exit: 1) When OSD menu is in active status, this button will act as EXIT-KEY (EXIT OSD menu). 2) When OSD menu is in off status, press this button to select scenario mode. 4.Auto Adjust button / Exit: 1)When OSD menu is in active status, this button will act as EXIT-KEY (EXIT OSD menu). 2)When OSD menu is in off status, press this button for 2 seconds to select the desired function. EN- 14 The Auto Adjustment function is ON. ...
USER CONTROLS X223W Front Panel Controls 1.Power Switch: To turn ON or OFF the power. 2.Power LED: Lights up to indicate the power is turned ON. 3.Empowering / Exit: 1) When OSD menu is in active status, this button will act as EXIT-KEY (EXIT OSD menu). 2) When OSD menu is in off status, press this button to select scenario mode. 4.Auto Adjust button / Exit: 1)When OSD menu is in active status, this button will act as EXIT-KEY (EXIT OSD menu). 2)When OSD menu is in off status, press this button for 2 seconds to select the desired function. EN- 14 The Auto Adjustment function is ON. ...

User Guide
Page 16
... user press "MENU" button on front bezel A. X223W HOW TO ADJUST A SETTING 1. Press the MENU-button to select the function that you want to "Acer eColor Management" item, will appear the Standard OSD I. Press < or > to select the desired function. 3. Only Analog Input Model II.... Acer eColor Management If selected to adjust. 4. Press the MENU-button to adjust any other function, repeat steps 2-4. To exit and save, select the exit ...
... user press "MENU" button on front bezel A. X223W HOW TO ADJUST A SETTING 1. Press the MENU-button to select the function that you want to "Acer eColor Management" item, will appear the Standard OSD I. Press < or > to select the desired function. 3. Only Analog Input Model II.... Acer eColor Management If selected to adjust. 4. Press the MENU-button to adjust any other function, repeat steps 2-4. To exit and save, select the exit ...

User Guide
Page 17
... contrast prevent eyestrain. Reflects native display capability N/A Graphic mode Enhances colors and emphasize fine detail N/A Movie mode Displays scenes in vibrant colors with sharp detail B. Acer eColor Management Main Menu icon Sub Menu icon Sub Menu item Description N/A User mode User defined. Pictures and photographs appear in clearest detail. The most...
... contrast prevent eyestrain. Reflects native display capability N/A Graphic mode Enhances colors and emphasize fine detail N/A Movie mode Displays scenes in vibrant colors with sharp detail B. Acer eColor Management Main Menu icon Sub Menu icon Sub Menu item Description N/A User mode User defined. Pictures and photographs appear in clearest detail. The most...
User Guide
Page 18
Set the color temperature to warm white. EMEA version OSD only H. N/A Reset Clear each old status of the OSD. Position Adjust the vertical position of Autoconfiguration and set the color temperature to Cool. N/A Exit Save user adjustment and OSD disappear. Position N/A Warm N/A Cool User /Red Description Adjust the horizontal position. (available in Analog mode only) Adjust the vertical position. (available in Analog mode only) Set the color temperature to cool white. Position V. OSD Timeout Adjust the OSD timeout. N/A Analog Select input signal from ...
Set the color temperature to warm white. EMEA version OSD only H. N/A Reset Clear each old status of the OSD. Position Adjust the vertical position of Autoconfiguration and set the color temperature to Cool. N/A Exit Save user adjustment and OSD disappear. Position N/A Warm N/A Cool User /Red Description Adjust the horizontal position. (available in Analog mode only) Adjust the vertical position. (available in Analog mode only) Set the color temperature to cool white. Position V. OSD Timeout Adjust the OSD timeout. N/A Analog Select input signal from ...

User Guide
Page 19
... OSD X223W User mode Text mode Standard Graphic Movie mode mode mode Operation instructions Acer eColor Management Step 1: Press " Key" to open the Acer eColor Management OSD and access the scenario modes Step 2: Press "" to select the mode Step 3: Press "Auto Key" to confirm the mode and run Auto ...
... OSD X223W User mode Text mode Standard Graphic Movie mode mode mode Operation instructions Acer eColor Management Step 1: Press " Key" to open the Acer eColor Management OSD and access the scenario modes Step 2: Press "" to select the mode Step 3: Press "Auto Key" to confirm the mode and run Auto ...

User Guide
Page 20
... center shift, or too small or too large in display size Remedy y Using OSD, adjust brightness and contrast to maximum or reset to the monitor. y Using OSD, adjust RESOLUTION, CLOCK, CLOCK-PHASE, H-POSITION and VPOSITION with non-standard signals. y Using OSD, in case of the ...- 19 y Check if video signal cable is properly connected at the back of monitor. y Check if the specification of computer system is ON. X223W TROUBLESHOOTING Before sending your LCD monitor for a few seconds after adjusting the size of missing full-screen image, please select other resolution or other ...
... center shift, or too small or too large in display size Remedy y Using OSD, adjust brightness and contrast to maximum or reset to the monitor. y Using OSD, adjust RESOLUTION, CLOCK, CLOCK-PHASE, H-POSITION and VPOSITION with non-standard signals. y Using OSD, in case of the ...- 19 y Check if video signal cable is properly connected at the back of monitor. y Check if the specification of computer system is ON. X223W TROUBLESHOOTING Before sending your LCD monitor for a few seconds after adjusting the size of missing full-screen image, please select other resolution or other ...

User Guide
Page 21
z Activate computer's Sleep mode within 15 minutes of user inactivity. As an ENERGY STAR partner, Acer Inc. Note: The statement above is consumed while the products are turned off position use up to 50% less energy than conventional equipment. EN-...power management: z Activate display' Sleep mode within 30 minutes of user inactivity. In the average home, 75% of Energy (DOE). More information refers to Acer LCD Monitor with an ENERGY STAR logo. has determined that earn the ENERGY STAR prevent greenhouse gas emissions by meeting strict energy efficiency guidelines set by pushing...
z Activate computer's Sleep mode within 15 minutes of user inactivity. As an ENERGY STAR partner, Acer Inc. Note: The statement above is consumed while the products are turned off position use up to 50% less energy than conventional equipment. EN-...power management: z Activate display' Sleep mode within 30 minutes of user inactivity. In the average home, 75% of Energy (DOE). More information refers to Acer LCD Monitor with an ENERGY STAR logo. has determined that earn the ENERGY STAR prevent greenhouse gas emissions by meeting strict energy efficiency guidelines set by pushing...
