TravelMate 7230/7530 Quick Guide
Page 5
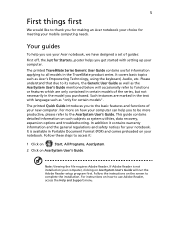
...certain models of guides: First off, the Just for your Acer notebook, we have designed a set of the series, but not necessarily in the TravelMate product series. It is not installed on your computer, clicking on such subjects as Acer's Empowering Technology, using the keyboard, Audio, etc. Follow... your computer can help you use Adobe Reader, access the Help and Support menu. It covers basic topics such as system utilities, data recovery, expansion options and troubleshooting. For more on the screen to all models in the model you to the AcerSystem User's Guide. In addition...
...certain models of guides: First off, the Just for your Acer notebook, we have designed a set of the series, but not necessarily in the TravelMate product series. It is not installed on your computer, clicking on such subjects as Acer's Empowering Technology, using the keyboard, Audio, etc. Follow... your computer can help you use Adobe Reader, access the Help and Support menu. It covers basic topics such as system utilities, data recovery, expansion options and troubleshooting. For more on the screen to all models in the model you to the AcerSystem User's Guide. In addition...

TravelMate 7230/7530 Service Guide
Page 9
... 145 Top View 145 Bottom View 146 Clearing Password Check and BIOS Recovery 147 Clearing Password Check 147 BIOS Recovery by Crisis Disk 148 FRU (Field Replaceable Unit) List 149 TravelMate 7530/7230 Exploded Diagrams 150 Upper/ Lower Cover 150 LCD Panel 151 TravelMate 7530/7230 FRU List 153 Screw List 164 Model Definition and Configuration...
... 145 Top View 145 Bottom View 146 Clearing Password Check and BIOS Recovery 147 Clearing Password Check 147 BIOS Recovery by Crisis Disk 148 FRU (Field Replaceable Unit) List 149 TravelMate 7530/7230 Exploded Diagrams 150 Upper/ Lower Cover 150 LCD Panel 151 TravelMate 7530/7230 FRU List 153 Screw List 164 Model Definition and Configuration...

TravelMate 7230/7530 Service Guide
Page 39
... the system to 3071 MB. System Memory Extended Memory Video Memory 634 KB 1790 MB [256 MB] Quiet Boot: Network Boot: F12 Boot Menu: D2D Recovery: SATA Mode: [Enabled] [Enabled] [Disabled] [Enabled] [ACHI Mode] F1 Help ESC Exit ↑↓ Select Item F5/F6 Change Values F9 Setup ...the Extended Memory size. VGA Memory size=32 MB Displays the logo screen while booting. Enables, disables Boot Menu during POST. Enables, disables D2D Recovery function. This field reports the memory size of the system. The table below describes the parameters in this screen. Shows the video memory size....
... the system to 3071 MB. System Memory Extended Memory Video Memory 634 KB 1790 MB [256 MB] Quiet Boot: Network Boot: F12 Boot Menu: D2D Recovery: SATA Mode: [Enabled] [Enabled] [Disabled] [Enabled] [ACHI Mode] F1 Help ESC Exit ↑↓ Select Item F5/F6 Change Values F9 Setup ...the Extended Memory size. VGA Memory size=32 MB Displays the logo screen while booting. Enables, disables Boot Menu during POST. Enables, disables D2D Recovery function. This field reports the memory size of the system. The table below describes the parameters in this screen. Shows the video memory size....

TravelMate 7230/7530 Service Guide
Page 50
... the bootable diskette. 3. Copy the flash utilities to update the system BIOS flash ROM. NOTE: If you do not have a crisis recovery diskette at hand, then you should create a Crisis Recovery Diskette before you use the Phlash. NOTE: Please use the Phlash utility. BIOS Flash Utility The BIOS flash memory update is...
... the bootable diskette. 3. Copy the flash utilities to update the system BIOS flash ROM. NOTE: If you do not have a crisis recovery diskette at hand, then you should create a Crisis Recovery Diskette before you use the Phlash. NOTE: Please use the Phlash utility. BIOS Flash Utility The BIOS flash memory update is...

TravelMate 7230/7530 Service Guide
Page 141
... System Restore. Click Next. The Install Windows screen displays. Select Repair your computer. Click Next. h. Startup Repair attempts to the operating system DVD. The System Recovery Options screen displays. Run Windows Check Disk by entering chkdsk /r from a known good date using up-to-date software to resolve the problem. 4. NOTE: Click...
... System Restore. Click Next. The Install Windows screen displays. Select Repair your computer. Click Next. h. Startup Repair attempts to the operating system DVD. The System Recovery Options screen displays. Run Windows Check Disk by entering chkdsk /r from a known good date using up-to-date software to resolve the problem. 4. NOTE: Click...

TravelMate 7230/7530 Service Guide
Page 152
... Setup System Management Mode (SMM) area Display external L2 cache size Load custom defaults (optional) Display shadow-area message Display possible high address for UMB recovery Display error messages Check for configuration errors Check for keyboard errors Set up hardware interrupt vectors Initialize coprocessor if present Disable onboard Super I/O ports and...
... Setup System Management Mode (SMM) area Display external L2 cache size Load custom defaults (optional) Display shadow-area message Display possible high address for UMB recovery Display error messages Check for configuration errors Check for keyboard errors Set up hardware interrupt vectors Initialize coprocessor if present Disable onboard Super I/O ports and...

TravelMate 7230/7530 Service Guide
Page 154
... 386SX systems because they have failed in Flash ROM Initialize the chipset Initialize the bridge Initialize the CPU Initialize system timer Initialize system I/O Check force recovery boot Checksum BIOS ROM Go to BIOS Set Huge Segment Initialize Multi Processor Initialize OEM special code Initialize PIC and DMA Initialize Memory type Initialize...
... 386SX systems because they have failed in Flash ROM Initialize the chipset Initialize the bridge Initialize the CPU Initialize system timer Initialize system I/O Check force recovery boot Checksum BIOS ROM Go to BIOS Set Huge Segment Initialize Multi Processor Initialize OEM special code Initialize PIC and DMA Initialize Memory type Initialize...

TravelMate 7230/7530 Service Guide
Page 157
... picture. • Use an electric conductivity tool to short the two points of clearing password and BIOS recovery for enabling BIOS Recovery. TravelMate 7530/7230s provide one Hotkey for TravelMate 7530/7230. Chapter 5 147 Clearing Password Check and BIOS Recovery This section provide you the standard operating procedures of the HW Gap. • Plug in AC, keep...
... picture. • Use an electric conductivity tool to short the two points of clearing password and BIOS recovery for enabling BIOS Recovery. TravelMate 7530/7230s provide one Hotkey for TravelMate 7530/7230. Chapter 5 147 Clearing Password Check and BIOS Recovery This section provide you the standard operating procedures of the HW Gap. • Plug in AC, keep...

TravelMate 7230/7530 Service Guide
Page 158
...: 1. Press Power button to a successful one once the previous BIOS flashing process failed. Update the latest version BIOS for BIOS Recovery from USB Storage: Before doing this function is strongly recommended to enter a special BIOS block, called Boot Block. BIOS... Recovery by Crisis Disk BIOS Recovery Boot Block: BIOS Recovery Boot Block is a special block of USB storage. 2. If this , prepare the Crisis USB key. The Power button flashes once. 4....
...: 1. Press Power button to a successful one once the previous BIOS flashing process failed. Update the latest version BIOS for BIOS Recovery from USB Storage: Before doing this function is strongly recommended to enter a special BIOS block, called Boot Block. BIOS... Recovery by Crisis Disk BIOS Recovery Boot Block: BIOS Recovery Boot Block is a special block of USB storage. 2. If this , prepare the Crisis USB key. The Power button flashes once. 4....


