User Manual
Page 4
... to rest on the marking label. Do not locate this product where people will probably cause unexpected short current or damage internal devices. • The adapter is only used for this monitor ,do not be used with this product, make sure that the total The openings should never be blocked by...
... to rest on the marking label. Do not locate this product where people will probably cause unexpected short current or damage internal devices. • The adapter is only used for this monitor ,do not be used with this product, make sure that the total The openings should never be blocked by...

User Manual
Page 10
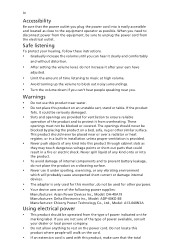
UNPACKING Please check the following items are present when you unpack the box, and save the packing materials in case you will need to ship or transport the monitor in future. LCD Monitor Quick Start Guide Audio Cable (Optional) AC Power Cord AC Adapter D-Sub Cable (Optional) DVI Cable (Optional) HDMI Cable (Optional) MHL Cable (Optional) EN-1
UNPACKING Please check the following items are present when you unpack the box, and save the packing materials in case you will need to ship or transport the monitor in future. LCD Monitor Quick Start Guide Audio Cable (Optional) AC Power Cord AC Adapter D-Sub Cable (Optional) DVI Cable (Optional) HDMI Cable (Optional) MHL Cable (Optional) EN-1

User Manual
Page 12
No user-adjustment is required. Plug one end of the AC power cord to the adapter, and plug the other heavy object, on the face of the monitor. Always put the monitor in either 100/120V AC or 220/240 V AC ...
No user-adjustment is required. Plug one end of the AC power cord to the adapter, and plug the other heavy object, on the face of the monitor. Always put the monitor in either 100/120V AC or 220/240 V AC ...

User Manual
Page 19
...the computer's port. 1-3 Connect HDMI Cable (Only HDMI-input model) a. Connect one end of the 24-pin DVI cable to the back of the adapter to the monitor and the other end to a properly grounded, AC outlet. 4. Power-ON Monitor and Computer Power-ON the monitor first, then power-ON...AC cord to your host system, please follow the steps as given below: Steps 1. 1-1 Connect Video Cable a. b. INSTALLATION To install the monitor to the adapter. b. Connect the Audio Cable (Only Audio-Input Model)(Optional) 3. Make sure both the monitor and computer are powered-OFF. Connect the...
...the computer's port. 1-3 Connect HDMI Cable (Only HDMI-input model) a. Connect one end of the 24-pin DVI cable to the back of the adapter to the monitor and the other end to a properly grounded, AC outlet. 4. Power-ON Monitor and Computer Power-ON the monitor first, then power-ON...AC cord to your host system, please follow the steps as given below: Steps 1. 1-1 Connect Video Cable a. b. INSTALLATION To install the monitor to the adapter. b. Connect the Audio Cable (Only Audio-Input Model)(Optional) 3. Make sure both the monitor and computer are powered-OFF. Connect the...
User Manual
Page 27
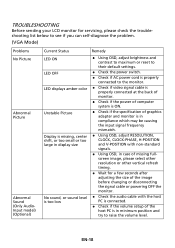
... is properly connected at the back of monitor. Check if the power of computer system is ON. Check if the specification of graphics adapter and monitor is in compliance which may be causing the input signal frequency mismatch. Using OSD, adjust RESOLUTION, CLOCK, CLOCK-PHASE, H-POSITION and V-POSITION...
... is properly connected at the back of monitor. Check if the power of computer system is ON. Check if the specification of graphics adapter and monitor is in compliance which may be causing the input signal frequency mismatch. Using OSD, adjust RESOLUTION, CLOCK, CLOCK-PHASE, H-POSITION and V-POSITION...

