Extensa 4420 / 4120 User's Guide EN
Page 5
...supplied power supply cord set , make sure that the new power cord meets the following the operating instructions Note: Adjust only those controls that are covered by the operating instructions, since improper adjustment of this product from unexpected noise produced by a qualified technician to restore the ...voltage points or other controls may result in performance, indicating a need to replace the power cord set . Do not pierce, open or disassemble the battery. If you come into the product • the product was exposed to rain or water • the product has been ...
...supplied power supply cord set , make sure that the new power cord meets the following the operating instructions Note: Adjust only those controls that are covered by the operating instructions, since improper adjustment of this product from unexpected noise produced by a qualified technician to restore the ...voltage points or other controls may result in performance, indicating a need to replace the power cord set . Do not pierce, open or disassemble the battery. If you come into the product • the product was exposed to rain or water • the product has been ...
Extensa 4420 / 4120 User's Guide EN
Page 6
... Do not dispose of them away from the battery, which came bundled with Acer approved chargers designated for its intended purpose. Potentially explosive environments Switch off the notebook...if not handled properly. Areas with a potentially explosive atmosphere and obey all signs and instructions. Do not short-circuit the battery. Please recycle when possible. Warning! chemical plants;... also explode if damaged. Wireless devices may cause interference or danger. Do not disassemble or dispose of batteries in a fire as that is prohibited or when it ...
... Do not dispose of them away from the battery, which came bundled with Acer approved chargers designated for its intended purpose. Potentially explosive environments Switch off the notebook...if not handled properly. Areas with a potentially explosive atmosphere and obey all signs and instructions. Do not short-circuit the battery. Please recycle when possible. Warning! chemical plants;... also explode if damaged. Wireless devices may cause interference or danger. Do not disassemble or dispose of batteries in a fire as that is prohibited or when it ...
TravelMate 4520/4220, Extensa 4420/4120 Service Guide
Page 37
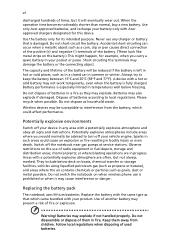
... Units Torque values kgf-cm 1.6 3 4 in reverse. Equivalent Torque Values Torque values indicated in this chapter is divided into three stages: 1. External modules disassembly 2. Chapter 3 System Disassembly This chapter provides step-by-step instructions on how to observe the instructions in a step-by step manner. To illustrate, removing the HDD assembly will need to...
... Units Torque values kgf-cm 1.6 3 4 in reverse. Equivalent Torque Values Torque values indicated in this chapter is divided into three stages: 1. External modules disassembly 2. Chapter 3 System Disassembly This chapter provides step-by-step instructions on how to observe the instructions in a step-by step manner. To illustrate, removing the HDD assembly will need to...

TravelMate 4520/4220, Extensa 4420/4120 Service Guide
Page 56
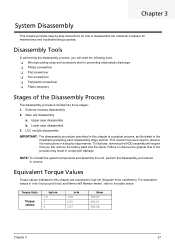
Remove the lower case screws securing the LCD module. Detach the LCD module from the main unit. Proceed to page 57 for instructions on how to disassemble the LCD module. 46 Chapter 3 Remove the hinge screws securing the LCD module. Step 12 Type M2.5 x L12 BZN+NYLOK Quantity 2 Color Silver Torque 4 kgf-cm +/-15% 13. Step 10 Type M2.5 x L8 BZN+NYLOK Quantity 2 Color Black Torque 3 kgf-cm +/-15% 11. 10. Turn the unit right side up and open the notebook lid again. 12.
Remove the lower case screws securing the LCD module. Detach the LCD module from the main unit. Proceed to page 57 for instructions on how to disassemble the LCD module. 46 Chapter 3 Remove the hinge screws securing the LCD module. Step 12 Type M2.5 x L12 BZN+NYLOK Quantity 2 Color Silver Torque 4 kgf-cm +/-15% 13. Step 10 Type M2.5 x L8 BZN+NYLOK Quantity 2 Color Black Torque 3 kgf-cm +/-15% 11. 10. Turn the unit right side up and open the notebook lid again. 12.


