
Safety Guide
Page 3
... instructions 10 Product servicing 10 Cleaning and servicing 10 Battery and adapter information 11 Accessing the power 11 Disconnecting the power source 11 Using electrical power 11 Guidelines for safe battery usage 13 Internal battery 15 Warnings and regulatory information 16 Optical drives 16 Telephone line safety 17 Emergency calls 17 Medical devices 17 Vehicles 18 Potentially explosive environments........ 18 Disposal instructions 19 ENERGY STAR 19 Wireless adapter...
... instructions 10 Product servicing 10 Cleaning and servicing 10 Battery and adapter information 11 Accessing the power 11 Disconnecting the power source 11 Using electrical power 11 Guidelines for safe battery usage 13 Internal battery 15 Warnings and regulatory information 16 Optical drives 16 Telephone line safety 17 Emergency calls 17 Medical devices 17 Vehicles 18 Potentially explosive environments........ 18 Disposal instructions 19 ENERGY STAR 19 Wireless adapter...

Safety Guide
Page 6
... regular breaks by looking at the center of the display. • Adjust the display brightness and/or contrast to relax your neck and shoulders. • Avoid tensing your muscles or shrugging your shoulders. • Install the external display, keyboard and mouse properly and within comfortable reach. • If you view your monitor more than the top edge of the...
... regular breaks by looking at the center of the display. • Adjust the display brightness and/or contrast to relax your neck and shoulders. • Avoid tensing your muscles or shrugging your shoulders. • Install the external display, keyboard and mouse properly and within comfortable reach. • If you view your monitor more than the top edge of the...

Safety Guide
Page 10
... off the computer and remove the battery pack if applicable. Refer all servicing to qualified service personnel when: • The power cord or plug is turned on. Unplug this product yourself, as opening or removing covers may result in sleep mode. Turn off or in damage and will often require extensive work by the operating instructions, since improper adjustment of other controls may expose you...
... off the computer and remove the battery pack if applicable. Refer all servicing to qualified service personnel when: • The power cord or plug is turned on. Unplug this product yourself, as opening or removing covers may result in sleep mode. Turn off or in damage and will often require extensive work by the operating instructions, since improper adjustment of other controls may expose you...
Safety Guide
Page 14
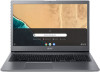
... in injury, and risk fire or explosion. • Device with built-in battery: A built-in a humid, wet or corrosive environment. This notebook uses a Lithium-based battery. Keep batteries away from children. The full performance of used batteries. 14 - Do not replace the battery with parts approved by an authorized service center. When the operation time becomes noticeably shorter than approved ones. Do not...
... in injury, and risk fire or explosion. • Device with built-in battery: A built-in a humid, wet or corrosive environment. This notebook uses a Lithium-based battery. Keep batteries away from children. The full performance of used batteries. 14 - Do not replace the battery with parts approved by an authorized service center. When the operation time becomes noticeably shorter than approved ones. Do not...
Safety Guide
Page 15
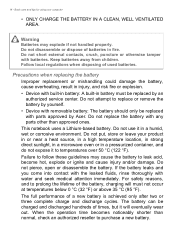
... or pen causes direct connection of the positive (+) and negative (-) terminals of batteries according to replace a built-in rechargeable battery, battery replacement must be done by following the instruction included in the product documentation. Battery performance is left in hot or cold places, such as household waste. authorized repair facility. • Recharge the battery by an Acer- Note Please refer to...
... or pen causes direct connection of the positive (+) and negative (-) terminals of batteries according to replace a built-in rechargeable battery, battery replacement must be done by following the instruction included in the product documentation. Battery performance is left in hot or cold places, such as household waste. authorized repair facility. • Recharge the battery by an Acer- Note Please refer to...
Safety Guide
Page 19
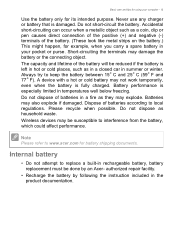
... death. Switch off the device at refueling points such as grain, dust or metal powders. Do not switch the notebook on the Waste from Electrical and Electronics Equipment (WEEE) regulations, visit www.acer-group.com/public/Sustainability ENERGY STAR Acer's ENERGY STAR qualified products save through higher energy efficiency, the more information on when wireless phone use of...
... death. Switch off the device at refueling points such as grain, dust or metal powders. Do not switch the notebook on the Waste from Electrical and Electronics Equipment (WEEE) regulations, visit www.acer-group.com/public/Sustainability ENERGY STAR Acer's ENERGY STAR qualified products save through higher energy efficiency, the more information on when wireless phone use of...
Safety Guide
Page 20
... a connection is available. marks Wireless adapter regulatory information Radio frequency interference Warning For safety reasons, turn off your laptop under the following conditions. These devices may be attracted to the device, and persons with hearing aids should not hold the device to the settings in any area, and always switch off all wireless or radio transmitting devices when using your device when its normal operating...
... a connection is available. marks Wireless adapter regulatory information Radio frequency interference Warning For safety reasons, turn off your laptop under the following conditions. These devices may be attracted to the device, and persons with hearing aids should not hold the device to the settings in any area, and always switch off all wireless or radio transmitting devices when using your device when its normal operating...
Safety Guide
Page 22
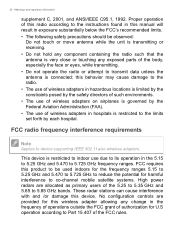
...High power radars are provided for this device. No configuration controls are allocated as primary users of the 5.25 to 5.35 GHz and 5.65 to 5.85 GHz bands. 22 - This device is restricted to indoor use of authorization for harmful interference to device supporting IEEE 802.11a/ac wireless adapters. ...touching any change in exposure substantially below the FCC's recommended limits. • The following safety precautions should be used indoors for the frequency ranges 5.15 to 5.25 GHz and 5.470 to 5.725 GHz to reduce the potential for U.S operation according to the limits set ...
...High power radars are provided for this device. No configuration controls are allocated as primary users of the 5.25 to 5.35 GHz and 5.65 to 5.85 GHz bands. 22 - This device is restricted to indoor use of authorization for harmful interference to device supporting IEEE 802.11a/ac wireless adapters. ...touching any change in exposure substantially below the FCC's recommended limits. • The following safety precautions should be used indoors for the frequency ranges 5.15 to 5.25 GHz and 5.470 to 5.725 GHz to reduce the potential for U.S operation according to the limits set ...
User Manual
Page 2
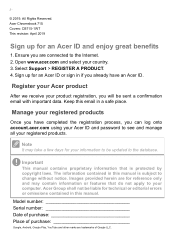
... connected to the database. Model number Serial number Date of purchase Place of Google LLC. Sign up for an Acer ID or sign in this manual. Register your Acer product After we receive your computer. Keep this email in this manual is protected by copyright laws. Important This manual contains proprietary information that do not apply to change without notice. Acer Chromebook 715 Covers: CB715-1WT...
... connected to the database. Model number Serial number Date of purchase Place of Google LLC. Sign up for an Acer ID or sign in this manual. Register your Acer product After we receive your computer. Keep this email in this manual is protected by copyright laws. Important This manual contains proprietary information that do not apply to change without notice. Acer Chromebook 715 Covers: CB715-1WT...
User Manual
Page 3
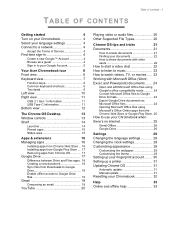
... of contents - 3 Getting started 4 Turn on your Chromebook 4 Select your language settings 4 Connect to a network 4 Accept the Terms of Service 4 First-time sign-in 4 Create a new Google™ Account 4 Browse as a guest 4 Sign in to your Google Account 5 Your Acer Chromebook tour 6 Front view 6 Keyboard view 7 Function keys 8 Common keyboard shortcuts 8 Touchpad 9 Left view 10 Right view 11 USB 3.1 Gen 1 information 11 USB Type-C information 11 Bottom...
... of contents - 3 Getting started 4 Turn on your Chromebook 4 Select your language settings 4 Connect to a network 4 Accept the Terms of Service 4 First-time sign-in 4 Create a new Google™ Account 4 Browse as a guest 4 Sign in to your Google Account 5 Your Acer Chromebook tour 6 Front view 6 Keyboard view 7 Function keys 8 Common keyboard shortcuts 8 Touchpad 9 Left view 10 Right view 11 USB 3.1 Gen 1 information 11 USB Type-C information 11 Bottom...
User Manual
Page 4
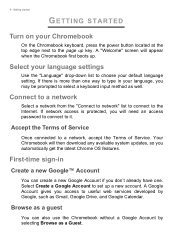
...-in your Chromebook On the Chromebook keyboard, press the power button located at the top edge next to the Internet. If network access is more than one . If there is protected, you will appear when the Chromebook first boots up key. A "Welcome" screen will need an access password to connect to a network, accept the Terms of Service Once connected to it. A Google Account gives you may be prompted to useful web services developed...
...-in your Chromebook On the Chromebook keyboard, press the power button located at the top edge next to the Internet. If network access is more than one . If there is protected, you will appear when the Chromebook first boots up key. A "Welcome" screen will need an access password to connect to a network, accept the Terms of Service Once connected to it. A Google Account gives you may be prompted to useful web services developed...

User Manual
Page 6
6 - Front view 1 3 2 # Icon Item Description 1 Microphones Internal microphones for video 3 Webcam communication. A light next to the webcam indicates that you are done setting it up, let us show you around your new Acer Chromebook. Your Acer Chromebook tour YOUR ACER CHROMEBOOK TOUR Now that the webcam is active. Web camera for sound recording. 2 Touchscreen Displays computer output, supports multi-touch input.
6 - Front view 1 3 2 # Icon Item Description 1 Microphones Internal microphones for video 3 Webcam communication. A light next to the webcam indicates that you are done setting it up, let us show you around your new Acer Chromebook. Your Acer Chromebook tour YOUR ACER CHROMEBOOK TOUR Now that the webcam is active. Web camera for sound recording. 2 Touchscreen Displays computer output, supports multi-touch input.

User Manual
Page 8
... next window. Full-screen Open the page in full-screen mode. Brightness down Decreases the volume. Common keyboard shortcuts You can use shortcuts to complete some hardware and software controls, such as screen brightness and volume. Keyboard shortcuts Description Ctrl + Takes screenshot. Alt + Projects your screen. Icon Function Description Previous Go to access some tasks more quickly. Reload Reload the current page. The dedicated function keys each have a specific function. Alt + Brightens the keyboard backlight. Volume...
... next window. Full-screen Open the page in full-screen mode. Brightness down Decreases the volume. Common keyboard shortcuts You can use shortcuts to complete some hardware and software controls, such as screen brightness and volume. Keyboard shortcuts Description Ctrl + Takes screenshot. Alt + Projects your screen. Icon Function Description Previous Go to access some tasks more quickly. Reload Reload the current page. The dedicated function keys each have a specific function. Alt + Brightens the keyboard backlight. Volume...

User Manual
Page 10
Indicates the computer's battery status. Charging: The light shows amber when the battery is charging. Connects to USB devices with a USB Type-C connector. Fully charged: The light shows blue when in Battery indicator USB port Headset / speaker jack Description Connects to the provided USB Type-C power adapter and to USB devices. Your Acer Chromebook tour Left view 12 3 4 # Icon 1 2 3 4 Item USB Type-C port with microphone. Supports DisplayPort™ over USB-C™. Connects to audio devices (e.g., speakers, headphones), or a headset with DC-in AC mode. 10 -
Indicates the computer's battery status. Charging: The light shows amber when the battery is charging. Connects to USB devices with a USB Type-C connector. Fully charged: The light shows blue when in Battery indicator USB port Headset / speaker jack Description Connects to the provided USB Type-C power adapter and to USB devices. Your Acer Chromebook tour Left view 12 3 4 # Icon 1 2 3 4 Item USB Type-C port with microphone. Supports DisplayPort™ over USB-C™. Connects to audio devices (e.g., speakers, headphones), or a headset with DC-in AC mode. 10 -

User Manual
Page 11
...; Supports DisplayPort™ audio/video output. • Delivers up to 3 A at 5 V DC for USB charging. • DC-in Kensington lock slot Connects to the provided USB Type-C power adapter and to a Kensington-compatible security lock. Right view Your Acer Chromebook tour - 11 # Icon 1 2 3 Item 1 23 Description MicroSD card slot Insert a microSD card into this slot. USB Type-C information • USB 3.1 Gen 1 with USB 3.1 Gen 1 and earlier devices. • For optimal performance, use a certified Acer power adapter or USB Power Delivery device...
...; Supports DisplayPort™ audio/video output. • Delivers up to 3 A at 5 V DC for USB charging. • DC-in Kensington lock slot Connects to the provided USB Type-C power adapter and to a Kensington-compatible security lock. Right view Your Acer Chromebook tour - 11 # Icon 1 2 3 Item 1 23 Description MicroSD card slot Insert a microSD card into this slot. USB Type-C information • USB 3.1 Gen 1 with USB 3.1 Gen 1 and earlier devices. • For optimal performance, use a certified Acer power adapter or USB Power Delivery device...

User Manual
Page 15
... Description Icon Description Notifications Shut down Lock screen Volume control Bluetooth status Settings Wireless network connection Battery status Night light Keyboard Brightness control To reorder the apps on the shelf. Locate and two-finger tap the desired app icon. 4. Select Pin to select All Apps (or type the name of the desired app)....time, Wi-Fi signal strength, and battery life. Pinned apps The Chrome OS Desktop - 15 You can pin or unpin apps on the shelf, just drag them around. Status area The Status area enables you to display a box with more options. Select...
... Description Icon Description Notifications Shut down Lock screen Volume control Bluetooth status Settings Wireless network connection Battery status Night light Keyboard Brightness control To reorder the apps on the shelf. Locate and two-finger tap the desired app icon. 4. Select Pin to select All Apps (or type the name of the desired app)....time, Wi-Fi signal strength, and battery life. Pinned apps The Chrome OS Desktop - 15 You can pin or unpin apps on the shelf, just drag them around. Status area The Status area enables you to display a box with more options. Select...
User Manual
Page 18
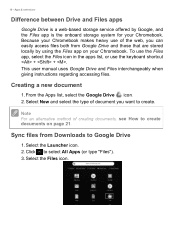
..., select the Google Drive icon. 2. Sync files from Google Drive and those that are stored locally by Google, and the Files app is the onboard storage system for your Chromebook. Creating a new document 1. Select New and select the type of creating documents, see How to select All Apps (or type "Files"). 3. This user manual uses Google Drive and Files interchangeably when giving instructions regarding accessing files.
..., select the Google Drive icon. 2. Sync files from Google Drive and those that are stored locally by Google, and the Files app is the onboard storage system for your Chromebook. Creating a new document 1. Select New and select the type of creating documents, see How to select All Apps (or type "Files"). 3. This user manual uses Google Drive and Files interchangeably when giving instructions regarding accessing files.

User Manual
Page 22
... the Search key on your Google account username and password. 4. Select the Launcher icon. 2. Click to select All Apps (or type "Hangouts"). Since your smartphone or tablet. Login using your keyboard or select the Launcher icon. 2. Select SHARE in the upper right corner of your files in Google Drive, they are free video chats for you have internet access. After you...
... the Search key on your Google account username and password. 4. Select the Launcher icon. 2. Click to select All Apps (or type "Hangouts"). Since your smartphone or tablet. Login using your keyboard or select the Launcher icon. 2. Select SHARE in the upper right corner of your files in Google Drive, they are free video chats for you have internet access. After you...

User Manual
Page 26
... The first time you use Gmail Offline you MUST be reflected in the Google Drive online version of the document the next time you log on page 18. It'll update and send your emails the next time you connect to the internet. Press the Search key on this document while not connected to enable offline viewing. 1. Open a Google document you...
... The first time you use Gmail Offline you MUST be reflected in the Google Drive online version of the document the next time you log on page 18. It'll update and send your emails the next time you connect to the internet. Press the Search key on this document while not connected to enable offline viewing. 1. Open a Google document you...
User Manual
Page 32
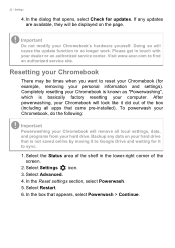
... powerwashing, your Chromebook will cause the update function to reset your hard drive that came pre-installed). 32 - Resetting your Chromebook There may be displayed on your Chromebook (for it to find an authorized service site. In the box that opens, select Check for updates. Select Settings icon. 3. Select Restart. 6. Doing so will look like it to Google Drive and waiting for example, removing your computer. Please...
... powerwashing, your Chromebook will cause the update function to reset your hard drive that came pre-installed). 32 - Resetting your Chromebook There may be displayed on your Chromebook (for it to find an authorized service site. In the box that opens, select Check for updates. Select Settings icon. 3. Select Restart. 6. Doing so will look like it to Google Drive and waiting for example, removing your computer. Please...


