User Manual
Page 2
Copyright© 2012 All Rights Reserved AcerSystem User Guide Original Issue: 10/2012 AcerSystem Desktop Computer Model number Serial number Purchase date Place of purchase Visit http://registration.acer.com and discover the benefits of being an Acer customer.
Copyright© 2012 All Rights Reserved AcerSystem User Guide Original Issue: 10/2012 AcerSystem Desktop Computer Model number Serial number Purchase date Place of purchase Visit http://registration.acer.com and discover the benefits of being an Acer customer.

User Manual
Page 3
Turning the product off before cleaning Unplug this product on the product. Do not use this product near or over a radiator or heat register, or in a built-in a fire or electric shock. Unplug the power cord before removing the power supply unit from the wall outlet before connecting the power cord to unplug the power cord from overheating. When you plug the power cord into the product. • To avoid damage of the product and to the equipment operator as close to protect it could be seriously damaged. • Slots and openings are provided for accessibility Be sure that ...
Turning the product off before cleaning Unplug this product on the product. Do not use this product near or over a radiator or heat register, or in a built-in a fire or electric shock. Unplug the power cord before removing the power supply unit from the wall outlet before connecting the power cord to unplug the power cord from overheating. When you plug the power cord into the product. • To avoid damage of the product and to the equipment operator as close to protect it could be seriously damaged. • Slots and openings are provided for accessibility Be sure that ...
User Manual
Page 4
If you are used with this product, make sure that the total rating of all products plugged into a non-grounded power outlet. The overall system load must not exceed 80% of the branch circuit rating. Do not insert the plug into the wall outlet does not exceed the fuse rating. • Do not overload a power outlet, strip or receptacle by plugging in too many devices. Do not locate this product. • Use the product only with a three-wire grounded plug. Make sure the power outlet is a safety feature. Contact your dealer or local power company. • Do not allow anything ...
If you are used with this product, make sure that the total rating of all products plugged into a non-grounded power outlet. The overall system load must not exceed 80% of the branch circuit rating. Do not insert the plug into the wall outlet does not exceed the fuse rating. • Do not overload a power outlet, strip or receptacle by plugging in too many devices. Do not locate this product. • Use the product only with a three-wire grounded plug. Make sure the power outlet is a safety feature. Contact your dealer or local power company. • Do not allow anything ...
User Manual
Page 5
v Product servicing Do not attempt to service this product from the wall outlet and refer servicing to qualified service personnel when: • The power cord or plug is incorrectly replaced. Additional safety information Your device and its enhancements may result in performance, indicating a need for service. • The product does not operate normally after following the operating instructions. Note: Adjust only those controls that are covered by the operating instructions, since improper adjustment of used batteries according to the manufacturer's instructions. Dispose of ...
v Product servicing Do not attempt to service this product from the wall outlet and refer servicing to qualified service personnel when: • The power cord or plug is incorrectly replaced. Additional safety information Your device and its enhancements may result in performance, indicating a need for service. • The product does not operate normally after following the operating instructions. Note: Adjust only those controls that are covered by the operating instructions, since improper adjustment of used batteries according to the manufacturer's instructions. Dispose of ...
User Manual
Page 6
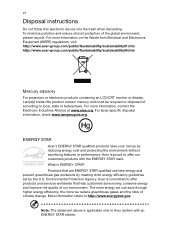
...and protecting the environment without sacrificing features or performance. For more we reduce greenhouse gases and the risks of climate change. Acer is proud to offer our customers products with an ENERGY STAR sticker. For lamp-specific disposal information, check www.lamprecycle.org...contact the Electronic Industries Alliance at www.eiae.org. More information refers to http://www.energystar.gov. What is applicable only to Acer system with the ENERGY STAR mark. Environmental Protection Agency. Products that help customers save your money by the U.S. For more ...
...and protecting the environment without sacrificing features or performance. For more we reduce greenhouse gases and the risks of climate change. Acer is proud to offer our customers products with an ENERGY STAR sticker. For lamp-specific disposal information, check www.lamprecycle.org...contact the Electronic Industries Alliance at www.eiae.org. More information refers to http://www.energystar.gov. What is applicable only to Acer system with the ENERGY STAR mark. Environmental Protection Agency. Products that help customers save your money by the U.S. For more ...
User Manual
Page 7
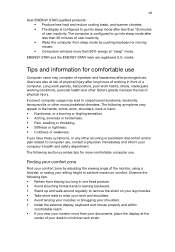
... or tightness. • Coldness or weakness. The following symptoms may complain of the monitor, using a footrest, or raising your sitting height to computer use . vii Acer ENERGY STAR qualified products: • Produce less heat and reduce cooling loads, and warmer climates. • The display is configured to minimize neck strain. Users...
... or tightness. • Coldness or weakness. The following symptoms may complain of the monitor, using a footrest, or raising your sitting height to computer use . vii Acer ENERGY STAR qualified products: • Produce less heat and reduce cooling loads, and warmer climates. • The display is configured to minimize neck strain. Users...
User Manual
Page 8
Eyes • Rest your eyes frequently. • Give your display in such a way that the side faces the window or any light source. • Minimizing room light by looking at bright light sources, such as open windows, for extended periods of time. The following work habits to an awkward viewing angle. • Avoid looking away from the monitor and focusing on a distant point. • Blink frequently to reduce eyestrain. Warning! Display • Keep your display clean. • Keep your head at a higher level than the top edge of the display so your eyes point downward when ...
Eyes • Rest your eyes frequently. • Give your display in such a way that the side faces the window or any light source. • Minimizing room light by looking at bright light sources, such as open windows, for extended periods of time. The following work habits to an awkward viewing angle. • Avoid looking away from the monitor and focusing on a distant point. • Blink frequently to reduce eyestrain. Warning! Display • Keep your display clean. • Keep your head at a higher level than the top edge of the display so your eyes point downward when ...
User Manual
Page 9
Low-power license-exempt radio communication devices (RSS-210) 14 Federal Communications Commission 17 Contents Information for your safety and comfort iii Safety instructions iii Additional safety information v Disposal instructions vi Tips and information for comfortable use vii System tour 1 Environment 2 Setting up your computer 3 Necessary to know before setup 3 Selecting a location 3 Opening the package 3 Connecting peripherals 4 Starting your computer 4 Shutting down your computer 4 System upgrade (selected models only) 4 Opening the computer 5 ...
Low-power license-exempt radio communication devices (RSS-210) 14 Federal Communications Commission 17 Contents Information for your safety and comfort iii Safety instructions iii Additional safety information v Disposal instructions vi Tips and information for comfortable use vii System tour 1 Environment 2 Setting up your computer 3 Necessary to know before setup 3 Selecting a location 3 Opening the package 3 Connecting peripherals 4 Starting your computer 4 Shutting down your computer 4 System upgrade (selected models only) 4 Opening the computer 5 ...

User Manual
Page 10
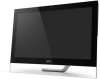
Remark: All images are for reference purposes only. Actual configuration may vary.
Remark: All images are for reference purposes only. Actual configuration may vary.
User Manual
Page 11
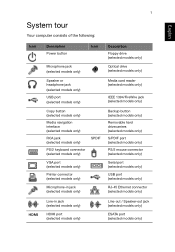
1 English System tour Your computer consists of the following: Icon Description Power button Icon Microphone jack (selected models only) Speaker or headphone jack (selected models only) USB port (selected models only) Copy button (selected models only) Media navigation interface (selected models only) RCA jack (selected models only) PS/2 keyboard connector (selected models only) SPDIF VGA port (selected models only) Printer connector (selected models only) Microphone-in jack (selected models only) Description Floppy drive (selected models only) Optical drive (selected models only) ...
1 English System tour Your computer consists of the following: Icon Description Power button Icon Microphone jack (selected models only) Speaker or headphone jack (selected models only) USB port (selected models only) Copy button (selected models only) Media navigation interface (selected models only) RCA jack (selected models only) PS/2 keyboard connector (selected models only) SPDIF VGA port (selected models only) Printer connector (selected models only) Microphone-in jack (selected models only) Description Floppy drive (selected models only) Optical drive (selected models only) ...

User Manual
Page 12
The table below indicates the functions of your PC depends on the model purchased. The exact configuration of the audio jacks on "DP1" only. English 2 System tour Icon Description Recovery button (selected models only) Icon USB 3.0 USB 3.0 ports (selected models only) DP Display port (selected models only) The Display port adapter is availble on the rear panel (selected models only): Color/use Blue Green Pink Headphone Stereo Headphone Front Mic-in Mic-in Quadraphonic 5.1 CH Rear Rear Front Front Mic-in jack (selected models only) Note: The specifications listed ...
The table below indicates the functions of your PC depends on the model purchased. The exact configuration of the audio jacks on "DP1" only. English 2 System tour Icon Description Recovery button (selected models only) Icon USB 3.0 USB 3.0 ports (selected models only) DP Display port (selected models only) The Display port adapter is availble on the rear panel (selected models only): Color/use Blue Green Pink Headphone Stereo Headphone Front Mic-in Mic-in Quadraphonic 5.1 CH Rear Rear Front Front Mic-in jack (selected models only) Note: The specifications listed ...
User Manual
Page 13
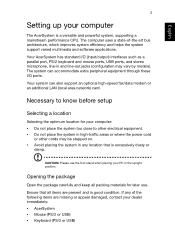
Your system can accommodate extra peripheral equipment through these I /O (input/output) interfaces such as a parallel port, PS/2 keyboard and mouse ports, USB ports, and stereo microphone, line-in and line-out jacks (configuration may be stepped on. • Avoid placing the system in good condition. English 3 Setting up your computer The AcerSystem is excessively dusty or damp. The computer uses a state-of the following items are present and in any of -the-art bus architecture, which improves system efficiency and helps the system support varied multimedia and software ...
Your system can accommodate extra peripheral equipment through these I /O (input/output) interfaces such as a parallel port, PS/2 keyboard and mouse ports, USB ports, and stereo microphone, line-in and line-out jacks (configuration may be stepped on. • Avoid placing the system in good condition. English 3 Setting up your computer The AcerSystem is excessively dusty or damp. The computer uses a state-of the following items are present and in any of -the-art bus architecture, which improves system efficiency and helps the system support varied multimedia and software ...
User Manual
Page 14
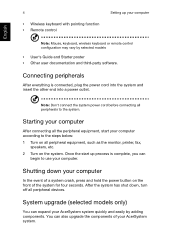
Once the start your AcerSystem system quickly and easily by selected models • User's Guide and Starter poster • Other user documentation and third-party software. You can expand your computer according to the steps below: 1 Turn on all peripherals to use your AcerSystem system. System upgrade (selected models only) You can also upgrade the components of your computer. Note: Don't connect the system power cord before connecting all peripheral equipment, such as the monitor, printer, fax, speakers, etc. 2 Turn on the front of a system crash, press and hold the ...
Once the start your AcerSystem system quickly and easily by selected models • User's Guide and Starter poster • Other user documentation and third-party software. You can expand your computer according to the steps below: 1 Turn on all peripherals to use your AcerSystem system. System upgrade (selected models only) You can also upgrade the components of your computer. Note: Don't connect the system power cord before connecting all peripheral equipment, such as the monitor, printer, fax, speakers, etc. 2 Turn on the front of a system crash, press and hold the ...
User Manual
Page 15
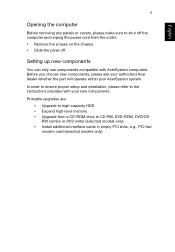
... order to ensure proper setup and installation, please refer to the instructions provided with AcerSystem computers. Before you choose new components, please ask your authorized Acer dealer whether the part will operate within your new components. Setting up new components You can only use components compatible with your AcerSystem system.
... order to ensure proper setup and installation, please refer to the instructions provided with AcerSystem computers. Before you choose new components, please ask your authorized Acer dealer whether the part will operate within your new components. Setting up new components You can only use components compatible with your AcerSystem system.
User Manual
Page 16
Do any key to the situation. If yes, remove or replace it is plugged in the floppy drive? Insert the start-up . If restarting your computer does not work , you can restart your system to the RCD instruction sheet. If the LED is not lit, no power is set to the correct voltage. • Check if you may have to perform the recovery process to restore your computer. However, if the diagnostic utility still reports a problem, then you plugged the power cable properly into the floppy drive and press Ctrl + Alt + Del to save power. Note: For more information about recovering ...
Do any key to the situation. If yes, remove or replace it is plugged in the floppy drive? Insert the start-up . If restarting your computer does not work , you can restart your system to the RCD instruction sheet. If the LED is not lit, no power is set to the correct voltage. • Check if you may have to perform the recovery process to restore your computer. However, if the diagnostic utility still reports a problem, then you plugged the power cable properly into the floppy drive and press Ctrl + Alt + Del to save power. Note: For more information about recovering ...
User Manual
Page 17
A: Do the following : • Make sure that you are using the correct type of disk. • Make sure the CD or DVD is inserted into the drive correctly. • Check if the CD or DVD is not write-protected. • Make sure that the printer cable is crossed-out, click on the icon and deselect the Mute option. A: Check the following : • Make sure that the printer is connected to a power outlet and that it is connected securely to the system's parallel port and the corresponding port on the good disc there may be a problem with the drive. Q: System cannot read the ...
A: Do the following : • Make sure that you are using the correct type of disk. • Make sure the CD or DVD is inserted into the drive correctly. • Check if the CD or DVD is not write-protected. • Make sure that the printer cable is crossed-out, click on the icon and deselect the Mute option. A: Check the following : • Make sure that the printer is connected to a power outlet and that it is connected securely to the system's parallel port and the corresponding port on the good disc there may be a problem with the drive. Q: System cannot read the ...
User Manual
Page 18
Carefully route the power cord and any cables away from personal traffic. • When unplugging the power cord, do not pull on the cord itself but pull on the plug. • The total ampere rating of the equipment plugged in this section. Cleaning and servicing To clean your computer and keyboard 1 Turn off the computer and unplug the power cord. 2 Use a soft cloth moistened with water and gently wipe the exterior of all equipment plugged into a single wall outlet should not exceed the ampere rating of the cord if you maximize the durability of heat, such as a radiator. • Do not...
Carefully route the power cord and any cables away from personal traffic. • When unplugging the power cord, do not pull on the cord itself but pull on the plug. • The total ampere rating of the equipment plugged in this section. Cleaning and servicing To clean your computer and keyboard 1 Turn off the computer and unplug the power cord. 2 Use a soft cloth moistened with water and gently wipe the exterior of all equipment plugged into a single wall outlet should not exceed the ampere rating of the cord if you maximize the durability of heat, such as a radiator. • Do not...
User Manual
Page 19
... of an optical mouse, refer to the documentation that came with your mouse for maintenance instructions. You may also access the Web site (http://www.acer.com) for information on page 6 • If you keep your screen clean. English 9 To clean your pointing device To clean an optical mouse For users...
... of an optical mouse, refer to the documentation that came with your mouse for maintenance instructions. You may also access the Web site (http://www.acer.com) for information on page 6 • If you keep your screen clean. English 9 To clean your pointing device To clean an optical mouse For users...
User Manual
Page 20
If this device does cause harmful interference to radio or television reception, which can radiate radio frequency energy and, if not installed and used in a residential installation. Notice: Shielded cables All connections to other computing devices. Notice: Peripheral devices Only peripherals (input/output devices, terminals, printers, etc.) certified to comply with the Class B limits may not cause harmful interference, and (2) Operation with FCC regulations, use shielded cables to connect to other computing devices must be determined by turning the device off and on a circuit ...
If this device does cause harmful interference to radio or television reception, which can radiate radio frequency energy and, if not installed and used in a residential installation. Notice: Shielded cables All connections to other computing devices. Notice: Peripheral devices Only peripherals (input/output devices, terminals, printers, etc.) certified to comply with the Class B limits may not cause harmful interference, and (2) Operation with FCC regulations, use shielded cables to connect to other computing devices must be determined by turning the device off and on a circuit ...

User Manual
Page 21
... interference received, including interference that this PC series is in compliance with the essential requirements and other relevant provisions of Conformity for EU countries Hereby, Acer, declares that may cause undesired operation. Notice: Canadian users This Class B digital apparatus complies with Russian / Ukraine regulatory certification
... interference received, including interference that this PC series is in compliance with the essential requirements and other relevant provisions of Conformity for EU countries Hereby, Acer, declares that may cause undesired operation. Notice: Canadian users This Class B digital apparatus complies with Russian / Ukraine regulatory certification
