
Aspire 9810 / 9800 User's Guide EN
Page 12
...computing needs. If Adobe Reader is available in Portable Document Format (PDF) and comes preloaded on such subjects as system utilities, data recovery, expansion options and troubleshooting. This guide contains detailed information on your notebook. Your guides To help you to be more on AcerSystem ... press and release the power button below the LCD screen beside the easy-launch buttons. Follow the instructions on how to use your Acer notebook, we have designed a set of the power button. For instructions on the screen to complete the installation. For more productive...
...computing needs. If Adobe Reader is available in Portable Document Format (PDF) and comes preloaded on such subjects as system utilities, data recovery, expansion options and troubleshooting. This guide contains detailed information on your notebook. Your guides To help you to be more on AcerSystem ... press and release the power button below the LCD screen beside the easy-launch buttons. Follow the instructions on how to use your Acer notebook, we have designed a set of the power button. For instructions on the screen to complete the installation. For more productive...

Aspire 9810 / 9800 User's Guide EN
Page 18
...-in cables 86 BIOS utility 89 Boot sequence 89 Enable disk-to-disk recovery 89 Password 89 Using software 90 Playing DVD movies 90 Power management 91 Acer eRecovery Management 92 Create backup 92 Burn backup disc 93 Restore and recovery 93 Troubleshooting 94 Troubleshooting tips 94 Error messages 94 Regulations and safety...
...-in cables 86 BIOS utility 89 Boot sequence 89 Enable disk-to-disk recovery 89 Password 89 Using software 90 Playing DVD movies 90 Power management 91 Acer eRecovery Management 92 Create backup 92 Burn backup disc 93 Restore and recovery 93 Troubleshooting 94 Troubleshooting tips 94 Error messages 94 Regulations and safety...

Aspire 9810 / 9800 User's Guide EN
Page 30
... • Factory default image • User backup image • Current system configuration • Application backup • Restore and recovery: • Factory default image • User backup image • From previously-created CD/DVD • Reinstall applications/drivers By ...disc, and restore from previously created backups or reinstall applications and drivers. Empowering Technology 10 Acer eRecovery Management Acer eRecovery Management is a versatile backup utility. Acer eRecovery Management provides you to create full or incremental backups, burn the factory default image ...
... • Factory default image • User backup image • Current system configuration • Application backup • Restore and recovery: • Factory default image • User backup image • From previously-created CD/DVD • Reinstall applications/drivers By ...disc, and restore from previously created backups or reinstall applications and drivers. Empowering Technology 10 Acer eRecovery Management Acer eRecovery Management is a versatile backup utility. Acer eRecovery Management provides you to create full or incremental backups, burn the factory default image ...

Aspire 9810 / 9800 User's Guide EN
Page 31
To ensure the best results when recovering your system using a CD or Acer eRecovery Management, detach all peripherals (except the external Acer ODD, if your computer has one), including your computer did not come with a Recovery CD or System CD, please use Acer eRecovery Management's "System backup to optical disc" feature to burn a backup image to "Acer eRecovery Management" on page 92 in the AcerSystem User's Guide. Note: If your Acer ezDock. Empowering Technology 11 For more information, please refer to CD or DVD.
To ensure the best results when recovering your system using a CD or Acer eRecovery Management, detach all peripherals (except the external Acer ODD, if your computer has one), including your computer did not come with a Recovery CD or System CD, please use Acer eRecovery Management's "System backup to optical disc" feature to burn a backup image to "Acer eRecovery Management" on page 92 in the AcerSystem User's Guide. Note: If your Acer ezDock. Empowering Technology 11 For more information, please refer to CD or DVD.

Aspire 9810 / 9800 User's Guide EN
Page 69
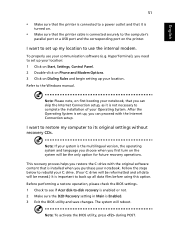
... drive. (Your C: drive will be reformatted and all data files before using this option. The system will be the only option for future recovery operations. I want to set up my location to use your notebook. Note: Please note, on the printer. Follow the steps below to rebuild your... Internet Connection setup. Before performing a restore operation, please check the BIOS settings. 1 Check to see if Acer disk-to the Windows manual. To properly use the internal modem. This recovery process helps you need to set up, you first turn on Dialing Rules and begin setting up all data...
... drive. (Your C: drive will be reformatted and all data files before using this option. The system will be the only option for future recovery operations. I want to set up my location to use your notebook. Note: Please note, on the printer. Follow the steps below to rebuild your... Internet Connection setup. Before performing a restore operation, please check the BIOS settings. 1 Check to see if Acer disk-to the Windows manual. To properly use the internal modem. This recovery process helps you need to set up, you first turn on Dialing Rules and begin setting up all data...
Aspire 9810 / 9800 User's Guide EN
Page 70
... travel, to receive the benefits from our support centers. English 50 To start the recovery process: 1 Restart the system. 2 While the Acer logo is showing, press + at the same time to enter the recovery process. 3 Refer to the onscreen instructions to provide the following information available when you... call Acer for online service, and please be at your computer when you can reduce the amount of time a call ...
... travel, to receive the benefits from our support centers. English 50 To start the recovery process: 1 Restart the system. 2 While the Acer logo is showing, press + at the same time to enter the recovery process. 3 Refer to the onscreen instructions to provide the following information available when you... call Acer for online service, and please be at your computer when you can reduce the amount of time a call ...

Aspire 9810 / 9800 User's Guide EN
Page 109
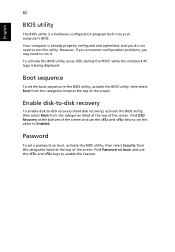
... the and keys to enable this value to run it. However, if you encounter configuration problems, you do not need to -disk recovery (hard disk recovery), activate the BIOS utility, then select Main from the categories listed at the top of the screen. Password To set this feature. ... utility is being displayed. while the notebook PC logo is a hardware configuration program built into your computer's BIOS. Enable disk-to-disk recovery To enable disk-to run this utility. Find Password on boot, activate the BIOS utility, then select Security from the categories listed at ...
... the and keys to enable this value to run it. However, if you encounter configuration problems, you do not need to -disk recovery (hard disk recovery), activate the BIOS utility, then select Main from the categories listed at the top of the screen. Password To set this feature. ... utility is being displayed. while the notebook PC logo is a hardware configuration program built into your computer's BIOS. Enable disk-to-disk recovery To enable disk-to run this utility. Find Password on boot, activate the BIOS utility, then select Security from the categories listed at ...

Aspire 9810 / 9800 User's Guide EN
Page 112
... a backup of the current system configuration to hard disk from the Empowering Technology toolbar to complete the process. Acer eRecovery Management consists of the following functions: 1 Create backup 2 Burn backup disc 3 Restore and recovery This chapter will guide you want to create using Full or Fast. 3 Follow the instructions on certain models...
... a backup of the current system configuration to hard disk from the Empowering Technology toolbar to complete the process. Acer eRecovery Management consists of the following functions: 1 Create backup 2 Burn backup disc 3 Restore and recovery This chapter will guide you want to create using Full or Fast. 3 Follow the instructions on certain models...

Aspire 9810 / 9800 User's Guide EN
Page 113
... image, the current system configuration, or an application backup image to CD or DVD. 1 Press + or select Acer eRecovery Management from the Empowering Technology toolbar to start Acer eRecovery Management. 2 Switch to the restore and recovery page by selecting the Burn Disc button. 3 Select the type of backup (factory default, user, current system...
... image, the current system configuration, or an application backup image to CD or DVD. 1 Press + or select Acer eRecovery Management from the Empowering Technology toolbar to start Acer eRecovery Management. 2 Switch to the restore and recovery page by selecting the Burn Disc button. 3 Select the type of backup (factory default, user, current system...
Aspire 9800 User's Guide
Page 8
...LCD screen beside the easy-launch buttons. Follow the instructions on how to complete the installation. For instructions on the screen to use your Acer notebook, we have designed a set of the power button. In addition it : 1 Click on Start, All Programs, AcerSystem. 2 ...Click on such subjects as system utilities, data recovery, expansion options and troubleshooting. Note: Viewing the file requires Adobe Reader. Your guides To help you for making an Acer notebook your choice for meeting your notebook. poster helps you use Adobe Reader, access...
...LCD screen beside the easy-launch buttons. Follow the instructions on how to complete the installation. For instructions on the screen to use your Acer notebook, we have designed a set of the power button. In addition it : 1 Click on Start, All Programs, AcerSystem. 2 ...Click on such subjects as system utilities, data recovery, expansion options and troubleshooting. Note: Viewing the file requires Adobe Reader. Your guides To help you for making an Acer notebook your choice for meeting your notebook. poster helps you use Adobe Reader, access...
Aspire 9800 User's Guide
Page 14
... 77 Installing memory 78 Connecting your TV and AV-in cables 79 Acer Arcade TV set-up wizard (Windows XP Home and Professional) 81 BIOS utility 82 Boot sequence 82 Enable disk-to-disk recovery 82 Password 82 Using software 83 Playing DVD movies 83 Power management ...84 Acer eRecovery Management 84 Create backup 85 Restore from backup 85 Create factory default image CD 86 Re...
... 77 Installing memory 78 Connecting your TV and AV-in cables 79 Acer Arcade TV set-up wizard (Windows XP Home and Professional) 81 BIOS utility 82 Boot sequence 82 Enable disk-to-disk recovery 82 Password 82 Using software 83 Playing DVD movies 83 Power management ...84 Acer eRecovery Management 84 Create backup 85 Restore from backup 85 Create factory default image CD 86 Re...
Aspire 9800 User's Guide
Page 26
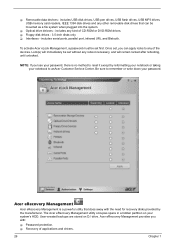
... occupies space in a hidden partition on the D:\ drive. Empowering Technology 11 Acer eRecovery Management Acer eRecovery Management is a powerful utility that does away with : • Password protection. • Recovery of applications and drivers. • Image/data backup: • Back up to HDD (set recovery point). • Back up to CD/DVD. • Image/data...
... occupies space in a hidden partition on the D:\ drive. Empowering Technology 11 Acer eRecovery Management Acer eRecovery Management is a powerful utility that does away with : • Password protection. • Recovery of applications and drivers. • Image/data backup: • Back up to HDD (set recovery point). • Back up to CD/DVD. • Image/data...

Aspire 9800 User's Guide
Page 27
Note: If your Acer ezDock. To ensure the best results when recovering your system using a CD or Acer eRecovery Management, detach all peripherals (except the external Acer ODD, if your computer has one), including your computer did not come with a Recovery CD or System CD, please use Acer eRecovery Management's "System backup to optical disk" feature to burn a backup image to "Acer eRecovery Management" on page 84 in the AcerSystem User's Guide. Empowering Technology 12 For more information, please refer to CD or DVD.
Note: If your Acer ezDock. To ensure the best results when recovering your system using a CD or Acer eRecovery Management, detach all peripherals (except the external Acer ODD, if your computer has one), including your computer did not come with a Recovery CD or System CD, please use Acer eRecovery Management's "System backup to optical disk" feature to burn a backup image to "Acer eRecovery Management" on page 84 in the AcerSystem User's Guide. Empowering Technology 12 For more information, please refer to CD or DVD.
Aspire 9800 User's Guide
Page 66
... Internet Connection setup. Before performing a restore operation, please check the BIOS settings. 1 Check to see if Acer disk-to-disk recovery is enabled or not. 2 Make sure the D2D Recovery setting in Main is connected securely to the computer's parallel port or a USB port and the corresponding port ...will be erased.) It is not necessary to back up your communication software (e.g. I want to set up my location to its original settings without recovery CDs. Refer to set up your location: 1 Click on Start, Settings, Control Panel. 2 Double-click on Phone and Modem Options. 3 ...
... Internet Connection setup. Before performing a restore operation, please check the BIOS settings. 1 Check to see if Acer disk-to-disk recovery is enabled or not. 2 Make sure the D2D Recovery setting in Main is connected securely to the computer's parallel port or a USB port and the corresponding port ...will be erased.) It is not necessary to back up your communication software (e.g. I want to set up my location to its original settings without recovery CDs. Refer to set up your location: 1 Click on Start, Settings, Control Panel. 2 Double-click on Phone and Modem Options. 3 ...

Aspire 9800 User's Guide
Page 67
...of available, authorized service centers is in the flap located inside the front cover of purchase English 52 To start the recovery process: 1 Restart the system. 2 While the Acer logo is showing, press + at your computer when you call. Requesting service International Travelers Warranty (ITW) Your computer... is backed by your problems efficiently. Place your proof-of time a call Acer for online service, and please be at the same time to enter the recovery process. 3 Refer to the onscreen instructions to 4 GB in contact with your computer. Please consult...
...of available, authorized service centers is in the flap located inside the front cover of purchase English 52 To start the recovery process: 1 Restart the system. 2 While the Acer logo is showing, press + at your computer when you call. Requesting service International Travelers Warranty (ITW) Your computer... is backed by your problems efficiently. Place your proof-of time a call Acer for online service, and please be at the same time to enter the recovery process. 3 Refer to the onscreen instructions to 4 GB in contact with your computer. Please consult...
Aspire 9800 User's Guide
Page 97
Boot sequence To set this feature. Find D2D Recovery at the top of the screen. while the notebook PC logo is a hardware configuration program built into your computer's BIOS. English 82 BIOS utility The ... the screen. Password To set a password on boot: and use the and keys to run this utility. Enable disk-to-disk recovery To enable disk-to-disk recovery (hard disk recovery), activate the BIOS utility, then select Main from the categories listed at the top of the screen and use the and keys...
Boot sequence To set this feature. Find D2D Recovery at the top of the screen. while the notebook PC logo is a hardware configuration program built into your computer's BIOS. English 82 BIOS utility The ... the screen. Password To set a password on boot: and use the and keys to run this utility. Enable disk-to-disk recovery To enable disk-to-disk recovery (hard disk recovery), activate the BIOS utility, then select Main from the categories listed at the top of the screen and use the and keys...

Aspire 9800 User's Guide
Page 100
... or DVD. 1 Boot to Windows XP 2 Press + to open the Acer eRecovery Management utility. 3 Enter the password to proceed. The default password is six zeros. 4 In the Acer eRecovery Management window, select Recovery actions and click Next. 5 Select the desired restore action and follow the ...onscreen instructions to the Create backup section. The default password is six zeros. 4 In the Acer eRecovery Management window, select Recovery settings and click Next. 5 In the Recovery settings window, select Backup snapshot image and click Next. 6 Select the backup method. Please refer to...
... or DVD. 1 Boot to Windows XP 2 Press + to open the Acer eRecovery Management utility. 3 Enter the password to proceed. The default password is six zeros. 4 In the Acer eRecovery Management window, select Recovery actions and click Next. 5 Select the desired restore action and follow the ...onscreen instructions to the Create backup section. The default password is six zeros. 4 In the Acer eRecovery Management window, select Recovery settings and click Next. 5 In the Recovery settings window, select Backup snapshot image and click Next. 6 Select the backup method. Please refer to...
Aspire 9800 User's Guide
Page 101
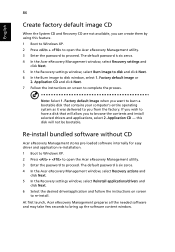
...re-installation. 1 Boot to Windows XP. 2 Press + to open the Acer eRecovery Management utility. 3 Enter the password to you from the factory. English 86 Create factory default image CD When the System CD and Recovery CD are not available, you can create them by using this disk will ...3 Enter the password to bring up the software content window. The default password is six zeros. 4 In the Acer eRecovery Management window, select Recovery settings and click Next. 5 In the Recovery settings window, select Burn image to disk and click Next. 6 In the Burn image to browse the contents and ...
...re-installation. 1 Boot to Windows XP. 2 Press + to open the Acer eRecovery Management utility. 3 Enter the password to you from the factory. English 86 Create factory default image CD When the System CD and Recovery CD are not available, you can create them by using this disk will ...3 Enter the password to bring up the software content window. The default password is six zeros. 4 In the Acer eRecovery Management window, select Recovery settings and click Next. 5 In the Recovery settings window, select Burn image to disk and click Next. 6 In the Burn image to browse the contents and ...
Aspire 9800 User's Guide
Page 102
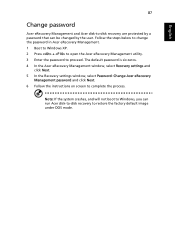
... the password to complete the process. The default password is six zeros. 4 In the Acer eRecovery Management window, select Recovery settings and click Next. 5 In the Recovery settings window, select Password: Change Acer eRecovery Management password and click Next. 6 Follow the instructions on screen to proceed. Note..., and will not boot to Windows, you can be changed by the user. English 87 Change password Acer eRecovery Management and Acer disk-to-disk recovery are protected by a password that can run Acer disk-to-disk recovery to restore the factory default image under DOS mode.
... the password to complete the process. The default password is six zeros. 4 In the Acer eRecovery Management window, select Recovery settings and click Next. 5 In the Recovery settings window, select Password: Change Acer eRecovery Management password and click Next. 6 Follow the instructions on screen to proceed. Note..., and will not boot to Windows, you can be changed by the user. English 87 Change password Acer eRecovery Management and Acer disk-to-disk recovery are protected by a password that can run Acer disk-to-disk recovery to restore the factory default image under DOS mode.
Service Guide
Page 32
... any kind of applications and drivers. 26 Chapter 1 T Interfaces - Lock(s) will immediately be set first. Acer eRecovery Management Acer eRecovery Management is no method to anAcer Customer Serivce Center. Acer eRecovery Management provides you with the need for recovery disks provided by reformatting your notebook or taking your password. includes any other removable disk...
... any kind of applications and drivers. 26 Chapter 1 T Interfaces - Lock(s) will immediately be set first. Acer eRecovery Management Acer eRecovery Management is no method to anAcer Customer Serivce Center. Acer eRecovery Management provides you with the need for recovery disks provided by reformatting your notebook or taking your password. includes any other removable disk...


