Aspire 7530 Tv Tuner - Acer
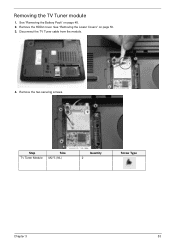
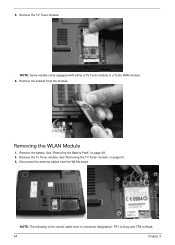
Aspire 7530 Tv Tuner
Related Manual Pages


Similar Questions


Connecting To Tv
how do i connect my acer aspire 5733 laptop to a tv, laptop does not have a hdmi point
how do i connect my acer aspire 5733 laptop to a tv, laptop does not have a hdmi point
(Posted by petergarforth 11 years ago)

Functions
How do you operate the function of TV tuner and others like Acer EasyPort IV, HDMI out and ARCADE DE...
How do you operate the function of TV tuner and others like Acer EasyPort IV, HDMI out and ARCADE DE...
(Posted by Ibejc16 11 years ago)