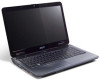

Acer Aspire 5332 / 5732Z Series Service Guide
Page 7
...Windows Keys 13 Hot Keys 14 Special Key 15 Using the System Utilities 16 Acer GridVista (dual-display compatible 16 Hardware Specifications and Configurations 17 System Utilities 25 ...Utility 38 WinFlash Utility 40 Remove HDD/BIOS Password Utilities 41 Machine Disassembly and Replacement 47 Disassembly Requirements 47 Pre-disassembly Instructions 48 Disassembly Process 48 External Module ... Lower Covers 52 Removing the Optical Drive Module 53 Removing the DIMM Modules 55 Removing the WLAN Module 56 Removing the Hard Disk Drive Module 58 Main Unit Disassembly Process ...
...Windows Keys 13 Hot Keys 14 Special Key 15 Using the System Utilities 16 Acer GridVista (dual-display compatible 16 Hardware Specifications and Configurations 17 System Utilities 25 ...Utility 38 WinFlash Utility 40 Remove HDD/BIOS Password Utilities 41 Machine Disassembly and Replacement 47 Disassembly Requirements 47 Pre-disassembly Instructions 48 Disassembly Process 48 External Module ... Lower Covers 52 Removing the Optical Drive Module 53 Removing the DIMM Modules 55 Removing the WLAN Module 56 Removing the Hard Disk Drive Module 58 Main Unit Disassembly Process ...
Acer Aspire 5332 / 5732Z Series Service Guide
Page 8
... 103 Replacing the Thermal Module 103 Replacing the Mainboard 104 Replacing the TouchPad Bracket 105 Replacing the Right Speaker Module 107 Replacing the Left Speaker Module 108 Replacing the Power Board 109 Replacing the Upper Cover 109 Replacing the LCD Module 113 Replacing the Keyboard 118 Replacing the Switch Cover 119 Replacing the Hard Disk Drive Module 119 Replacing the WLAN Module 121 Replacing the...
... 103 Replacing the Thermal Module 103 Replacing the Mainboard 104 Replacing the TouchPad Bracket 105 Replacing the Right Speaker Module 107 Replacing the Left Speaker Module 108 Replacing the Power Board 109 Replacing the Upper Cover 109 Replacing the LCD Module 113 Replacing the Keyboard 118 Replacing the Switch Cover 119 Replacing the Hard Disk Drive Module 119 Replacing the WLAN Module 121 Replacing the...

Acer Aspire 5332 / 5732Z Series Service Guide
Page 129
Place the Switch Cover left side first on to secure the carrier. Place the HDD in the HDD carrier. 2. Chapter 3 119 Replacing the Hard Disk Drive Module 1. Replace the four (4) screws (two each side) to the Upper Cover. 2. Press down as indicated to snap the Switch Cover into place. Replacing the Switch Cover 1.
Place the Switch Cover left side first on to secure the carrier. Place the HDD in the HDD carrier. 2. Chapter 3 119 Replacing the Hard Disk Drive Module 1. Replace the four (4) screws (two each side) to the Upper Cover. 2. Press down as indicated to snap the Switch Cover into place. Replacing the Switch Cover 1.
Acer Aspire 5332 / 5732Z Series Service Guide
Page 148
...Rerun the test to verify that all of the following devices: • Non-Acer devices • Printer, mouse, and other external devices • Battery pack • Hard disk drive • DIMM • CD-ROM/Diskette drive Module • PC Cards 4. If any problems are no error is inoperative. ... 10 times. 2. When analyzing an intermittent problem, do not isolate non-defective FRU). NOTE: Verify that there are found, replace the FRU. 3. Do not replace a non-defective FRU: • System board • LCD assembly 138 Chapter 4 Follow these procedures to isolate the failing FRU...
...Rerun the test to verify that all of the following devices: • Non-Acer devices • Printer, mouse, and other external devices • Battery pack • Hard disk drive • DIMM • CD-ROM/Diskette drive Module • PC Cards 4. If any problems are no error is inoperative. ... 10 times. 2. When analyzing an intermittent problem, do not isolate non-defective FRU). NOTE: Verify that there are found, replace the FRU. 3. Do not replace a non-defective FRU: • System board • LCD assembly 138 Chapter 4 Follow these procedures to isolate the failing FRU...
Acer Aspire 5332 / 5732Z Series Service Guide
Page 227
A AFLASH Utility 37 Antennas Removing 91 Replacing 94 B Battery Replacing 124 Battery Pack Removing 50 BIOS ROM type 18 vendor 18 Version 18 BIOS Utility 25-37 Advanced 28 Boot 35 Exit 36 Navigating 25 ... hotkeys 14 E EasyTouch Failure 136 Euro 15 External Module Disassembly Flowchart 49 F Features 1 Flash Utility 37 FPC Cable Removing 89 FRU (Field Replaceable Unit) List 153 H Hard Disk Drive Removing 58 Replacing 119 HDTV Switch Failure 137 Hibernation mode hotkey 14 Hot Keys 12 I Indicators 10 Intermittent Problems 138 Internal Speaker Failure 130 J Jumper...
A AFLASH Utility 37 Antennas Removing 91 Replacing 94 B Battery Replacing 124 Battery Pack Removing 50 BIOS ROM type 18 vendor 18 Version 18 BIOS Utility 25-37 Advanced 28 Boot 35 Exit 36 Navigating 25 ... hotkeys 14 E EasyTouch Failure 136 Euro 15 External Module Disassembly Flowchart 49 F Features 1 Flash Utility 37 FPC Cable Removing 89 FRU (Field Replaceable Unit) List 153 H Hard Disk Drive Removing 58 Replacing 119 HDTV Switch Failure 137 Hibernation mode hotkey 14 Hot Keys 12 I Indicators 10 Intermittent Problems 138 Internal Speaker Failure 130 J Jumper...


