
User Guide
Page 13
.... In addition it : 1 Click on Start, All Programs, AcerSystem. 2 Click on AcerSystem User's Guide. For instructions on the screen to use your Acer notebook, we have designed a set of the power button. The printed User's Guide introduces you to be more on the computer, simply press and release...tips for meeting your computer can help you use Adobe Reader, access the Help and Support menu. poster helps you for making an Acer notebook your choice for using your computer Turning your new computer. Your guides To help you to the basic features and functions of your...
.... In addition it : 1 Click on Start, All Programs, AcerSystem. 2 Click on AcerSystem User's Guide. For instructions on the screen to use your Acer notebook, we have designed a set of the power button. The printed User's Guide introduces you to be more on the computer, simply press and release...tips for meeting your computer can help you use Adobe Reader, access the Help and Support menu. poster helps you for making an Acer notebook your choice for using your computer Turning your new computer. Your guides To help you to the basic features and functions of your...
User Guide
Page 18
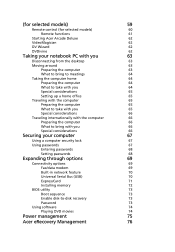
(for selected models) 59 Remote control (for selected models) 60 Remote functions 61 Starting Acer Arcade Deluxe 62 VideoMagician 62 DV Wizard 62 DVDivine 62 Taking your notebook PC with you 63 Disconnecting from the desktop 63 Moving around 63 ... Built-in network feature 70 Universal Serial Bus (USB) 70 ExpressCard 71 Installing memory 72 BIOS utility 73 Boot sequence 73 Enable disk-to-disk recovery 73 Password 73 Using software 74 Playing DVD movies 74 Power management 75...
(for selected models) 59 Remote control (for selected models) 60 Remote functions 61 Starting Acer Arcade Deluxe 62 VideoMagician 62 DV Wizard 62 DVDivine 62 Taking your notebook PC with you 63 Disconnecting from the desktop 63 Moving around 63 ... Built-in network feature 70 Universal Serial Bus (USB) 70 ExpressCard 71 Installing memory 72 BIOS utility 73 Boot sequence 73 Enable disk-to-disk recovery 73 Password 73 Using software 74 Playing DVD movies 74 Power management 75...
User Guide
Page 19
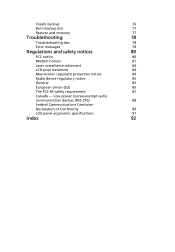
...-210) 88 Federal Communications Comission Declaration of Conformity 89 LCD panel ergonomic specifications 91 Index 92 Create backup 76 Burn backup disc 77 Restore and recovery 77 Troubleshooting 78 Troubleshooting tips 78 Error messages 78 Regulations and safety notices 80 FCC notice 80 Modem notices 81 Laser compliance statement 84 LCD...
...-210) 88 Federal Communications Comission Declaration of Conformity 89 LCD panel ergonomic specifications 91 Index 92 Create backup 76 Burn backup disc 77 Restore and recovery 77 Troubleshooting 78 Troubleshooting tips 78 Error messages 78 Regulations and safety notices 80 FCC notice 80 Modem notices 81 Laser compliance statement 84 LCD...
User Guide
Page 31
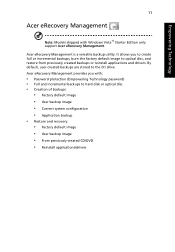
... default image • User backup image • Current system configuration • Application backup • Restore and recovery: • Factory default image • User backup image • From previously-created CD/DVD • Reinstall applications/drivers Acer eRecovery Management provides you to create full or incremental backups, burn the factory default image to...
... default image • User backup image • Current system configuration • Application backup • Restore and recovery: • Factory default image • User backup image • From previously-created CD/DVD • Reinstall applications/drivers Acer eRecovery Management provides you to create full or incremental backups, burn the factory default image to...
User Guide
Page 32
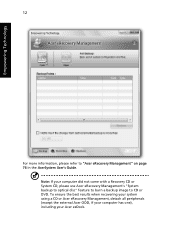
To ensure the best results when recovering your system using a CD or Acer eRecovery Management, detach all peripherals (except the external Acer ODD, if your computer has one), including your computer did not come with a Recovery CD or System CD, please use Acer eRecovery Management's "System backup to optical disc" feature to burn a backup image to "Acer eRecovery Management" on page 76 in the AcerSystem User's Guide. Empowering Technology 12 For more information, please refer to CD or DVD. Note: If your Acer ezDock.
To ensure the best results when recovering your system using a CD or Acer eRecovery Management, detach all peripherals (except the external Acer ODD, if your computer has one), including your computer did not come with a Recovery CD or System CD, please use Acer eRecovery Management's "System backup to optical disc" feature to burn a backup image to "Acer eRecovery Management" on page 76 in the AcerSystem User's Guide. Empowering Technology 12 For more information, please refer to CD or DVD. Note: If your Acer ezDock.
User Guide
Page 64
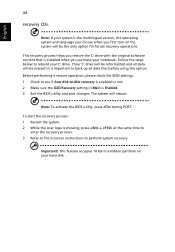
...using this option. Before performing a restore operation, please check the BIOS settings. 1 Check to see if Acer disk-to back up all data will be the only option for future recovery operations. The system will be erased.) It is Enabled. 3 Exit the BIOS utility and save changes. This...feature occupies 10 GB in Main is important to -disk recovery is the multilingual version, the operating system and language you choose when you purchase your hard disk. To start the recovery process: 1 Restart the system. 2 While the Acer logo is installed when you first turn on your notebook. ...
...using this option. Before performing a restore operation, please check the BIOS settings. 1 Check to see if Acer disk-to back up all data will be the only option for future recovery operations. The system will be erased.) It is Enabled. 3 Exit the BIOS utility and save changes. This...feature occupies 10 GB in Main is important to -disk recovery is the multilingual version, the operating system and language you choose when you purchase your hard disk. To start the recovery process: 1 Restart the system. 2 While the Acer logo is installed when you first turn on your notebook. ...
User Guide
Page 93
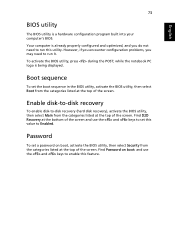
.... English 73 BIOS utility The BIOS utility is being displayed. However, if you encounter configuration problems, you do not need to -disk recovery (hard disk recovery), activate the BIOS utility, then select Main from the categories listed at the top of the screen. To activate the BIOS utility, press... during the POST; Find D2D Recovery at the top of the screen and use the and keys to run it. Enable disk-to-disk recovery To enable disk-to run this feature. Your computer is already properly configured and optimized,...
.... English 73 BIOS utility The BIOS utility is being displayed. However, if you encounter configuration problems, you do not need to -disk recovery (hard disk recovery), activate the BIOS utility, then select Main from the categories listed at the top of the screen. To activate the BIOS utility, press... during the POST; Find D2D Recovery at the top of the screen and use the and keys to run it. Enable disk-to-disk recovery To enable disk-to run this feature. Your computer is already properly configured and optimized,...
User Guide
Page 96
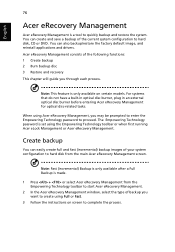
...the system. For systems that do not have a built-in optical disc burner, plug in an external optical disc burner before entering Acer eRecovery Management for optical disc-related tasks. Note: Fast (incremental) Backup is only available after a Full Backup is a tool to ...to proceed. Acer eRecovery Management consists of backup you may be prompted to enter the Empowering Technology password to start Acer eRecovery Management. 2 In the Acer eRecovery Management window, select the type of the following functions: 1 Create backup 2 Burn backup disc 3 Restore and recovery This chapter ...
...the system. For systems that do not have a built-in optical disc burner, plug in an external optical disc burner before entering Acer eRecovery Management for optical disc-related tasks. Note: Fast (incremental) Backup is only available after a Full Backup is a tool to ...to proceed. Acer eRecovery Management consists of backup you may be prompted to enter the Empowering Technology password to start Acer eRecovery Management. 2 In the Acer eRecovery Management window, select the type of the following functions: 1 Create backup 2 Burn backup disc 3 Restore and recovery This chapter ...
User Guide
Page 97
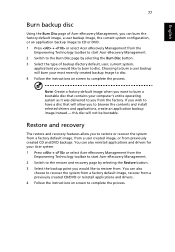
... from a factory default image, from a user created image, or from the Empowering Technology toolbar to start Acer eRecovery Management. 2 Switch to the restore and recovery page by selecting the Burn Disc button. 3 Select the type of Acer eRecovery Management, you can burn the factory default image, a user backup image, the current system configuration...
... from a factory default image, from a user created image, or from the Empowering Technology toolbar to start Acer eRecovery Management. 2 Switch to the restore and recovery page by selecting the Burn Disc button. 3 Select the type of Acer eRecovery Management, you can burn the factory default image, a user backup image, the current system configuration...


