
User Manual
Page 36
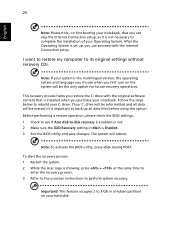
... data files before using this option. Note: To activate the BIOS utility, press during POST. To start the recovery process: 1 Restart the system. 2 While the Acer logo is showing, press + at the same time to enter the recovery process. 3 Refer to the onscreen instructions to back up , you can proceed with... and language you choose when you first turn on your Operating System. Before performing a restore operation, please check the BIOS settings. 1 Check to see if Acer disk-to complete the installation of your hard disk. The system will reboot.
... data files before using this option. Note: To activate the BIOS utility, press during POST. To start the recovery process: 1 Restart the system. 2 While the Acer logo is showing, press + at the same time to enter the recovery process. 3 Refer to the onscreen instructions to back up , you can proceed with... and language you choose when you first turn on your Operating System. Before performing a restore operation, please check the BIOS settings. 1 Check to see if Acer disk-to complete the installation of your hard disk. The system will reboot.

User Manual
Page 59
... 48 Create backup You can create and save backup images to hard disk, CD or DVD. 1 Boot to Windows XP 2 Press + to open the Acer eRecovery utility. 3 Enter the password to store the backup image on CD or DVD. 7 After choosing the backup method, click Next. The default password ... to store the backup disk image on the hard disk (D:\). Note: The "Restore C:" item is enabled only if there is six zeros. 4 In the Acer eRecovery window, select Recovery actions and click Next. 5 Select the desired restore action and follow the onscreen instructions to proceed. a Use Backup to HDD to...
... 48 Create backup You can create and save backup images to hard disk, CD or DVD. 1 Boot to Windows XP 2 Press + to open the Acer eRecovery utility. 3 Enter the password to store the backup image on CD or DVD. 7 After choosing the backup method, click Next. The default password ... to store the backup disk image on the hard disk (D:\). Note: The "Restore C:" item is enabled only if there is six zeros. 4 In the Acer eRecovery window, select Recovery actions and click Next. 5 Select the desired restore action and follow the onscreen instructions to proceed. a Use Backup to HDD to...

User Manual
Page 60
...Next. 6 Follow the instructions on screen to -disk recovery are protected by the user. The default password is six zeros. 4 In the Acer eRecovery window, select Recovery actions and click Next. 5 In the Recovery settings window, select Reinstall applications/drivers and click Next. 6 Select the... for easy driver and application re-installation. 1 Boot to Windows XP. 2 Press + to open the Acer eRecovery utility. 3 Enter the password to proceed. English 49 4 In the Acer eRecovery window, select Recovery settings and click Next. 5 In the Recovery settings window, select Burn image to...
...Next. 6 Follow the instructions on screen to -disk recovery are protected by the user. The default password is six zeros. 4 In the Acer eRecovery window, select Recovery actions and click Next. 5 In the Recovery settings window, select Reinstall applications/drivers and click Next. 6 Select the... for easy driver and application re-installation. 1 Boot to Windows XP. 2 Press + to open the Acer eRecovery utility. 3 Enter the password to proceed. English 49 4 In the Acer eRecovery window, select Recovery settings and click Next. 5 In the Recovery settings window, select Burn image to...


