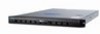
Acer Altos R520 User's Guide EN
Page 2
...this publication may be reproduced, stored in a retrieval system, or transmitted, in this manual or supplementary documents and publications. Acer Altos R520 Series User's Guide Changes may be made periodically to their respective companies. This company makes no representations or warranties, either... expressed or implied, with respect to notify any person of Acer Incorporated. Acer Altos R520 Model Name : Part Number: Purchase Date: Place of Purchase: Acer and the Acer logo are registered trademarks of merchantability or fitness for identification purposes only and...
Acer Altos R520 User's Guide EN
Page 9
ix Hardware diagnostic testing Verifying proper operation of key system lights Specific problems and corrective actions Error beep codes BIOS POST error beep codes ARMC/3 module error beep codes Diagnostic POST code LEDs Appendix A: Acer Altos R520 rack installation guide Setting up the system rack System rack installation Vertical mounting hole pattern Installing the system into the rack 131 131 132 139 139 141 142 149 151 153 154 155 Appendix B: RAID configuration Configuring integrated SAS RAID Configuring the integrated SAS SW RAID Configuring the onboard SATA RAID 163 165 167 169 174
Acer Altos R520 User's Guide EN
Page 12
The Acer Altos R520 is a 1U dual-core Intel Xeonbased server equipped with component identification. This chapter provides a brief overview of the system hardware, including illustrations with numerous high performance features designed to provide easy server set up, remote management, highly reliable shared storage, and handle more demanding database or high transaction applications.
Acer Altos R520 User's Guide EN
Page 13
... storage • Slim-line IDE optical drive • Supports either a SAS or SATA HDD interface 3 System features Listed below are the key features of the Acer Altos R520 server.
Acer Altos R520 User's Guide EN
Page 18
8 Front panel 1 System tour Item Component Item Component A Rack handles D Dual-purpose bay* B Slim-line optical drive bay E 2.5" hot-plug HDD bays C Mini control panel bay * The Acer Altos R520 dual-purpose bay supports either the standard control panel or two 2.5" hot-plug HDD drives.
Acer Altos R520 User's Guide EN
Page 27
... A USB 2.0 port B System identification indicator C System status indicator D Power/sleep indicator Item Component E Power/sleep button F NMI button G System ID button 17 Control panel The Acer Altos R520 server supports either the mini control panel, providing basic functionality, or the standard control panel, which adds additional server management features. Both control panels utilize...
Acer Altos R520 User's Guide EN
Page 41
...-free • Stable surface free from vibration • Well-ventilated and away from sources of heat • Secluded from the package: • Acer Altos R520 server system • Acer EasyBUILDTM • Acer Altos R520 accessory box If any of the above items are damaged or missing, contact your dealer immediately. Consider the following items from electromagnetic fields...
Acer Altos R520 User's Guide EN
Page 45
... Gently press the drive Stop/Eject button again to the EasyBUILD Installation guide. Follow all onscreen instructions. 35 Configuring the system OS The Acer Altos R520 server comes with the EasyBUILD DVD. Make sure that it is properly inserted before closing the disc tray. For more information, refer to... close the disc tray. 6 The Acer EasyBUILD sequence begins. To start using EasyBUILD, follow the steps below. 1 Locate the EasyBUILD DVD included in the system package. 2 With ...
Acer Altos R520 User's Guide EN
Page 77
... configuration are organized in to 2 dual ranked DDR2 FBDIMMs. The memory channels are supported by the server. DIMMD1 and DIMMD2 67 Upgrading the system memory Acer Altos R520 server supports eight DDR2 fully buffered DIMM slots with four FBDIMM memory channels. DIMMB1 and DIMMB2 • Branch 1 • Channel C -
Acer Altos R520 User's Guide EN
Page 160
This appendix shows you how to set up the Acer Altos R520 server in a rack mount configuration.
Acer Altos R520 User's Guide EN
Page 162
... supply circuit to the system to avoid any accidents. • Circuit overloading Appropriate consideration should be used when addressing concerns about circuit overload. 152 Appendix A: Acer Altos R520 rack installation guide • Elevated operating ambient temperature The maximum operating temperature of the equipment should not be compromised when installing the system in a rack...
Acer Altos R520 User's Guide EN
Page 163
The figure below shows the server in a rack-mount position. A tool-less rack rail and CMA (cable management arm) kit is available for installing system to a rack cabinet. 153 System rack installation The Acer Altos R520 server should be mounted into a rack.
Acer Altos R520 User's Guide EN
Page 164
... a manner shown in the figure below: The system occupies 1U in this guide is equivalent to the documentation that came with closer spacing. 154 Appendix A: Acer Altos R520 rack installation guide Vertical mounting hole pattern The four vertical rails of the rack. Note: The unit of the two holes with the system rack...
Acer Altos R520 User's Guide EN
Page 166
Align the screw holes of the server. Caution! To avoid personal injury, care should be taken when pressing the inner rail release latches and sliding the component into the rack. 2 Attach the inner rails to both sides of the inner rail to the server screws (A), then slide rails to the other mounting rail. 156 Appendix A: Acer Altos R520 rack installation guide (3) Do the same thing to the left until the rails lock into place with an audible click (B).
Acer Altos R520 User's Guide EN
Page 168
158 Appendix A: Acer Altos R520 rack installation guide (6) Fully extend the mounting rails on the rack.
Acer Altos R520 User's Guide EN
Page 170
As you to tie-wrap all cables to and from the system. The CMA allows you slide the system in the CMA (C). 160 Appendix A: Acer Altos R520 rack installation guide 5 Attach the CMA (cable management arm) to the rear of the right mounting rail (B1). (4) Insert the CMA arm connector into the ...