User Manual
Page 2
..., and purchase information. Model Number Serial Number Purchase Date Place of Purchase Acer and the Acer logo are used herein for identification purposes only and belong to the contents hereof and specifically disclaims the implied warranties of merchantability or fitness for a particular purpose. Copyright..., purchase date, and place of purchase information in new editions of this publication without the prior written permission of Acer Inc. Acer Altos G310 Mk2 series User's Guide 1st Issue: February 2005 Changes may be made periodically to the information in any form or by...
..., and purchase information. Model Number Serial Number Purchase Date Place of Purchase Acer and the Acer logo are used herein for identification purposes only and belong to the contents hereof and specifically disclaims the implied warranties of merchantability or fitness for a particular purpose. Copyright..., purchase date, and place of purchase information in new editions of this publication without the prior written permission of Acer Inc. Acer Altos G310 Mk2 series User's Guide 1st Issue: February 2005 Changes may be made periodically to the information in any form or by...

User Manual
Page 7
... compliance statement iv Important safety instructions v 1 System information 1 Product briefing 3 Processor 3 Memory subsystem 3 Storage 4 Graphics interface 4 Networking 4 I/O ports 4 Serial ATA ports 4 PCI I/O 4 Caring features 5 Product specification summary 7 2 System tour 9 System board 11 Mainboard layout 11 Jumper settings and CMOS clear 13 External and internal structure 14 Front bezel 14 Front panel...
... compliance statement iv Important safety instructions v 1 System information 1 Product briefing 3 Processor 3 Memory subsystem 3 Storage 4 Graphics interface 4 Networking 4 I/O ports 4 Serial ATA ports 4 PCI I/O 4 Caring features 5 Product specification summary 7 2 System tour 9 System board 11 Mainboard layout 11 Jumper settings and CMOS clear 13 External and internal structure 14 Front bezel 14 Front panel...

User Manual
Page 9
... installation 82 First steps checklist 82 Hardware diagnostic testing 83 Verifying proper operation of key system lights 84 Confirming loading of the operating system 84 Specific problems and corrective actions 84 Power light does not light 85 No characters appear on screen 86 Characters are distorted or incorrect 87 System cooling...
... installation 82 First steps checklist 82 Hardware diagnostic testing 83 Verifying proper operation of key system lights 84 Confirming loading of the operating system 84 Specific problems and corrective actions 84 Power light does not light 85 No characters appear on screen 86 Characters are distorted or incorrect 87 System cooling...

User Manual
Page 19
7 Product specification summary Highlighted below are the system's key features: • Single Intel® Pentium® 4 processor supporting Hyper-Threading technology and EM64T • 533/800 MHz ...
7 Product specification summary Highlighted below are the system's key features: • Single Intel® Pentium® 4 processor supporting Hyper-Threading technology and EM64T • 533/800 MHz ...
User Manual
Page 42
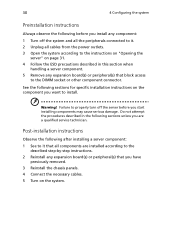
See the following sections for specific installation instructions on the component you are installed according to the described step-by-step instructions. 2 Reinstall any expansion board(s) or peripheral(s) that you have ...
See the following sections for specific installation instructions on the component you are installed according to the described step-by-step instructions. 2 Reinstall any expansion board(s) or peripheral(s) that you have ...

User Manual
Page 43
... system board. Before opening the server Before opening the server, observe the following sections for instructions. 31 Opening the server Caution! Note: Because of the G310 Mk2 design specification, only the side panel needs to be removed to the following precautions: 1 Turn off your system and all cables from the power outlets. 3 Place...
... system board. Before opening the server Before opening the server, observe the following sections for instructions. 31 Opening the server Caution! Note: Because of the G310 Mk2 design specification, only the side panel needs to be removed to the following precautions: 1 Turn off your system and all cables from the power outlets. 3 Place...
User Manual
Page 94
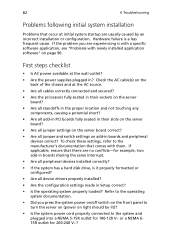
... should be lit)? • Is the system power cord properly connected to the manufacturer's documentation that occur at initial system startup are experiencing is with a specific software application, see "Problems with them. First steps checklist • Is AC power available at the AC source. • Are all cables correctly connected and...
... should be lit)? • Is the system power cord properly connected to the manufacturer's documentation that occur at initial system startup are experiencing is with a specific software application, see "Problems with them. First steps checklist • Is AC power available at the AC source. • Are all cables correctly connected and...

User Manual
Page 96
The prompt varies according to correct the problem. Check for these specific problems: • Power light does not light. • No characters appear on screen. • Characters on the screen appear distorted or incorrect. • System cooling ... 88. • If system LEDs are problems with application software. • The bootable CD-ROM is checked, its activity light should turn on page 86. Specific problems and corrective actions This section provides possible solutions for the following: • Does the floppy disk drive activity light turn on the screen. If...
The prompt varies according to correct the problem. Check for these specific problems: • Power light does not light. • No characters appear on screen. • Characters on the screen appear distorted or incorrect. • System cooling ... 88. • If system LEDs are problems with application software. • The bootable CD-ROM is checked, its activity light should turn on page 86. Specific problems and corrective actions This section provides possible solutions for the following: • Does the floppy disk drive activity light turn on the screen. If...

User Manual
Page 113
... loads • automatic detection and configuration of disk drives • ability to handle configuration changes • support for Interrupt 13 and Enhanced Disk Drive Specification • support for RAID levels 0, and 1 • special handling of error log and rebuilding • ROM option size of 64 Kbyte •... On Error during bootup • support to disable/enable BIOS state 101 SATA ports The Embedded Server RAID Technology can support up to boot. Specification v1.01, January 11, 1996) • co-existence with SCSI and CD devices • 48-bit LBA support for read, write,...
... loads • automatic detection and configuration of disk drives • ability to handle configuration changes • support for Interrupt 13 and Enhanced Disk Drive Specification • support for RAID levels 0, and 1 • special handling of error log and rebuilding • ROM option size of 64 Kbyte •... On Error during bootup • support to disable/enable BIOS state 101 SATA ports The Embedded Server RAID Technology can support up to boot. Specification v1.01, January 11, 1996) • co-existence with SCSI and CD devices • 48-bit LBA support for read, write,...

User Manual
Page 114
102 Appendix A: Embedded SATA RAID Technology for the Altos G310 Mk2 Driver Features The driver features include • special interface for configuration information, configuration changes, and manageability • optimized disk access • support for... • support for online mirror rebuilding • support for check consistency for mirrored disks • bootable RAID 0, and 1 • customized messages specific for OEM (original equipment manufacturer) • soft bad block management Manageability/Disk console The features you can use to manage the logical and physical disks...
102 Appendix A: Embedded SATA RAID Technology for the Altos G310 Mk2 Driver Features The driver features include • special interface for configuration information, configuration changes, and manageability • optimized disk access • support for... • support for online mirror rebuilding • support for check consistency for mirrored disks • bootable RAID 0, and 1 • customized messages specific for OEM (original equipment manufacturer) • soft bad block management Manageability/Disk console The features you can use to manage the logical and physical disks...

User Manual
Page 118
... all these drives as if they have the capacity of the smallest drive. If you use drives with different capacities in a specific array determines the possible RAID levels that you press . RAID 0 requires one to configure arrays and logical drives. 106 Appendix ...and arrays. LSI Logic recommends using drives with the array. Configuring arrays and logical drives This section provides detailed instructions for the Altos G310 Mk2 6 Initialize the new logical drive(s). The main menu for using each configuration method. Selecting a configuration method "Configuring physical arrays ...
... all these drives as if they have the capacity of the smallest drive. If you use drives with different capacities in a specific array determines the possible RAID levels that you press . RAID 0 requires one to configure arrays and logical drives. 106 Appendix ...and arrays. LSI Logic recommends using drives with the array. Configuring arrays and logical drives This section provides detailed instructions for the Altos G310 Mk2 6 Initialize the new logical drive(s). The main menu for using each configuration method. Selecting a configuration method "Configuring physical arrays ...

User Manual
Page 119
... the stripe size to 4, 8, 16, 32, 64, or 128 Kbytes. RAID 0 requires one or two physical drives. The Configuration Menu screen displays, as shown in a specific array determines the RAID levels that can be implemented with a single logical drive. You can change their configuration. A larger stripe size produces higher read requests...
... the stripe size to 4, 8, 16, 32, 64, or 128 Kbytes. RAID 0 requires one or two physical drives. The Configuration Menu screen displays, as shown in a specific array determines the RAID levels that can be implemented with a single logical drive. You can change their configuration. A larger stripe size produces higher read requests...

User Manual
Page 122
... CU Management Menu. By default, the logical drive size associates the available space in the array by pressing the arrow keys to select specific physical drives. 3 Press the spacebar to associate the selected physical drive with disk drive 3. 4 Press after you save the new array...appears. 7 Set the logical drive size by moving the cursor to Size and pressing . 110 Appendix A: Embedded SATA RAID Technology for the Altos G310 Mk2 Caution: The New Configuration option erases the existing configuration data when you finish creating the current array. 5 Press to configure logical drives. 6...
... CU Management Menu. By default, the logical drive size associates the available space in the array by pressing the arrow keys to select specific physical drives. 3 Press the spacebar to associate the selected physical drive with disk drive 3. 4 Press after you save the new array...appears. 7 Set the logical drive size by moving the cursor to Size and pressing . 110 Appendix A: Embedded SATA RAID Technology for the Altos G310 Mk2 Caution: The New Configuration option erases the existing configuration data when you finish creating the current array. 5 Press to configure logical drives. 6...

User Manual
Page 133
... the Management Menu on the system power. An array selection window displays the devices connected to the current controller. 4 Press the arrow keys to choose specific physical drives and press spacebar to enter the MegaRAID Configuration Utility. The indicator for 2 disk drives is RAID1. Create RAID1 volume 1 After the server has...
... the Management Menu on the system power. An array selection window displays the devices connected to the current controller. 4 Press the arrow keys to choose specific physical drives and press spacebar to enter the MegaRAID Configuration Utility. The indicator for 2 disk drives is RAID1. Create RAID1 volume 1 After the server has...

User Manual
Page 134
Initialize RAID volume 1 Press to return to the Management Menu. 2 Select Initialize from Configuration menu. 2 Press arrow keys to choose specific physical drives and press to set the drive as Hot Spare disk. Now you can start the initialization process. 5 When initialization is complete, press any ...
Initialize RAID volume 1 Press to return to the Management Menu. 2 Select Initialize from Configuration menu. 2 Press arrow keys to choose specific physical drives and press to set the drive as Hot Spare disk. Now you can start the initialization process. 5 When initialization is complete, press any ...

User Manual
Page 136
124 P package contents 23 Post-installation instructions 30 Preinstallation instructions 30 Preinstallation requirements 23 Processor 3 Product 3 Product specifications 7 Q quick configuration steps Configuration Utility 105 R RAID 0 number of drives 106 RAID 1 number of drives 106 RAID 10 number of drives 106 RAID levels assigning ...
124 P package contents 23 Post-installation instructions 30 Preinstallation instructions 30 Preinstallation requirements 23 Processor 3 Product 3 Product specifications 7 Q quick configuration steps Configuration Utility 105 R RAID 0 number of drives 106 RAID 1 number of drives 106 RAID 10 number of drives 106 RAID levels assigning ...