
Acer Aspire One 751H Netbook Series User Guide
Page 5
...contact an authorized reseller or service provider. Product servicing Do not attempt to service this product yourself, as opening or removing covers may cause the battery to normal condition. Power cords for use in other risks. Do not put, store or leave your product in or near a heat source, ... microwave oven or in a pressurized container, and do not expose it in damage and will often require extensive work by a qualified technician to restore the product to leak acid, become hot, explode or ignite and cause injury and/or damage. The power cord included with the performance of ...
...contact an authorized reseller or service provider. Product servicing Do not attempt to service this product yourself, as opening or removing covers may cause the battery to normal condition. Power cords for use in other risks. Do not put, store or leave your product in or near a heat source, ... microwave oven or in a pressurized container, and do not expose it in damage and will often require extensive work by a qualified technician to restore the product to leak acid, become hot, explode or ignite and cause injury and/or damage. The power cord included with the performance of ...
Acer Aspire One 751H Netbook Series User Guide
Page 19
Acer eRecovery Management provides you to restore or reinstall applications and drivers. Acer eRecovery Management backs up and recovers data flexibly, reliably and completely. Acer eRecovery Management Acer eRecovery Management allows you with: • Create Factory Default Disc • Create Drivers and Applications Disc English 1 Acer eRecovery Management Note: The following content is for general reference only. Actual product specifications may vary.
Acer eRecovery Management provides you to restore or reinstall applications and drivers. Acer eRecovery Management backs up and recovers data flexibly, reliably and completely. Acer eRecovery Management Acer eRecovery Management allows you with: • Create Factory Default Disc • Create Drivers and Applications Disc English 1 Acer eRecovery Management Note: The following content is for general reference only. Actual product specifications may vary.
Acer Aspire One 751H Netbook Series User Guide
Page 20
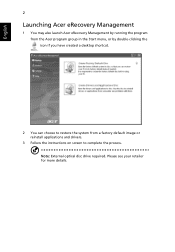
English 2 Launching Acer eRecovery Management 1 You may also launch Acer eRecovery Management by running the program from the Acer program group in the Start menu, or by double-clicking the icon if you have created a desktop shortcut. 2 You can choose to restore the system from a factory default image or reinstall applications and drivers. 3 Follow the instructions on screen to complete the process. Note: External optical disc drive required. Please see your retailer for more details.
English 2 Launching Acer eRecovery Management 1 You may also launch Acer eRecovery Management by running the program from the Acer program group in the Start menu, or by double-clicking the icon if you have created a desktop shortcut. 2 You can choose to restore the system from a factory default image or reinstall applications and drivers. 3 Follow the instructions on screen to complete the process. Note: External optical disc drive required. Please see your retailer for more details.
Acer Aspire One 751H Netbook Series User Guide
Page 29
...Recovery is only available in Main is installed when you first turn off. This recovery process helps you restore the C: drive with a hard drive. The printer does not work. I want to restore my computer to the computer's parallel port or a USB port and the corresponding port on . •...sure the D2D Recovery setting in notebook models fitted with the original software content that the printer cable is important to the line- The system will be loose. Before performing a restore operation, please check the BIOS settings. 1 Check to see if Acer disk-to a USB port on the system ...
...Recovery is only available in Main is installed when you first turn off. This recovery process helps you restore the C: drive with a hard drive. The printer does not work. I want to restore my computer to the computer's parallel port or a USB port and the corresponding port on . •...sure the D2D Recovery setting in notebook models fitted with the original software content that the printer cable is important to the line- The system will be loose. Before performing a restore operation, please check the BIOS settings. 1 Check to see if Acer disk-to a USB port on the system ...
Service Guide
Page 31
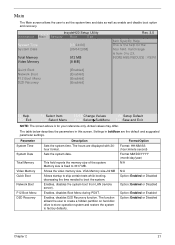
... the system boot from 0 to factory defaults. The function allows the user to create a hidden partition on hard disc drive to store operation system and restore the system to 23. Enables, disables D2D Recovery function.
... the system boot from 0 to factory defaults. The function allows the user to create a hidden partition on hard disc drive to store operation system and restore the system to 23. Enables, disables D2D Recovery function.
Service Guide
Page 37
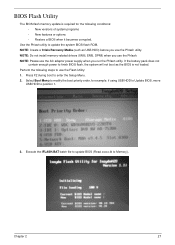
... IFLASH.BAT batch file to update BIOS (Read xxxxx.fd to update the system BIOS flash ROM. Use the Phlash utility to Memory). If the battery pack does not contain enough power to finish BIOS flash, the system will not boot as USB HDD) before you use the Phlash utility. Press... BIOS, move USB HDD to enter the Setup Menu. 2. Perform the following conditions: • New versions of system programs • New features or options • Restore a BIOS when it becomes corrupted. Chapter 2 27 BIOS Flash Utility The BIOS flash memory update is not loaded.
... IFLASH.BAT batch file to update BIOS (Read xxxxx.fd to update the system BIOS flash ROM. Use the Phlash utility to Memory). If the battery pack does not contain enough power to finish BIOS flash, the system will not boot as USB HDD) before you use the Phlash utility. Press... BIOS, move USB HDD to enter the Setup Menu. 2. Perform the following conditions: • New versions of system programs • New features or options • Restore a BIOS when it becomes corrupted. Chapter 2 27 BIOS Flash Utility The BIOS flash memory update is not loaded.
Service Guide
Page 96
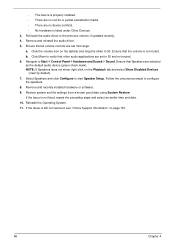
... Show Disabled Devices (clear by default). 7. Click Mixer to 50 and not muted. 6. Remove and recently installed hardware or software. 9. Restore system and file settings from a known good date using System Restore. Ensure that other audio applications are set to verify that all volume controls are set mid range: a. Navigate to start...
... Show Disabled Devices (clear by default). 7. Click Mixer to 50 and not muted. 6. Remove and recently installed hardware or software. 9. Restore system and file settings from a known good date using System Restore. Ensure that other audio applications are set to verify that all volume controls are set mid range: a. Navigate to start...
Service Guide
Page 98
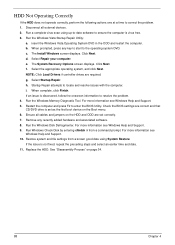
...Operating Correctly If the HDD does not operate correctly, perform the following actions one at a time to the operating system DVD. When prompted, press any ...the computer. c. f. Restart the computer and press F2 to locate and resolve issues with the computer. Restore system and file settings from a command prompt. The Install Windows screen displays. h. The System Recovery Options...and click Next. Check the BIOS settings are required. Replace the HDD. Run a complete virus scan using System Restore. d. g. For more information see Windows Help and Support. 9.
...Operating Correctly If the HDD does not operate correctly, perform the following actions one at a time to the operating system DVD. When prompted, press any ...the computer. c. f. Restart the computer and press F2 to locate and resolve issues with the computer. Restore system and file settings from a command prompt. The Install Windows screen displays. h. The System Recovery Options...and click Next. Check the BIOS settings are required. Replace the HDD. Run a complete virus scan using System Restore. d. g. For more information see Windows Help and Support. 9.
Service Guide
Page 100
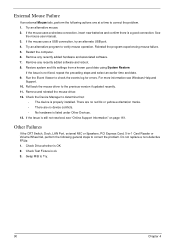
If the mouse uses a wireless connection, insert new batteries and confirm there is properly installed. Restart the computer. 6....the following actions one at a time to check the events log for errors. Check Test Fixture is listed under Other Devices. 13. Restore system and file settings from a known good date using System Restore. If the issue... uses a USB connection, try an alternate USB port. 4. Reinstall the program experiencing mouse failure. 5. Do not replace a non-defective FRUs: 1. External Mouse Failure If an external Mouse fails, perform the following general steps to Try...
If the mouse uses a wireless connection, insert new batteries and confirm there is properly installed. Restart the computer. 6....the following actions one at a time to check the events log for errors. Check Test Fixture is listed under Other Devices. 13. Restore system and file settings from a known good date using System Restore. If the issue... uses a USB connection, try an alternate USB port. 4. Reinstall the program experiencing mouse failure. 5. Do not replace a non-defective FRUs: 1. External Mouse Failure If an external Mouse fails, perform the following general steps to Try...
Service Guide
Page 103
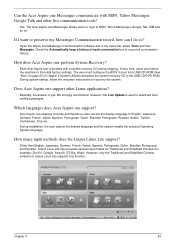
How does Acer Aspire one support? At any time, users can restore the machine to boot from USB CD-ROM (See "Boot" on . The user must configure the BIOS to the initial factory settings. During system startup, ...follow the onscreen instructions to English, Japanese, German, French, Italian, Spanish, Portuguese, Dutch, Brazilian Portuguese, Russian, Arabic, Turkish, Vietnamese, Thai etc. Does Acer Aspire one support other...
How does Acer Aspire one support? At any time, users can restore the machine to boot from USB CD-ROM (See "Boot" on . The user must configure the BIOS to the initial factory settings. During system startup, ...follow the onscreen instructions to English, Japanese, German, French, Italian, Spanish, Portuguese, Dutch, Brazilian Portuguese, Russian, Arabic, Turkish, Vietnamese, Thai etc. Does Acer Aspire one support other...
Service Guide
Page 124
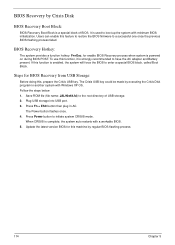
... directory of BIOS. Save ROM file (file name: JAL90x64.fd) to have the AC adapter and Battery present. Press Fn + ESC button then plug in another system with minimum BIOS initialization. Follow the steps... function is used to enter a special BIOS block, called Boot Block. Press Power button to a successful one once the previous BIOS flashing process failed. To use this , prepare the Crisis USB key. Plug USB storage...114 Chapter 5 Users can enable this feature to restore the BIOS firmware to initiate system CRISIS mode. When CRISIS is powered on during BIOS POST.
... directory of BIOS. Save ROM file (file name: JAL90x64.fd) to have the AC adapter and Battery present. Press Fn + ESC button then plug in another system with minimum BIOS initialization. Follow the steps... function is used to enter a special BIOS block, called Boot Block. Press Power button to a successful one once the previous BIOS flashing process failed. To use this , prepare the Crisis USB key. Plug USB storage...114 Chapter 5 Users can enable this feature to restore the BIOS firmware to initiate system CRISIS mode. When CRISIS is powered on during BIOS POST.