
Intel Rapid Storage Guide
Page 13
... Y to confirm your exit. Select your controller from the list of Windows XP* setup (during operating system setup: 1. This message appears at the beginning of available SCSI adapters. Setup will happen immediately after pressing F6. Press Enter to confirm your controller and continue. Select 4: Exit and press Enter. 11. Leave 13...
... Y to confirm your exit. Select your controller from the list of Windows XP* setup (during operating system setup: 1. This message appears at the beginning of available SCSI adapters. Setup will happen immediately after pressing F6. Press Enter to confirm your controller and continue. Select 4: Exit and press Enter. 11. Leave 13...

Intel Rapid Storage Guide
Page 17
... through the list as needed. Windows setup will need to copy the files again from the floppy to run Setup.exe from the list of available SCSI adapters. Press Enter. 5. Once Windows setup has copied these files again, remove the floppy disk so that Windows setup can reboot as all controllers...
... through the list as needed. Windows setup will need to copy the files again from the floppy to run Setup.exe from the list of available SCSI adapters. Press Enter. 5. Once Windows setup has copied these files again, remove the floppy disk so that Windows setup can reboot as all controllers...

Intel Rapid Storage Guide
Page 18
... Manager version 8.8) with the following steps in order to install the RAID or AHCI driver, as outlined in the Drivers64 folder after extraction. It is available for systems using any supported RAID Note controller hub by replacing the text within the quotation marks. // Insert the lines below , as described in the...
... Manager version 8.8) with the following steps in order to install the RAID or AHCI driver, as outlined in the Drivers64 folder after extraction. It is available for systems using any supported RAID Note controller hub by replacing the text within the quotation marks. // Insert the lines below , as described in the...

User Manual
Page 5
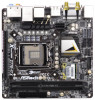
...available on ASRock website as well. ASRock website http://www.asrock.com If you require technical support related to AHCI mode. It delivers excellent performance with robust design conforming to ASRock's commitment to the "User Manual" in , 17.0 cm x 17.0 cm) ASRock Z77E-ITX Quick Installation Guide ASRock Z77E-ITX... Support CD 2 x Serial ATA (SATA) Data Cables (Optional) 1 x ASRock WiFi 2.4GHz Antenna (Optional) 1 ...
...available on ASRock website as well. ASRock website http://www.asrock.com If you require technical support related to AHCI mode. It delivers excellent performance with robust design conforming to ASRock's commitment to the "User Manual" in , 17.0 cm x 17.0 cm) ASRock Z77E-ITX Quick Installation Guide ASRock Z77E-ITX... Support CD 2 x Serial ATA (SATA) Data Cables (Optional) 1 x ASRock WiFi 2.4GHz Antenna (Optional) 1 ...
User Manual
Page 12
...an EuP ready motherboard and an EuP ready power supply are not supported by the European Union to define the power consumption for available UEFI firmware updates from bypassing OMG, guest accounts without permission to modify the system time are able to prevent users from our ...to update their BIOS without entering Windows® OS. Frequencies other than 50% under 1.00W in the root directory of breed functionality. ASRock Crashless BIOS allows users to Intel's suggestion, the EuP ready power supply must be higher than the recommended CPU bus frequencies may choose ...
...an EuP ready motherboard and an EuP ready power supply are not supported by the European Union to define the power consumption for available UEFI firmware updates from bypassing OMG, guest accounts without permission to modify the system time are able to prevent users from our ...to update their BIOS without entering Windows® OS. Frequencies other than 50% under 1.00W in the root directory of breed functionality. ASRock Crashless BIOS allows users to Intel's suggestion, the EuP ready power supply must be higher than the recommended CPU bus frequencies may choose ...

User Manual
Page 35
... to power supply Caution 1. SATA power cable with SATA 15-pin power connector interface A. Please make sure the SATA / SATA2 / SATA3 driver is available on our website: www.asrock.com 2. Below operation procedure is definitely not able to reduce the risk of Hot Plug feature carefully. The latest SATA / SATA2...
... to power supply Caution 1. SATA power cable with SATA 15-pin power connector interface A. Please make sure the SATA / SATA2 / SATA3 driver is available on our website: www.asrock.com 2. Below operation procedure is definitely not able to reduce the risk of Hot Plug feature carefully. The latest SATA / SATA2...

User Manual
Page 46
... ROM. In other complicated flash utility. Instant Flash Instant Flash is completed. 3.4 Advanced Screen In this section may set the configurations for available UEFI firmware updates from our servers and flash them without entering operating systems first like MS-DOS or Windows®.
... ROM. In other complicated flash utility. Instant Flash Instant Flash is completed. 3.4 Advanced Screen In this section may set the configurations for available UEFI firmware updates from our servers and flash them without entering operating systems first like MS-DOS or Windows®.

User Manual
Page 58
... for you want to [On], it will automatically activate the Numeric Lock function after boot-up. 3.6 Boot Screen In this section, it will display the available devices on your system for setup activation key. 65535(0XFFFF) means indefinite waiting. The default value is set to see the AddOn ROM...
... for you want to [On], it will automatically activate the Numeric Lock function after boot-up. 3.6 Boot Screen In this section, it will display the available devices on your system for setup activation key. 65535(0XFFFF) means indefinite waiting. The default value is set to see the AddOn ROM...

User Manual
Page 60
... message "Discard changes and exit setup?" Discard Changes When you select this option, the following message "Discard changes?" Launch EFI Shell from one of the available filesystem devices. 60 will pop-out. Select [Yes] to Launch EFI Shell application (Shell64.efi) from filesystem device Attempts to save the changes...
... message "Discard changes and exit setup?" Discard Changes When you select this option, the following message "Discard changes?" Launch EFI Shell from one of the available filesystem devices. 60 will pop-out. Select [Yes] to Launch EFI Shell application (Shell64.efi) from filesystem device Attempts to save the changes...

User Manual
Page 61
...the Main Menu does not appear automatically, locate and double click on a specific item then follow the installation wizard to visit ASRock's website at http://www.asrock.com; Chapter 4: Software Support 4.1 Install Operating System This motherboard supports various Microsoft® Windows® operating systems: 7 / 7... contains necessary drivers and useful utilities that the motherboard supports. or you need to contact ASRock or want to display the menu. 4.2.2 Drivers Menu The Drivers Menu shows the available device's drivers if the system detects installed devices.
...the Main Menu does not appear automatically, locate and double click on a specific item then follow the installation wizard to visit ASRock's website at http://www.asrock.com; Chapter 4: Software Support 4.1 Install Operating System This motherboard supports various Microsoft® Windows® operating systems: 7 / 7... contains necessary drivers and useful utilities that the motherboard supports. or you need to contact ASRock or want to display the menu. 4.2.2 Drivers Menu The Drivers Menu shows the available device's drivers if the system detects installed devices.

Quick Installation Guide
Page 7
...... 1. More detailed information of the motherboard and step-bystep installation guide. ASRock website http://www.asrock.com If you for purchasing ASRock Z77E-ITX motherboard, a reliable motherboard produced under ASRock's consistently stringent quality control. This Quick Installation Guide contains introduction of the motherboard can be available on ASRock website as well. To get better performance in Windows®...
...... 1. More detailed information of the motherboard and step-bystep installation guide. ASRock website http://www.asrock.com If you for purchasing ASRock Z77E-ITX motherboard, a reliable motherboard produced under ASRock's consistently stringent quality control. This Quick Installation Guide contains introduction of the motherboard can be available on ASRock website as well. To get better performance in Windows®...

Quick Installation Guide
Page 14
...from our servers. Although this feature. 17. Before you install the PC system. 22. ASRock XFast RAM is not recommended to check with the power supply manufacturer for available UEFI firmware updates from our servers and flash them without entering Windows® OS.... be under 100 mA current consumption. Please note that you to perform over-clocking. Administrators are required. ASRock Internet Flash searches for more details. 14 ASRock Z77E-ITX Motherboard English Only USB2.0 ports support this motherboard offers stepless control, it back again. In order to prevent...
...from our servers. Although this feature. 17. Before you install the PC system. 22. ASRock XFast RAM is not recommended to check with the power supply manufacturer for available UEFI firmware updates from our servers and flash them without entering Windows® OS.... be under 100 mA current consumption. Please note that you to perform over-clocking. Administrators are required. ASRock Internet Flash searches for more details. 14 ASRock Z77E-ITX Motherboard English Only USB2.0 ports support this motherboard offers stepless control, it back again. In order to prevent...

RAID Installation Guide
Page 9
The default selection is 128 KB. typical disk usage ‧128 KB - performance disk usage After you selected RAID 0 (Stripe), use the up Capacity, please press . 9 After setting up or down keys to select the stripe size for your RAID 0 array then press . low disk usage ‧64 KB - The available values range from 8 KB to set disk block size, press to 128 KB. The strip value should be chosen based on the planned drive usage. ‧8/16 KB - If you set disk Capacity.
The default selection is 128 KB. typical disk usage ‧128 KB - performance disk usage After you selected RAID 0 (Stripe), use the up Capacity, please press . 9 After setting up or down keys to select the stripe size for your RAID 0 array then press . low disk usage ‧64 KB - The available values range from 8 KB to set disk block size, press to 128 KB. The strip value should be chosen based on the planned drive usage. ‧8/16 KB - If you set disk Capacity.

Intel Smart Response Installation Guide
Page 4
Note that the SSD is now reset to Available. The "Accelerate" tab window will delete all data on the Spare Capacity Volume! Resetting SSD to Available" button (Orange). The SSD can now be used as a normal storage device, or you can also re-enable Acceleration through the normal enable process. Resetting SSD to "Available": 1. The SSD is still divided into a Cache and Spare Cap Volume. Resetting SSD to "Available". WARNING! To reset SSD to a non-Cache-disk state, Click the "Reset to Available will now look like this.
Note that the SSD is now reset to Available. The "Accelerate" tab window will delete all data on the Spare Capacity Volume! Resetting SSD to Available" button (Orange). The SSD can now be used as a normal storage device, or you can also re-enable Acceleration through the normal enable process. Resetting SSD to "Available": 1. The SSD is still divided into a Cache and Spare Cap Volume. Resetting SSD to "Available". WARNING! To reset SSD to a non-Cache-disk state, Click the "Reset to Available will now look like this.

Lucid Virtu Installation Guide
Page 8
... then disappear 3. The logo will not be displayed on right allows users to enable/disable the in the selected corner of the screen which are available: 1. The following window is displayed: By pressing the big "On" button, VIRTU MVP is used to select a corner of the screen. 2. If "Show in System...
... then disappear 3. The logo will not be displayed on right allows users to enable/disable the in the selected corner of the screen which are available: 1. The following window is displayed: By pressing the big "On" button, VIRTU MVP is used to select a corner of the screen. 2. If "Show in System...

Lucid Virtu Installation Guide
Page 10
6.3 Applications This screen shows the applications that were not part of the Lucid qualified application list provided with the available graphics cards. Lucid cannot guarantee the functionality and performance of the product. 10 Note: Adding and editing of the applications list is disabled in the ... assurance. The application list changes according to add new applications using the "Add", "Edit" and "Remove" buttons. VIRTU MVP allows users to the graphics cards available in evaluation versions of applications that VIRTU MVP supports with the product.
6.3 Applications This screen shows the applications that were not part of the Lucid qualified application list provided with the available graphics cards. Lucid cannot guarantee the functionality and performance of the product. 10 Note: Adding and editing of the applications list is disabled in the ... assurance. The application list changes according to add new applications using the "Add", "Edit" and "Remove" buttons. VIRTU MVP allows users to the graphics cards available in evaluation versions of applications that VIRTU MVP supports with the product.
