

Intel Rapid Storage Guide
Page 1
Starting with RAID 1 can reduce the power consumption of the chipset and Serial ATA (SATA) hard drive. 1 Valuable digital memories are protected against data loss in a RAID 0 configuration, data can be accomplished easily with an external drive. By seamlessly storing ...
Starting with RAID 1 can reduce the power consumption of the chipset and Serial ATA (SATA) hard drive. 1 Valuable digital memories are protected against data loss in a RAID 0 configuration, data can be accomplished easily with an external drive. By seamlessly storing ...

Intel Rapid Storage Guide
Page 12
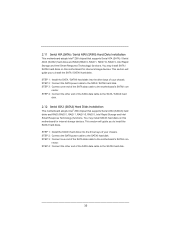
... enable RAID in the system BIOS, a RAID volume must be created, and the F6 installation method must be enabled in the system BIOS. 1. Switch the SATA Operation Mode option to select the physical disks. 6. Press Enter to RAID. 5. How to install an operating system onto a RAID volume (F6 install method) In...
... enable RAID in the system BIOS, a RAID volume must be created, and the F6 installation method must be enabled in the system BIOS. 1. Switch the SATA Operation Mode option to select the physical disks. 6. Press Enter to RAID. 5. How to install an operating system onto a RAID volume (F6 install method) In...
Intel Rapid Storage Guide
Page 15
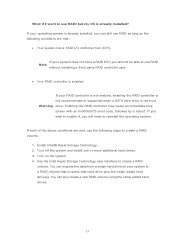
... has a RAID I want to create a RAID volume. Turn on your RAID controller is not enabled, enabling the RAID controller is not recommended or supported when a SATA hard drive is enabled.
... has a RAID I want to create a RAID volume. Turn on your RAID controller is not enabled, enabling the RAID controller is not recommended or supported when a SATA hard drive is enabled.

Intel Rapid Storage Guide
Page 18
... hub by replacing the text within the quotation marks. // Insert the lines below , as applicable, into the UNATTEND.TXT file [MassStorageDrivers] "Intel(R) 82801R/DO/DH SATA RAID Controller" = OEM 18
... hub by replacing the text within the quotation marks. // Insert the lines below , as applicable, into the UNATTEND.TXT file [MassStorageDrivers] "Intel(R) 82801R/DO/DH SATA RAID Controller" = OEM 18

Intel Rapid Storage Guide
Page 19
Place IAAHCI.CAT, IAAHCI.INF, IASTOR.CAT, IASTOR.INF, IASTOR.SYS, and TXTSETUP.OEM into the UNATTEND.TXT file [MassStorageDrivers] "Intel(R) 82801R/DO/DH SATA AHCI Controller" = OEM [OEMBootFiles] iaAhci.inf iaStor.sys iaAhci.cat Txtsetup.oem 3. [OEMBootFiles] iaStor.inf iaStor.sys iaStor.cat Txtsetup.oem Systems configured for AHCI: ...
Place IAAHCI.CAT, IAAHCI.INF, IASTOR.CAT, IASTOR.INF, IASTOR.SYS, and TXTSETUP.OEM into the UNATTEND.TXT file [MassStorageDrivers] "Intel(R) 82801R/DO/DH SATA AHCI Controller" = OEM [OEMBootFiles] iaAhci.inf iaStor.sys iaAhci.cat Txtsetup.oem 3. [OEMBootFiles] iaStor.inf iaStor.sys iaStor.cat Txtsetup.oem Systems configured for AHCI: ...

Intel Smart Response Installation Guide
Page 1
You MUST have both the HDD you just need to set the UEFI option "SATA Mode" to a RAID mode system, then install all performance testing, chose "Maximized" mode. 7. Once open RST GUI from either Start Menu or by step instructions ... Icon tray, lower right-hand corner of the screen. 4. For the new version RST driver, please check our website for the latest information: http://www.asrock.com * Before you use Enhanced or Maximized Mode. 6. When pop-up menu appears, chose which SSD you wish to use as the Cache device, which...
You MUST have both the HDD you just need to set the UEFI option "SATA Mode" to a RAID mode system, then install all performance testing, chose "Maximized" mode. 7. Once open RST GUI from either Start Menu or by step instructions ... Icon tray, lower right-hand corner of the screen. 4. For the new version RST driver, please check our website for the latest information: http://www.asrock.com * Before you use Enhanced or Maximized Mode. 6. When pop-up menu appears, chose which SSD you wish to use as the Cache device, which...
User Manual
Page 3
...Expansion Slots (PCI and PCI Express Slots 22 2.7 Dual Monitor and Surround Display Features 23 2.8 ASRock Smart Remote Installation Guide 26 2.9 Jumpers Setup 27 2.10 Onboard Headers and Connectors 28 2.11 Serial ATA (SATA) / Serial ATAII (SATAII) Hard Disks Installation 33 2.12 Serial ATA3 (SATA3) Hard Disks ...Installation 33 2.13 Hot Plug and Hot Swap Functions for SATA / SATAII HDDs 34 2.14 Hot Plug and Hot Swap Functions for SATA3 HDDs .... 34 2.15 SATA / SATAII / SATA3 HDD Hot Plug Feature and Operation Guide 35 2.16 Driver Installation Guide...
...Expansion Slots (PCI and PCI Express Slots 22 2.7 Dual Monitor and Surround Display Features 23 2.8 ASRock Smart Remote Installation Guide 26 2.9 Jumpers Setup 27 2.10 Onboard Headers and Connectors 28 2.11 Serial ATA (SATA) / Serial ATAII (SATAII) Hard Disks Installation 33 2.12 Serial ATA3 (SATA3) Hard Disks ...Installation 33 2.13 Hot Plug and Hot Swap Functions for SATA / SATAII HDDs 34 2.14 Hot Plug and Hot Swap Functions for SATA3 HDDs .... 34 2.15 SATA / SATAII / SATA3 HDD Hot Plug Feature and Operation Guide 35 2.16 Driver Installation Guide...
User Manual
Page 5
... (ATX Form Factor: 12.0-in x 7.5-in Storage Con guration to set the BIOS option in , 30.5 cm x 19.1 cm) ASRock Z68 Pro3 Gen3 Quick Installation Guide ASRock Z68 Pro3 Gen3 Support CD 2 x Serial ATA (SATA) Data Cables (Optional) 1 x I/O Panel Shield ASRock Reminds You... For the BIOS setup, please refer to quality and endurance. Chapter 1: Introduction Thank you are using. It...
... (ATX Form Factor: 12.0-in x 7.5-in Storage Con guration to set the BIOS option in , 30.5 cm x 19.1 cm) ASRock Z68 Pro3 Gen3 Quick Installation Guide ASRock Z68 Pro3 Gen3 Support CD 2 x Serial ATA (SATA) Data Cables (Optional) 1 x I/O Panel Shield ASRock Reminds You... For the BIOS setup, please refer to quality and endurance. Chapter 1: Introduction Thank you are using. It...

User Manual
Page 28
...(see p.13 No. 21) (9-pin USB10_11) (see p.13, No. 7) SATA2_5 SATA2_3 SATA2_4 SATA2_2 These four Serial ATAII (SATAII) connectors support SATA data cables for internal storage devices. Besides four default USB 2.0 ports on the I/O panel, there are NOT jumpers. Placing jumper caps over these ...Each USB 2.0 header can be connected to 3.0 Gb/s data transfer rate. Either end of the motherboard! The current SATA3 interface allows up to the SATA / SATAII / SATA3 hard disk or the SATAII / SATA3 connector on this motherboard. Serial ATAII Connectors (SATA2_2: see p.13, No. 12) (...
...(see p.13 No. 21) (9-pin USB10_11) (see p.13, No. 7) SATA2_5 SATA2_3 SATA2_4 SATA2_2 These four Serial ATAII (SATAII) connectors support SATA data cables for internal storage devices. Besides four default USB 2.0 ports on the I/O panel, there are NOT jumpers. Placing jumper caps over these ...Each USB 2.0 header can be connected to 3.0 Gb/s data transfer rate. Either end of the motherboard! The current SATA3 interface allows up to the SATA / SATAII / SATA3 hard disk or the SATAII / SATA3 connector on this motherboard. Serial ATAII Connectors (SATA2_2: see p.13, No. 12) (...
User Manual
Page 33
... the motherboard's SATA3 con- STEP 3: Connect one end of the SATA data cable to install the SATA3 hard disks. nector. 2.11 Serial ATA (SATA) / Serial ATAII (SATAII) Hard Disks Installation This motherboard adopts Intel® Z68 chipset that supports Serial ATA3 (SATA3) hard disks and RAID (RAID...your chassis. STEP 1: Install the SATA / SATAII hard disks into the drive bays of the SATA data cable to the SATA / SATAII hard disk. 2.12 Serial ATA3 (SATA3) Hard Disks Installation This motherboard adopts Intel® Z68 chipset that supports Serial ATA (SATA) / Serial ATAII (SATAII) hard ...
... the motherboard's SATA3 con- STEP 3: Connect one end of the SATA data cable to install the SATA3 hard disks. nector. 2.11 Serial ATA (SATA) / Serial ATAII (SATAII) Hard Disks Installation This motherboard adopts Intel® Z68 chipset that supports Serial ATA3 (SATA3) hard disks and RAID (RAID...your chassis. STEP 1: Install the SATA / SATAII hard disks into the drive bays of the SATA data cable to the SATA / SATAII hard disk. 2.12 Serial ATA3 (SATA3) Hard Disks Installation This motherboard adopts Intel® Z68 chipset that supports Serial ATA (SATA) / Serial ATAII (SATAII) hard ...
User Manual
Page 34
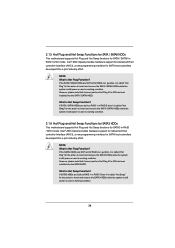
... the SATA3 HDDs while the system is still power-on and in RAID / AHCI mode. Intel® Z68 chipset provides hardware support for Advanced Host controller Interface (AHCI), a new programming interface for SATA host controllers developed thru a joint industry effort. What is Hot Swap Function? If SATA3 HDDs are built...HDDs while the system is still power-on and in working condition. 34 What is Hot Swap Function? NOTE What is Hot Plug Function? If SATA / SATAII HDDs are built as RAID 1 or RAID 5 then it cannot perform Hot Plug if the OS has been installed into the SATA3 ...
... the SATA3 HDDs while the system is still power-on and in RAID / AHCI mode. Intel® Z68 chipset provides hardware support for Advanced Host controller Interface (AHCI), a new programming interface for SATA host controllers developed thru a joint industry effort. What is Hot Swap Function? If SATA3 HDDs are built...HDDs while the system is still power-on and in working condition. 34 What is Hot Swap Function? NOTE What is Hot Plug Function? If SATA / SATAII HDDs are built as RAID 1 or RAID 5 then it cannot perform Hot Plug if the OS has been installed into the SATA3 ...
User Manual
Page 35
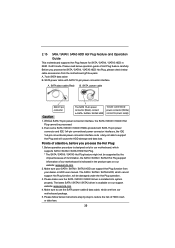
.... 2. Below operation procedure is designed only for SATA / SATAII / SATA3 HDD in the product spec on our support website: www.asrock.com 4. A. 7-pin SATA data cable B. Points of HDD crash or data loss. 35 The SATA / SATAII / SATA3 HDD, which supports SATA / SATAII / SATA3 HDD Hot Plug. * The SATA / SATAII / SATA3 Hot Plug feature might not...
.... 2. Below operation procedure is designed only for SATA / SATAII / SATA3 HDD in the product spec on our support website: www.asrock.com 4. A. 7-pin SATA data cable B. Points of HDD crash or data loss. 35 The SATA / SATAII / SATA3 HDD, which supports SATA / SATAII / SATA3 HDD Hot Plug. * The SATA / SATAII / SATA3 Hot Plug feature might not...

User Manual
Page 36
...-pin cable. Step 1 Unplug SATA data cable from SATA / SATAII / SATA3 HDD side. 36 Step 1 Please connect SATA power cable 1x4-pin end Step 2 Connect SATA data cable to (White) to the SATA / SATAII / SATA3 HDD. Step 2 Unplug SATA 15-pin power cable connector (Black) from SATA / SATAII / SATA3 HDD side.... How to Hot Plug a SATA / SATAII / SATA3 HDD: Points of ...
...-pin cable. Step 1 Unplug SATA data cable from SATA / SATAII / SATA3 HDD side. 36 Step 1 Please connect SATA power cable 1x4-pin end Step 2 Connect SATA data cable to (White) to the SATA / SATAII / SATA3 HDD. Step 2 Unplug SATA 15-pin power cable connector (Black) from SATA / SATAII / SATA3 HDD side.... How to Hot Plug a SATA / SATAII / SATA3 HDD: Points of ...

User Manual
Page 37
...at the following path: .. \ Intel Rapid Storage Information If you want to manage RAID functions, you install can be installed to your SATA / SATAII / SATA3 HDDs with RAID functions, please follow below procedures according to the OS you need to install those required drivers. Therefore...allowed to use "Intel Rapid Storage" in Windows® environment, please install "SATAII driver" from up UEFI. Enter UEFI SETUP UTILITY Advanced screen SATA Con guration. B. STEP 1: Set up to bottom side to check the installation guide in the folder at the following path: .. \ RAID ...
...at the following path: .. \ Intel Rapid Storage Information If you want to manage RAID functions, you install can be installed to your SATA / SATAII / SATA3 HDDs with RAID functions, please follow below procedures according to the OS you need to install those required drivers. Therefore...allowed to use "Intel Rapid Storage" in Windows® environment, please install "SATAII driver" from up UEFI. Enter UEFI SETUP UTILITY Advanced screen SATA Con guration. B. STEP 1: Set up to bottom side to check the installation guide in the folder at the following path: .. \ RAID ...

User Manual
Page 38
...bit / VistaTM / VistaTM 64-bit OS on your system. 38 STEP 2: Install Windows® 7 / 7 64-bit / VistaTM / VistaTM 64-bit OS on your system. Using SATA / SATAII / STA3 HDDs without NCQ function STEP 1: Set up UEFI. A. 2.18 Installing Windows® 7 / 7 64-bit / VistaTM / VistaTM 64-bit / XP / XP...bit Without RAID Functions If you want to install Windows® 7 / 7 64-bit / VistaTM / VistaTM 64-bit / XP / XP 64bit OS on your SATA / SATAII / SATA3 HDDs without RAID functions, please follow below procedures according to the OS you install. 2.18.1 Installing Windows® XP / XP 64-bit ...
...bit / VistaTM / VistaTM 64-bit OS on your system. 38 STEP 2: Install Windows® 7 / 7 64-bit / VistaTM / VistaTM 64-bit OS on your system. Using SATA / SATAII / STA3 HDDs without NCQ function STEP 1: Set up UEFI. A. 2.18 Installing Windows® 7 / 7 64-bit / VistaTM / VistaTM 64-bit / XP / XP...bit Without RAID Functions If you want to install Windows® 7 / 7 64-bit / VistaTM / VistaTM 64-bit / XP / XP 64bit OS on your SATA / SATAII / SATA3 HDDs without RAID functions, please follow below procedures according to the OS you install. 2.18.1 Installing Windows® XP / XP 64-bit ...

User Manual
Page 52
... Reporting Technology) feature. Con guration options: [Disabled], [Auto], [Enabled]. 52 Use this to [IDE Mode]. SATA Controller 1 This item appears only when you set "SATA Mode" to select SATA mode. Please select [Compatible] when you install legacy OS. If native OS (Windows® XP / VistaTM /...]. If native OS (Windows® XP / VistaTM / 7) is installed, please select [Enhanced]. Hard Disk S.M.A.R.T. 3.4.4 Storage Configuration SATA Mode Use this item to [IDE Mode]. AHCI (Advanced Host Controller Interface) supports NCQ and other new features that will improve...
... Reporting Technology) feature. Con guration options: [Disabled], [Auto], [Enabled]. 52 Use this to [IDE Mode]. SATA Controller 1 This item appears only when you set "SATA Mode" to select SATA mode. Please select [Compatible] when you install legacy OS. If native OS (Windows® XP / VistaTM /...]. If native OS (Windows® XP / VistaTM / 7) is installed, please select [Enhanced]. Hard Disk S.M.A.R.T. 3.4.4 Storage Configuration SATA Mode Use this item to [IDE Mode]. AHCI (Advanced Host Controller Interface) supports NCQ and other new features that will improve...
User Manual
Page 61
... you install Windows® 7 64-bit OS, OS will be installed on a HDD Larger Than 2TB in UEFI Setup Utility > Advanced > Storage Configuration > SATA Mode. 3. Start Windows® installation. 5. Installing OS on a large size HDD (>2TB). Please make sure to install the operating system. 1. Please install the hotfi...
... you install Windows® 7 64-bit OS, OS will be installed on a HDD Larger Than 2TB in UEFI Setup Utility > Advanced > Storage Configuration > SATA Mode. 3. Start Windows® installation. 5. Installing OS on a large size HDD (>2TB). Please make sure to install the operating system. 1. Please install the hotfi...
User Manual
Page 62
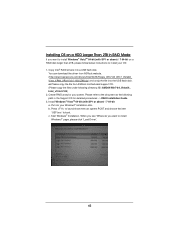
... at the following directory: D:\ AMD64\Win7-64_Vista64_ Intel_v10.6.0.100) 2. b. or Please copy the file from ASRock website. (http://download.asrock.com/drivers/Intel/SATA/Floppy_Win7-64_Win7_Vista64_ Vista_XP64_XP(v10.6.0.1002)Z68.zip) and unzip the file into the USB flash disk. page, please click "Load Driver". ... flash disk. Start Windows® Installation. Copy Intel® RAID drivers into your OS: 1. You can download the driver from ASRock motherboard support CD. (Please copy the files under following path in RAID Mode If you want to boot.
... at the following directory: D:\ AMD64\Win7-64_Vista64_ Intel_v10.6.0.100) 2. b. or Please copy the file from ASRock website. (http://download.asrock.com/drivers/Intel/SATA/Floppy_Win7-64_Win7_Vista64_ Vista_XP64_XP(v10.6.0.1002)Z68.zip) and unzip the file into the USB flash disk. page, please click "Load Driver". ... flash disk. Start Windows® Installation. Copy Intel® RAID drivers into your OS: 1. You can download the driver from ASRock motherboard support CD. (Please copy the files under following path in RAID Mode If you want to boot.
Quick Installation Guide
Page 5
... If you require technical support related to set the BIOS option in , 30.5 cm x 19.1 cm) ASRock Z68 Pro3 Gen3 Quick Installation Guide ASRock Z68 Pro3 Gen3 Support CD 2 x Serial ATA (SATA) Data Cables (Optional) 1 x I/O Panel Shield ASRock Reminds You... To get better performance in Windows® 7 / 7 64-bit / VistaTM / VistaTM 64bit, it is recommended to this motherboard, please visit...
... If you require technical support related to set the BIOS option in , 30.5 cm x 19.1 cm) ASRock Z68 Pro3 Gen3 Quick Installation Guide ASRock Z68 Pro3 Gen3 Support CD 2 x Serial ATA (SATA) Data Cables (Optional) 1 x I/O Panel Shield ASRock Reminds You... To get better performance in Windows® 7 / 7 64-bit / VistaTM / VistaTM 64bit, it is recommended to this motherboard, please visit...

Quick Installation Guide
Page 24
... USB8_9) (see p.2 No. 21) (9-pin USB10_11) (see p.2, No. 7) SATA2_5 SATA2_3 SATA2_4 SATA2_2 These four Serial ATAII (SATAII) connectors support SATA data cables for internal storage devices. Each USB 2.0 header can be connected to 3.0 Gb/s data transfer rate. Serial ATAII Connectors (SATA2_2: see ...SATA) Data Cable (Optional) Either end of the motherboard! Placing jumper caps over these headers and connectors. Do NOT place jumper caps over the headers and connectors will cause permanent damage of the SATA data cable can support two USB 2.0 ports. ASRock Z68 Pro3 Gen3...
... USB8_9) (see p.2 No. 21) (9-pin USB10_11) (see p.2, No. 7) SATA2_5 SATA2_3 SATA2_4 SATA2_2 These four Serial ATAII (SATAII) connectors support SATA data cables for internal storage devices. Each USB 2.0 header can be connected to 3.0 Gb/s data transfer rate. Serial ATAII Connectors (SATA2_2: see ...SATA) Data Cable (Optional) Either end of the motherboard! Placing jumper caps over these headers and connectors. Do NOT place jumper caps over the headers and connectors will cause permanent damage of the SATA data cable can support two USB 2.0 ports. ASRock Z68 Pro3 Gen3...
