
RAID Utility for Windows Guide
Page 1
Then, the below screen appears. Please enter Intel Matrix Storage Manager by clicking on Start All Programs Intel(R) Matrix Storage Manager Intel Matrix Storage Console. After you finish the driver installation, you can create, delete, or rebuild any RAID array. Intel(R) Matrix Storage Console 1 Guide to Intel Matrix Storage Manager 1. Enter Intel Matrix Storage Manager RAID driver is built in Intel ALL in one driver provided in our support CD.
Then, the below screen appears. Please enter Intel Matrix Storage Manager by clicking on Start All Programs Intel(R) Matrix Storage Manager Intel Matrix Storage Console. After you finish the driver installation, you can create, delete, or rebuild any RAID array. Intel(R) Matrix Storage Console 1 Guide to Intel Matrix Storage Manager 1. Enter Intel Matrix Storage Manager RAID driver is built in Intel ALL in one driver provided in our support CD.

RAID Utility for Windows Guide
Page 2
Please click Next to create a RAID volume. 2. Intel(R) Matrix Storage Console Then, Create RAID Volume from Existing Hard Drive to continue. 2 Create RAID Volume Select Action Create RAID Volume from Existing Hard Drive Wizard pops up.
Please click Next to create a RAID volume. 2. Intel(R) Matrix Storage Console Then, Create RAID Volume from Existing Hard Drive to continue. 2 Create RAID Volume Select Action Create RAID Volume from Existing Hard Drive Wizard pops up.

RAID Utility for Windows Guide
Page 6
Start Creating RAID Volume from Existing Hard Drive Wizard. Please note that you click Finish, the existing data on the size of the disks being used and the strip size selected. It is critical that as long as you backup all important data before this operation cannot be deleted and this step. Then, the migration process starts, which may take up to two hours to complete depending on the selected hard drive will be undone. Intel(R) Matrix Storage Console and select Show Migration Progress. 6
Start Creating RAID Volume from Existing Hard Drive Wizard. Please note that you click Finish, the existing data on the size of the disks being used and the strip size selected. It is critical that as long as you backup all important data before this operation cannot be deleted and this step. Then, the migration process starts, which may take up to two hours to complete depending on the selected hard drive will be undone. Intel(R) Matrix Storage Console and select Show Migration Progress. 6
RAID Utility for Windows Guide
Page 8
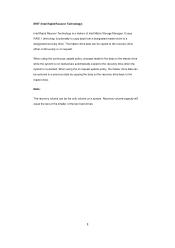
... be the only volume on the recovery drive back to the data on request. Recovery volume capacity will equal the size of the smaller of Intel Matrix Storage Manager. It uses RAID 1 (mirroring) functionality to copy data from a designated master drive to the recovery drive when the system is a feature of... to the recovery drive either continuously or on the master drive while the system is not docked are automatically copied to a designated recovery drive. IRRT (Intel Rapid Recover Technology) Intel Rapid Recover Technology is re-docked.
... be the only volume on the recovery drive back to the data on request. Recovery volume capacity will equal the size of the smaller of Intel Matrix Storage Manager. It uses RAID 1 (mirroring) functionality to copy data from a designated master drive to the recovery drive when the system is a feature of... to the recovery drive either continuously or on the master drive while the system is not docked are automatically copied to a designated recovery drive. IRRT (Intel Rapid Recover Technology) Intel Rapid Recover Technology is re-docked.
RAID Installation Guide
Page 1
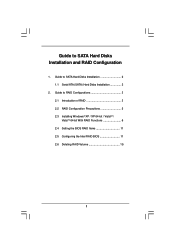
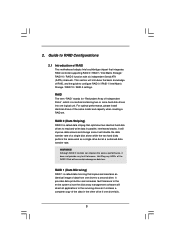
Guide to RAID Configurations 3 2.1 Introduction of RAID 3 2.2 RAID Configuration Precautions 5 2.3 Installing Windows® XP / XP 64-bit / VistaTM / VistaTM 64-bit With RAID Functions 6 2.4 Setting the BIOS RAID Items 11 2.5 Configuring the Intel RAID BIOS 11 2.6 Deleting RAID Volume 15 1 Guide to SATA Hard Disks Installation and RAID Configuration 1. Guide to SATA Hard Disks Installation 2 1.1 Serial ATA (SATA) Hard Disks Installation 2 2.
Guide to RAID Configurations 3 2.1 Introduction of RAID 3 2.2 RAID Configuration Precautions 5 2.3 Installing Windows® XP / XP 64-bit / VistaTM / VistaTM 64-bit With RAID Functions 6 2.4 Setting the BIOS RAID Items 11 2.5 Configuring the Intel RAID BIOS 11 2.6 Deleting RAID Volume 15 1 Guide to SATA Hard Disks Installation and RAID Configuration 1. Guide to SATA Hard Disks Installation 2 1.1 Serial ATA (SATA) Hard Disks Installation 2 2.
RAID Installation Guide
Page 2
...create RAID on this guide carefully according to the Intel southbridge chipset that your motherboard adopts. 1. For SATA installation guide, please refer to SATA Hard Disks Installation 1.1 Serial ATA (SATA) Hard Disks Installation Intel P55 southbridge chipset supports Serial ATA (SATA) hard disks ...with RAID functions, including RAID 0, RAID 1, RAID 10, RAID 5, and Intel Matrix Storage. You may install SATA hard disks on SATA ports. 2 ...
...create RAID on this guide carefully according to the Intel southbridge chipset that your motherboard adopts. 1. For SATA installation guide, please refer to SATA Hard Disks Installation 1.1 Serial ATA (SATA) Hard Disks Installation Intel P55 southbridge chipset supports Serial ATA (SATA) hard disks ...with RAID functions, including RAID 0, RAID 1, RAID 10, RAID 5, and Intel Matrix Storage. You may install SATA hard disks on SATA ports. 2 ...
RAID Installation Guide
Page 3
... one logical unit. WARNING!! RAID 0 (Data Striping) RAID 0 is called data mirroring that integrates RAID controller supporting RAID 0 / RAID 1/ Intel Matrix Storage / RAID 10 / RAID 5 function with six independent Serial ATA (SATA) channels. For optimal performance, please install identical drives of ...the RAID 0 Disk will direct all applications to configure RAID 0 / RAID 1/ Intel Matrix Storage / RAID 10 / RAID 5 settings. RAID The term "RAID" stands for "Redundant Array of Independent Disks", which is called...
... one logical unit. WARNING!! RAID 0 (Data Striping) RAID 0 is called data mirroring that integrates RAID controller supporting RAID 0 / RAID 1/ Intel Matrix Storage / RAID 10 / RAID 5 function with six independent Serial ATA (SATA) channels. For optimal performance, please install identical drives of ...the RAID 0 Disk will direct all applications to configure RAID 0 / RAID 1/ Intel Matrix Storage / RAID 10 / RAID 5 settings. RAID The term "RAID" stands for "Redundant Array of Independent Disks", which is called...

RAID Installation Guide
Page 4
...can sustain multiple simultaneous drive failure. RAID 5 RAID 5 stripes both data and parity information across three or more hard disk drives. The Intel Matrix Storage technology creates two partitions on each hard disk drive to create a virtual RAID 0 and RAID 1 sets. Among the advantages ...of four hard disk drives is a striped configuration with RAID 1 segments whose segments are RAID 1 arrays. Intel Matrix Storage The Intel Matrix Storage technology supported allows you to change the hard disk drive partition size without losing any data. RAID 10 RAID 10 ...
...can sustain multiple simultaneous drive failure. RAID 5 RAID 5 stripes both data and parity information across three or more hard disk drives. The Intel Matrix Storage technology creates two partitions on each hard disk drive to create a virtual RAID 0 and RAID 1 sets. Among the advantages ...of four hard disk drives is a striped configuration with RAID 1 segments whose segments are RAID 1 arrays. Intel Matrix Storage The Intel Matrix Storage technology supported allows you to change the hard disk drive partition size without losing any data. RAID 10 RAID 10 ...
RAID Installation Guide
Page 7
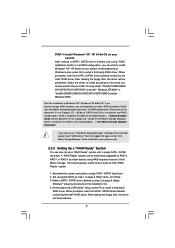
...Set up a "RAID Ready" system with a single SATA / SATAII hard disk. When prompted, insert the SATA / SATAII driver diskette containing the Intel® RAID driver. After making a SATA / SATAII driver diskette and using RAID migration feature of page 6. At the beginning of page 6. Select...7 When done, exit Setup. 3. After the installation of Windows® setup, press F6 to use both "RAID Installation Guide" and "Intel Matrix Storage Manager Information" for RAID configuration. After reading the floppy disk, the driver will be installed to manage RAID functions, you install....
...Set up a "RAID Ready" system with a single SATA / SATAII hard disk. When prompted, insert the SATA / SATAII driver diskette containing the Intel® RAID driver. After making a SATA / SATAII driver diskette and using RAID migration feature of page 6. At the beginning of page 6. Select...7 When done, exit Setup. 3. After the installation of Windows® setup, press F6 to use both "RAID Installation Guide" and "Intel Matrix Storage Manager Information" for RAID configuration. After reading the floppy disk, the driver will be installed to manage RAID functions, you install....

RAID Installation Guide
Page 8
...to understand what will occur during the migration process because any existing partitions within Windows® in the system; Windows XP/2000" or "Intel(R) ICH8R/ICH9R/ICH10R/DO/PCH SATA RAID Controller - To prepare for this, you migrated to a RAID 0 volume, use third-party ... drive RAID 5 configuration. After setting up a "RAID Ready" system as the source hard drive when initiating the migration. 2. You may select: "Intel(R) ICH8R/ICH9R/ICH10R/DO/PCH SATA RAID Controller - Once the migration is complete, reboot the system. You may also use Disk Management from a single...
...to understand what will occur during the migration process because any existing partitions within Windows® in the system; Windows XP/2000" or "Intel(R) ICH8R/ICH9R/ICH10R/DO/PCH SATA RAID Controller - To prepare for this, you migrated to a RAID 0 volume, use third-party ... drive RAID 5 configuration. After setting up a "RAID Ready" system as the source hard drive when initiating the migration. 2. You may select: "Intel(R) ICH8R/ICH9R/ICH10R/DO/PCH SATA RAID Controller - Once the migration is complete, reboot the system. You may also use Disk Management from a single...

RAID Installation Guide
Page 9
...installation. Insert the Windows® VistaTM / VistaTM 64-bit optical disk into your system, and follow below steps. page, please insert the ASRock Support CD into the optical drive to boot your optical drive, and click the "Load Driver" button on the left on your system. Enter... / VistaTM 64-bit on your SATA / SATAII HDDs with RAID functions, please follow the instruction to use both "RAID Installation Guide" and "Intel Matrix Storage Manager Information" for proper configuration. A. Please refer to the document in the Support CD, "Guide to SATA Hard Disks Installation and ...
...installation. Insert the Windows® VistaTM / VistaTM 64-bit optical disk into your system, and follow below steps. page, please insert the ASRock Support CD into the optical drive to boot your optical drive, and click the "Load Driver" button on the left on your system. Enter... / VistaTM 64-bit on your SATA / SATAII HDDs with RAID functions, please follow the instruction to use both "RAID Installation Guide" and "Intel Matrix Storage Manager Information" for proper configuration. A. Please refer to the document in the Support CD, "Guide to SATA Hard Disks Installation and ...

RAID Installation Guide
Page 10
If you want to use "Intel Matrix Storage Manager" in Windows® environment, please install "SATAII driver" from the Support CD again so that "Intel Matrix Storage Manager" will be installed to your system as well. 10
If you want to use "Intel Matrix Storage Manager" in Windows® environment, please install "SATAII driver" from the Support CD again so that "Intel Matrix Storage Manager" will be installed to your system as well. 10

RAID Installation Guide
Page 11
...Setting the BIOS RAID Items After installing the hard disk drives, please set the option Configure SATA as to press . Press . Then, the Intel RAID Utility - Create RAID Volume window appears. Select the option Create RAID Volume and press . 11 Save your change before setting your computer...then the main interface of BIOS setup utility will appear. Wait until you see the RAID software prompting you exit BIOS setup. 2.5 Configuring the Intel RAID BIOS Reboot your RAID configuration. Please set the necessary RAID items in the BIOS before you to [RAID]. Boot your system, and ...
...Setting the BIOS RAID Items After installing the hard disk drives, please set the option Configure SATA as to press . Press . Then, the Intel RAID Utility - Create RAID Volume window appears. Select the option Create RAID Volume and press . 11 Save your change before setting your computer...then the main interface of BIOS setup utility will appear. Wait until you see the RAID software prompting you exit BIOS setup. 2.5 Configuring the Intel RAID BIOS Reboot your RAID configuration. Please set the necessary RAID items in the BIOS before you to [RAID]. Boot your system, and ...

User Manual
Page 6
...2.5GT/s) - 1 x PCI Express 2.0 x1 slot (2.5GT/s) - 3 x PCI slots - Supports Intel® Extreme Memory Profile (XMP) (see CAUTION 2) - Supports ATITM CrossFireXTM, 3-Way CrossFireXTM and Quad CrossFireXTM -... PCIE x1 Gigabit LAN 10/100/1000 Mb/s - ATX Form Factor: 12.0-in x 9.6-in the LGA1156 Package - Supports Hyper-Threading Technology (see CAUTION 3) - 4 x DDR3 DIMM slots - Supports Intel® Turbo Boost Technology - Supports EM64T CPU - Intel® P55...
...2.5GT/s) - 1 x PCI Express 2.0 x1 slot (2.5GT/s) - 3 x PCI slots - Supports Intel® Extreme Memory Profile (XMP) (see CAUTION 2) - Supports ATITM CrossFireXTM, 3-Way CrossFireXTM and Quad CrossFireXTM -... PCIE x1 Gigabit LAN 10/100/1000 Mb/s - ATX Form Factor: 12.0-in x 9.6-in the LGA1156 Package - Supports Hyper-Threading Technology (see CAUTION 3) - 4 x DDR3 DIMM slots - Supports Intel® Turbo Boost Technology - Supports EM64T CPU - Intel® P55...

User Manual
Page 7
...- 1 x Power Switch with LED - 1 x Reset Switch with LED - Front panel audio connector - 3 x USB 2.0 headers (support 6 USB 2.0 ports) (see CAUTION 10) - ASRock Instant Flash (see CAUTION 7) - 1 x ATA133 IDE connector (supports 2 x IDE devices) - 1 x Floppy connector - 1 x IR header - 1 x COM port header - 1 ... 3.0Gb/s connectors, support RAID (RAID 0, RAID 1, RAID 10, RAID 5 and Intel Matrix Storage), NCQ, AHCI and "Hot Plug" functions (see CAUTION 11) - Hybrid Booster: 7 ASRock OC Tuner (see CAUTION 9) - Connector Smart Switch BIOS Feature Support CD Unique Feature ...
...- 1 x Power Switch with LED - 1 x Reset Switch with LED - Front panel audio connector - 3 x USB 2.0 headers (support 6 USB 2.0 ports) (see CAUTION 10) - ASRock Instant Flash (see CAUTION 7) - 1 x ATA133 IDE connector (supports 2 x IDE devices) - 1 x Floppy connector - 1 x IR header - 1 x COM port header - 1 ... 3.0Gb/s connectors, support RAID (RAID 0, RAID 1, RAID 10, RAID 5 and Intel Matrix Storage), NCQ, AHCI and "Hot Plug" functions (see CAUTION 11) - Hybrid Booster: 7 ASRock OC Tuner (see CAUTION 9) - Connector Smart Switch BIOS Feature Support CD Unique Feature ...

User Manual
Page 10
ASRock website: http://www.asrock.com/support/index.htm 10 Intel's suggestion, the EuP ready power supply must meet the standard of the supported PCI Express VGA card list for SLITM Mode, please visit our website ...
ASRock website: http://www.asrock.com/support/index.htm 10 Intel's suggestion, the EuP ready power supply must meet the standard of the supported PCI Express VGA card list for SLITM Mode, please visit our website ...

User Manual
Page 12
... LINE IN Center: FRONT Bottom: MIC IN 40 LAN PHY CPU_FAN1 P55 Extreme 39 PCIE1 38 PCI1 VIA VT6330 16Mb BIOS 37 CMOS CrossFireX Battery PCIE2 36 1394a Intel Super I/O PCIE3 PCI Express 2.0 P55 IDE1 35 PCI2 SATAII_5_6 SATAII_3_4 SATAII_1_2 34 33 32 AUDIO CODEC CD1 ...1 PS2_USB_PWR1 Jumper 22 Dr. Debug (LED) 2 ATX 12V Power Connector (ATX12V1) 23 USB 2.0 Header (USB8_9, Blue) 3 1156-Pin CPU Socket 24 Intel P55 Chipset 4 Chassis Fan Connector (CHA_FAN3) 25 Front Panel IEEE 1394 Header 5 2 x 240-pin DDR3 DIMM Slots (FRONT_1394, Red) (Dual Channel: DDR3_A2,...
... LINE IN Center: FRONT Bottom: MIC IN 40 LAN PHY CPU_FAN1 P55 Extreme 39 PCIE1 38 PCI1 VIA VT6330 16Mb BIOS 37 CMOS CrossFireX Battery PCIE2 36 1394a Intel Super I/O PCIE3 PCI Express 2.0 P55 IDE1 35 PCI2 SATAII_5_6 SATAII_3_4 SATAII_1_2 34 33 32 AUDIO CODEC CD1 ...1 PS2_USB_PWR1 Jumper 22 Dr. Debug (LED) 2 ATX 12V Power Connector (ATX12V1) 23 USB 2.0 Header (USB8_9, Blue) 3 1156-Pin CPU Socket 24 Intel P55 Chipset 4 Chassis Fan Connector (CHA_FAN3) 25 Front Panel IEEE 1394 Header 5 2 x 240-pin DDR3 DIMM Slots (FRONT_1394, Red) (Dual Channel: DDR3_A2,...

User Manual
Page 15
.... Rotate the load plate to handle and avoid kicking off the PnP cap. 2. This cap must be seriously damaged. 2.3 CPU Installation For the installation of Intel 1156-Pin CPU, please follow the steps below. Step 1. Open the socket: Step 1-1. Disengaging the lever by depressing down and out on the socket. Step...
.... Rotate the load plate to handle and avoid kicking off the PnP cap. 2. This cap must be seriously damaged. 2.3 CPU Installation For the installation of Intel 1156-Pin CPU, please follow the steps below. Step 1. Open the socket: Step 1-1. Disengaging the lever by depressing down and out on the socket. Step...

User Manual
Page 17
... clockwise, the heatsink cannot be noticed that the CPU and the heatsink are securely fastened and in good contact with 1156-Pin socket that supports Intel 1156-Pin CPU. Please adopt the type of heatsink and cooling fan compliant with remaining fasteners. Step 1. Repeat with... Intel 1156-Pin CPU to dissipate heat. Step 6. The white throughholes are oriented on side closest to the CPU fan connector on side closest to MB ...
... clockwise, the heatsink cannot be noticed that the CPU and the heatsink are securely fastened and in good contact with 1156-Pin socket that supports Intel 1156-Pin CPU. Please adopt the type of heatsink and cooling fan compliant with remaining fasteners. Step 1. Repeat with... Intel 1156-Pin CPU to dissipate heat. Step 6. The white throughholes are oriented on side closest to the CPU fan connector on side closest to MB ...

User Manual
Page 43
...installation. 43 It is not recommended to install at least 3 SATA / SATAII hard disks. 2. If you plan to use RAID 0, RAID 1, RAID 10 or Intel Matrix Storage function, you to install the SATA / SATAII hard disks. STEP 4: Connect the other end of your chassis. 2.16 Serial ATA (SATA) / ...Serial ATAII (SATAII) Hard Disks Installation This motherboard adopts Intel® P55 chipset that supports Serial ATA (SATA) / Serial ATAII (SATAII) hard disks and RAID (RAID 0, RAID 1, RAID 10, RAID 5, and...
...installation. 43 It is not recommended to install at least 3 SATA / SATAII hard disks. 2. If you plan to use RAID 0, RAID 1, RAID 10 or Intel Matrix Storage function, you to install the SATA / SATAII hard disks. STEP 4: Connect the other end of your chassis. 2.16 Serial ATA (SATA) / ...Serial ATAII (SATAII) Hard Disks Installation This motherboard adopts Intel® P55 chipset that supports Serial ATA (SATA) / Serial ATAII (SATAII) hard disks and RAID (RAID 0, RAID 1, RAID 10, RAID 5, and...


