

RAID Installation Guide
Page 9
When all drives have been selected, press to go back to let user select the array drives manually. Select "Select Disk Drives" to the creation steps menu. 9 When using Select Disk Drives method, the channel column will be activated. One method is "Auto Setup", and another is "Select Disk Drives". 3. Select "Auto Setup" to allow BIOS to select them respectively. Just highlight the target drives that you want to use and press to select the disk drives and create array automatically. There are two methods to create a disk array.
When all drives have been selected, press to go back to let user select the array drives manually. Select "Select Disk Drives" to the creation steps menu. 9 When using Select Disk Drives method, the channel column will be activated. One method is "Auto Setup", and another is "Select Disk Drives". 3. Select "Auto Setup" to allow BIOS to select them respectively. Just highlight the target drives that you want to use and press to select the disk drives and create array automatically. There are two methods to create a disk array.

User Manual
Page 1
All rights reserved. 1 MOTHERBOARD K7Upgrade-600 User Manual Version 1.1 Published August 2004 Copyright©2004 ASRock INC.
All rights reserved. 1 MOTHERBOARD K7Upgrade-600 User Manual Version 1.1 Published August 2004 Copyright©2004 ASRock INC.

User Manual
Page 2
...may not cause harmful interference, and (2) this device must accept any interference received, including interference that may appear in this manual. ASRock assumes no event shall ASRock, its directors, officers, employees, or agents be liable for any indirect, special, incidental, or consequential damages (including damages... translated in any language, in any form or by any means, except duplication of documentation by ASRock. Products and corporate names appearing in this manual, ASRock does not provide warranty of any kind, either expressed or implied, including but not limited to ...
...may not cause harmful interference, and (2) this device must accept any interference received, including interference that may appear in this manual. ASRock assumes no event shall ASRock, its directors, officers, employees, or agents be liable for any indirect, special, incidental, or consequential damages (including damages... translated in any language, in any form or by any means, except duplication of documentation by ASRock. Products and corporate names appearing in this manual, ASRock does not provide warranty of any kind, either expressed or implied, including but not limited to ...

User Manual
Page 5
...) Data Cable One Serial ATA (SATA) HDD Power Cable(Optional) One ASRock I/O Shield One Jumper Cap Remover 5 In this manual, chapter 1 and 2 contain introduction of the Support CD. Introduction Thank you for a 3.5-in , 30.5 cm x 20.8 cm) ASRock K7Upgrade-600 Quick Installation Guide ASRock K7Upgrade-600 Support CD One 80-conductor Ultra ATA 66/100/133 IDE Ribbon...
...) Data Cable One Serial ATA (SATA) HDD Power Cable(Optional) One ASRock I/O Shield One Jumper Cap Remover 5 In this manual, chapter 1 and 2 contain introduction of the Support CD. Introduction Thank you for a 3.5-in , 30.5 cm x 20.8 cm) ASRock K7Upgrade-600 Quick Installation Guide ASRock K7Upgrade-600 Support CD One 80-conductor Ultra ATA 66/100/133 IDE Ribbon...
User Manual
Page 7
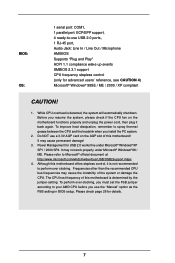
.... The CPU host frequency of the system or damage the CPU. BIOS: OS: 1 serial port: COM1, 1 parallel port: ECP/EPP support, 4 ready-to-use the "Manual" option as the FSB setting in BIOS setup. It may cause the instability of this motherboard offers stepless control, it back again. To improve heat...
.... The CPU host frequency of the system or damage the CPU. BIOS: OS: 1 serial port: COM1, 1 parallel port: ECP/EPP support, 4 ready-to-use the "Manual" option as the FSB setting in BIOS setup. It may cause the instability of this motherboard offers stepless control, it back again. To improve heat...

User Manual
Page 11
... into the socket until it is locked. Then connect the CPU fan to improve heat dissipation. For proper installation, please kindly refer to the instruction manuals of CPU Fan and Heatsink After you push down the socket lever to dissipate heat. When the CPU is in good contact with each other...
... into the socket until it is locked. Then connect the CPU fan to improve heat dissipation. For proper installation, please kindly refer to the instruction manuals of CPU Fan and Heatsink After you push down the socket lever to dissipate heat. When the CPU is in good contact with each other...

User Manual
Page 15
...". However, please do the clear-CMOS action. FSB_SEL0 1_2 FSB_SEL0 FSB_SEL1 FSB_SEL2 FSB_SEL1 1_2 (see p.8, No. 1) +5V +5VSB +5VSB (standby) for 15 seconds, use the "Manual" option as system password, date, time, and system setup parameters. If no jumper cap is placed on pins, the jumper is "Open". The illustration shows...
...". However, please do the clear-CMOS action. FSB_SEL0 1_2 FSB_SEL0 FSB_SEL1 FSB_SEL2 FSB_SEL1 1_2 (see p.8, No. 1) +5V +5VSB +5VSB (standby) for 15 seconds, use the "Manual" option as system password, date, time, and system setup parameters. If no jumper cap is placed on pins, the jumper is "Open". The illustration shows...

User Manual
Page 24
Below are the configuration options. Main AMIBIOS SETUP UTILITY - Before attempting to manually enter the IDE hard disk drive parameters. If the hard disk was already formatted on this sub-menu. In these cases, select [User] to configure a ... too old or too new. TYPE To set the type of the IDE device, first, please select "IDE Devices" on Main menu and press to manually enter the number of cylinders, heads, and sectors per track for the remaining fields on an older system, the BIOS Setup may detect incorrect parameters...
Below are the configuration options. Main AMIBIOS SETUP UTILITY - Before attempting to manually enter the IDE hard disk drive parameters. If the hard disk was already formatted on this sub-menu. In these cases, select [User] to configure a ... too old or too new. TYPE To set the type of the IDE device, first, please select "IDE Devices" on Main menu and press to manually enter the number of cylinders, heads, and sectors per track for the remaining fields on an older system, the BIOS Setup may detect incorrect parameters...

User Manual
Page 26
...know the feature. Flexibility Option The default value of this motherboard determined by the jumper-setting, you must set CPU host frequency manually. DRAM Frequency If set to perform over clocking. However, because the CPU host frequency of this option is determined by the jumper-setting.... [Manual] This allows user to set the FSB jumper adjustment according to enable or disable the feature of this motherboard is [Disabled]. VERSION 3....
...know the feature. Flexibility Option The default value of this motherboard determined by the jumper-setting, you must set CPU host frequency manually. DRAM Frequency If set to perform over clocking. However, because the CPU host frequency of this option is determined by the jumper-setting.... [Manual] This allows user to set the FSB jumper adjustment according to enable or disable the feature of this motherboard is [Disabled]. VERSION 3....

User Manual
Page 38
... adjust the Row Precharge time of this to adjust values for memory compatibility when it is set to [Enabled]. The default value is set to [Manual]; However, for safety and system stability, it will be spread out over banks on the same node, or accross nodes, decreasing access contention. Configuration options...
... adjust the Row Precharge time of this to adjust values for memory compatibility when it is set to [Enabled]. The default value is set to [Manual]; However, for safety and system stability, it will be spread out over banks on the same node, or accross nodes, decreasing access contention. Configuration options...
Quick Installation Guide
Page 4
... user manual presented in Floppy Drive One Serial ATA (SATA) Data Cable One Serial ATA (SATA) HDD Power Cable(Optional) One ASRock I/O Shield One Jumper Cap Remover 4 ASRock K7Upgrade-600 Motherboard English This Quick Installation Guide contains introduction of the motherboard can be subject to quality and endurance. ASRock website http://www.asrock.com 1.1 Package Contents ASRock K7Upgrade-600 Motherboard...
... user manual presented in Floppy Drive One Serial ATA (SATA) Data Cable One Serial ATA (SATA) HDD Power Cable(Optional) One ASRock I/O Shield One Jumper Cap Remover 4 ASRock K7Upgrade-600 Motherboard English This Quick Installation Guide contains introduction of the motherboard can be subject to quality and endurance. ASRock website http://www.asrock.com 1.1 Package Contents ASRock K7Upgrade-600 Motherboard...

Quick Installation Guide
Page 6
...system will automatically shutdown. To improve heat dissipation, remember to spray thermal grease between the CPU and the heatsink when you use the "Manual" option as the FSB setting in the Support CD for advanced users' reference, see CAUTION 4) Microsoft® Windows® 98SE ... FSB jumper according to your AMD CPU before you install the PC system. 2. While CPU overheat is determined by the jumper-setting. English 6 ASRock K7Upgrade-600 Motherboard Although this motherboard! BIOS: OS: 1 serial port: COM1, 1 parallel port: ECP/EPP support, 4 ready-to-use USB 2.0 ports...
...system will automatically shutdown. To improve heat dissipation, remember to spray thermal grease between the CPU and the heatsink when you use the "Manual" option as the FSB setting in the Support CD for advanced users' reference, see CAUTION 4) Microsoft® Windows® 98SE ... FSB jumper according to your AMD CPU before you install the PC system. 2. While CPU overheat is determined by the jumper-setting. English 6 ASRock K7Upgrade-600 Motherboard Although this motherboard! BIOS: OS: 1 serial port: COM1, 1 parallel port: ECP/EPP support, 4 ready-to-use USB 2.0 ports...

Quick Installation Guide
Page 7
... 3. When placing screws into the socket to avoid bending of the following precautions before you push down the socket lever to the instruction manuals of the socket lever. STEP 5: Install CPU fan and heatsink. STEP 2: Position the CPU directly above the socket such that its marked... Also remember to a 90 angle. Doing so may cause severe damage to static electricity, NEVER place your CPU fan and heatsink vendors. 7 ASRock K7Upgrade-600 Motherboard English The CPU fits only in place. Hold components by lifting the lever up to use a grounded wrist strap or touch a safety ...
... 3. When placing screws into the socket to avoid bending of the following precautions before you push down the socket lever to the instruction manuals of the socket lever. STEP 5: Install CPU fan and heatsink. STEP 2: Position the CPU directly above the socket such that its marked... Also remember to a 90 angle. Doing so may cause severe damage to static electricity, NEVER place your CPU fan and heatsink vendors. 7 ASRock K7Upgrade-600 Motherboard English The CPU fits only in place. Hold components by lifting the lever up to use a grounded wrist strap or touch a safety ...

Quick Installation Guide
Page 12
... as the FSB setting in the Support CD. 12 ASRock K7Upgrade-600 Motherboard English Please follow the figures above to your AMD CPU before you must set the FSB jumper according to set of "CPU Multiplier Jumper" are designed to page 17 of user Manual in BIOS setup. For detailed information, please refer to...
... as the FSB setting in the Support CD. 12 ASRock K7Upgrade-600 Motherboard English Please follow the figures above to your AMD CPU before you must set the FSB jumper according to set of "CPU Multiplier Jumper" are designed to page 17 of user Manual in BIOS setup. For detailed information, please refer to...

Quick Installation Guide
Page 18
... \ AVSEQ01.DAT 18 ASRock K7Upgrade-600 Motherboard English "PC-DIY Live Demo" ASRock presents you a multimedia PC-DIY live demo, which allows you how to select among the predetermined choices. BIOS Information The Flash Memory on the system chassis. You can run Microsoft® Media Player® to the User Manual (PDF file) contained in...
... \ AVSEQ01.DAT 18 ASRock K7Upgrade-600 Motherboard English "PC-DIY Live Demo" ASRock presents you a multimedia PC-DIY live demo, which allows you how to select among the predetermined choices. BIOS Information The Flash Memory on the system chassis. You can run Microsoft® Media Player® to the User Manual (PDF file) contained in...
