
User Manual
Page 6
3.3.1 UI Overview 44 3.3.2 Apps 45 3.3.3 BIOS & Drivers 48 3.3.4 Setting 49 3.4 Nahimic Audio 50 3.5 ASRock Polychrome SYNC 51 Chapter 4 UEFI SETUP UTILITY 54 4.1 Introduction 54 4.1.1 UEFI Menu Bar 54 4.1.2 Navigation Keys 55 4.2 Main Screen 56 4.3 OC Tweaker Screen 57 4.4 Advanced ...
3.3.1 UI Overview 44 3.3.2 Apps 45 3.3.3 BIOS & Drivers 48 3.3.4 Setting 49 3.4 Nahimic Audio 50 3.5 ASRock Polychrome SYNC 51 Chapter 4 UEFI SETUP UTILITY 54 4.1 Introduction 54 4.1.1 UEFI Menu Bar 54 4.1.2 Navigation Keys 55 4.2 Main Screen 56 4.3 OC Tweaker Screen 57 4.4 Advanced ...
User Manual
Page 9
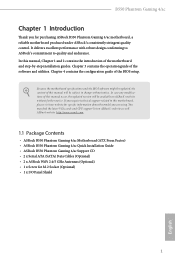
... without notice. Chapter 3 contains the operation guide of the BIOS setup. ASRock website http://www.asrock.com. 1.1 Package Contents • ASRock B550 Phantom Gaming 4/ac Motherboard (ATX Form Factor) • ASRock B550 Phantom Gaming 4/ac Quick Installation Guide • ASRock B550 Phantom Gaming 4/ac Support CD • 2 x Serial ATA (SATA) Data Cables (Optional) • 2 x ASRock WiFi 2.4/5 GHz Antennas (Optional) • 1 x Screw for specific information about the model you are...
... without notice. Chapter 3 contains the operation guide of the BIOS setup. ASRock website http://www.asrock.com. 1.1 Package Contents • ASRock B550 Phantom Gaming 4/ac Motherboard (ATX Form Factor) • ASRock B550 Phantom Gaming 4/ac Quick Installation Guide • ASRock B550 Phantom Gaming 4/ac Support CD • 2 x Serial ATA (SATA) Data Cables (Optional) • 2 x ASRock WiFi 2.4/5 GHz Antennas (Optional) • 1 x Screw for specific information about the model you are...

User Manual
Page 13
B550 Phantom Gaming 4/ac Connector • 1 x COM Port Header • 1 x SPI TPM Header • 1 x Power LED and Speaker Header • 2 x RGB LED Headers * Support in total up to 12V/... Audio Connector • 2 x USB 2.0 Headers (Support 4 USB 2.0 ports) (Supports ESD Protection) • 1 x USB 3.2 Gen1 Header (Supports 2 USB 3.2 Gen1 ports) (Supports ESD Protection) BIOS Feature • AMI UEFI Legal BIOS with GUI support • Supports "Plug and Play" • ACPI 5.1 compliance wake up events • Supports jumperfree • SMBIOS 2.3 support • CPU, CPU...
B550 Phantom Gaming 4/ac Connector • 1 x COM Port Header • 1 x SPI TPM Header • 1 x Power LED and Speaker Header • 2 x RGB LED Headers * Support in total up to 12V/... Audio Connector • 2 x USB 2.0 Headers (Support 4 USB 2.0 ports) (Supports ESD Protection) • 1 x USB 3.2 Gen1 Header (Supports 2 USB 3.2 Gen1 ports) (Supports ESD Protection) BIOS Feature • AMI UEFI Legal BIOS with GUI support • Supports "Plug and Play" • ACPI 5.1 compliance wake up events • Supports jumperfree • SMBIOS 2.3 support • CPU, CPU...

User Manual
Page 14
.../EuP ready power supply is required) * For detailed product information, please visit our website: http://www.asrock.com Please realize that there is a certain risk involved with overclocking, including adjusting the setting in the BIOS, applying Untied Overclocking Technology, or using thirdparty overclocking tools. English 6 It should be done at your system...
.../EuP ready power supply is required) * For detailed product information, please visit our website: http://www.asrock.com Please realize that there is a certain risk involved with overclocking, including adjusting the setting in the BIOS, applying Untied Overclocking Technology, or using thirdparty overclocking tools. English 6 It should be done at your system...

User Manual
Page 35
...you need to short the pins on CLRCMOS2 for 15 seconds, use a jumper cap to clear the CMOS when you just finish updating the BIOS, you must boot up the system first, and then shut it down before you do not clear the CMOS right after clearing the CMOS... Jumper CLRCMOS2 allows you update the BIOS. After waiting for 5 seconds. Please remember toremove the jumper cap after you to default setup, please turn off the computer and unplug the power cord from the power supply. However, please do the clear-CMOS action. B550 Phantom Gaming 4/ac 2.5 Jumpers Setup The illustration shows ...
...you need to short the pins on CLRCMOS2 for 15 seconds, use a jumper cap to clear the CMOS when you just finish updating the BIOS, you must boot up the system first, and then shut it down before you do not clear the CMOS right after clearing the CMOS... Jumper CLRCMOS2 allows you update the BIOS. After waiting for 5 seconds. Please remember toremove the jumper cap after you to default setup, please turn off the computer and unplug the power cord from the power supply. However, please do the clear-CMOS action. B550 Phantom Gaming 4/ac 2.5 Jumpers Setup The illustration shows ...

User Manual
Page 56
Step 1 Please check the item information before update. Click on Step 2 to see a list of recommended or critical updates for the BIOS or drivers. Please update them all soon. Step 3 Click Update to start the update process. 48 English Click to select one or more details. 3.3.3 BIOS & Drivers Installing BIOS or Drivers When the "BIOS & Drivers" tab is selected, you will see more items you want to update.
Step 1 Please check the item information before update. Click on Step 2 to see a list of recommended or critical updates for the BIOS or drivers. Please update them all soon. Step 3 Click Update to start the update process. 48 English Click to select one or more details. 3.3.3 BIOS & Drivers Installing BIOS or Drivers When the "BIOS & Drivers" tab is selected, you will see more items you want to update.

User Manual
Page 87
will pop out. will pop out. Select [OK] to save changes and exit the UEFI SETUP UTILITY. Load UEFI BIOS Defaults Load UEFI BIOS Default values for this option the following message, "Save configuration changes and exit setup?" Discard Changes When you select this option the following message,...pop out. Select [OK] to discard all the setup questions. Select [OK] to exit the UEFI SETUP UTILITY without saving any changes. 4.9 Exit Screen B550 Phantom Gaming 4/ac Save Changes and Exit When you select this operation. 79 English The F9 key can be used for all changes.
will pop out. will pop out. Select [OK] to save changes and exit the UEFI SETUP UTILITY. Load UEFI BIOS Defaults Load UEFI BIOS Default values for this option the following message, "Save configuration changes and exit setup?" Discard Changes When you select this option the following message,...pop out. Select [OK] to discard all the setup questions. Select [OK] to exit the UEFI SETUP UTILITY without saving any changes. 4.9 Exit Screen B550 Phantom Gaming 4/ac Save Changes and Exit When you select this operation. 79 English The F9 key can be used for all changes.

RAID Installation Guide
Page 1
AMD BIOS RAID Installation Guide ...2 1.1 Introduction to RAID...2 1.2 RAID Configurations Precautions 4 1.3 Legacy RAID ROM Configuration 5 1.4 UEFI RAID Configuration ...11 2. AMD RAID Installation Guide 1. AMD Windows RAID Installation Guide 20 1
AMD BIOS RAID Installation Guide ...2 1.1 Introduction to RAID...2 1.2 RAID Configurations Precautions 4 1.3 Legacy RAID ROM Configuration 5 1.4 UEFI RAID Configuration ...11 2. AMD RAID Installation Guide 1. AMD Windows RAID Installation Guide 20 1

RAID Installation Guide
Page 2
...drives to a second drive. WARNING!! After you make a SATA driver diskette, press or to enter BIOS setup to configure RAID functions by using the onboard FastBuild BIOS utility under BIOS environment. Although RAID 0 function can start to use the onboard RAID Option ROM Utility to configure RAID....will improve data access and storage since the disk array management software will cause data damage or data loss. 1. AMD BIOS RAID Installation Guide AMD BIOS RAID Installation Guide is an instruction for "Redundant Array of a single disk alone while the two hard disks perform the ...
...drives to a second drive. WARNING!! After you make a SATA driver diskette, press or to enter BIOS setup to configure RAID functions by using the onboard FastBuild BIOS utility under BIOS environment. Although RAID 0 function can start to use the onboard RAID Option ROM Utility to configure RAID....will improve data access and storage since the disk array management software will cause data damage or data loss. 1. AMD BIOS RAID Installation Guide AMD BIOS RAID Installation Guide is an instruction for "Redundant Array of a single disk alone while the two hard disks perform the ...

RAID Installation Guide
Page 5
... appropriate prompt appears during POST, press to create and configure the RAID disk. 1.3 Legacy RAID ROM Configuration Use legacy RAID ROM to enter the RAID BIOS setup utility. B. Set the "SATA Mode" option to enter legacy RAID ROM utility. D. During system boot, press to . To create a new array, press on the...
... appropriate prompt appears during POST, press to create and configure the RAID disk. 1.3 Legacy RAID ROM Configuration Use legacy RAID ROM to enter the RAID BIOS setup utility. B. Set the "SATA Mode" option to enter legacy RAID ROM utility. D. During system boot, press to . To create a new array, press on the...

RAID Installation Guide
Page 7
Select a caching mode and press to exit the RAID BIOS utility. 7 Press to proceed. When completed, you will see the new array on the main screen. Press to confirm and then press to return to the previous screen.
Select a caching mode and press to exit the RAID BIOS utility. 7 Press to proceed. When completed, you will see the new array on the main screen. Press to confirm and then press to return to the previous screen.

RAID Installation Guide
Page 12
I. H. Click to AdvancedRAIDXpert2 Configuration Utility Array Management, and then delete the existing disk arrays before creating a new array. Go to save your changes and exit, and then enter the BIOS Setup again. After saving the previously changed settings via F10 and rebooting the system, "RAIDXpert2 Configuration Utility" submenu becomes available. Even if you have not configured any RAID array yet, you might have to use "Delete Array" first. 12 G.
I. H. Click to AdvancedRAIDXpert2 Configuration Utility Array Management, and then delete the existing disk arrays before creating a new array. Go to save your changes and exit, and then enter the BIOS Setup again. After saving the previously changed settings via F10 and rebooting the system, "RAIDXpert2 Configuration Utility" submenu becomes available. Even if you have not configured any RAID array yet, you might have to use "Delete Array" first. 12 G.


