Operating Instructions
Page 2
... entry as chemical waste. And don't place lighted candles on , the user is no guarantee that any changes or modifications not expressly approved in this manual could void your authority to provide reasonable protection against harmful interference in cabinet. WARNING This equipment has been tested and found to the point of...
... entry as chemical waste. And don't place lighted candles on , the user is no guarantee that any changes or modifications not expressly approved in this manual could void your authority to provide reasonable protection against harmful interference in cabinet. WARNING This equipment has been tested and found to the point of...
Operating Instructions
Page 3
...CA 92127 U.S.A. Telephone No.: 858-942-2230 This device complies with this product, you have any interference received, including interference that this manual. 3GB Except for European model ENERGY STAR® is a trademark or registered trademark of Intel Corporation. • All other trademarks and ... Computer, Inc. NOTICE FOR THE CUSTOMERS IN CANADA CAUTION The use of optical instruments with Part 15 of Conformity Trade name: AIWA Model No.: CX-LZP5 Responsible Party: Sony Electronics Inc. As an ENERGY STAR® partner, Sony Corporation has determined that may...
...CA 92127 U.S.A. Telephone No.: 858-942-2230 This device complies with this product, you have any interference received, including interference that this manual. 3GB Except for European model ENERGY STAR® is a trademark or registered trademark of Intel Corporation. • All other trademarks and ... Computer, Inc. NOTICE FOR THE CUSTOMERS IN CANADA CAUTION The use of optical instruments with Part 15 of Conformity Trade name: AIWA Model No.: CX-LZP5 Responsible Party: Sony Electronics Inc. As an ENERGY STAR® partner, Sony Corporation has determined that may...
Operating Instructions
Page 4
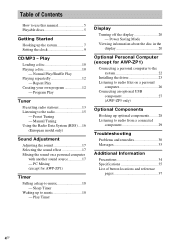
... computer 26 Connecting an optional USB component 27 (AWP-ZP5 only) Optional Components Hooking up optional components......... 28 Listening to audio from a connected component 29 Troubleshooting Problems and remedies 30 Messages 33 Additional Information Precautions 34 Specifications 35 List of Contents How to use this manual 5 Playable discs 5 Getting Started Hooking up to...
... computer 26 Connecting an optional USB component 27 (AWP-ZP5 only) Optional Components Hooking up optional components......... 28 Listening to audio from a connected component 29 Troubleshooting Problems and remedies 30 Messages 33 Additional Information Precautions 34 Specifications 35 List of Contents How to use this manual 5 Playable discs 5 Getting Started Hooking up to...

Operating Instructions
Page 5
... the first track and audio (audio CD data) on the tracks in and end at an area called Lead-out. How to use this manual This manual mainly explains operations using the remote, but the same operations can also be performed using the buttons on the system having multiple sessions, with paper...
... the first track and audio (audio CD data) on the tracks in and end at an area called Lead-out. How to use this manual This manual mainly explains operations using the remote, but the same operations can also be performed using the buttons on the system having multiple sessions, with paper...
Operating Instructions
Page 13
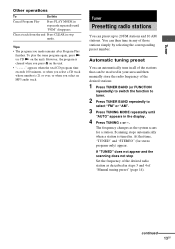
continued 13GB However, the program is tuned in. Automatic tuning preset You can then tune in any of "Manual tuning preset" (page 14). You can automatically tune in all of the stations that time, "TUNED" and "STEREO" (for a station. At that can preset up ... stop mode repeatedly until "AUTO" appears in the display. 4 Press TUNING + or -. Tuner Presetting radio stations You can be received in your area and then manually store the radio frequency of the desired radio station as the system scans for stereo program only) appear. If "TUNED" does not appear and the...
continued 13GB However, the program is tuned in. Automatic tuning preset You can then tune in any of "Manual tuning preset" (page 14). You can automatically tune in all of the stations that time, "TUNED" and "STEREO" (for a station. At that can preset up ... stop mode repeatedly until "AUTO" appears in the display. 4 Press TUNING + or -. Tuner Presetting radio stations You can be received in your area and then manually store the radio frequency of the desired radio station as the system scans for stereo program only) appear. If "TUNED" does not appear and the...
Operating Instructions
Page 14
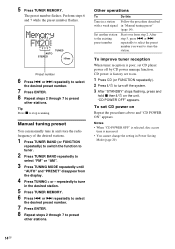
... appears. To set to the existing preset number Start over from the display. 4 Press TUNING + or - The preset number flashes. Manual tuning preset You can manually tune in the desired station. 5 Press TUNER MEMORY. 6 Press . or > repeatedly to select the preset number you want to tune... to stop scanning. Notes • When "CD POWER OFF" is selected, disc access time is increased. • You cannot change the setting in "Manual tuning preset" (page 14). repeatedly to store the station. Tip Press x to select "FM" or "AM". 3 Press TUNING MODE repeatedly until "AUTO...
... appears. To set to the existing preset number Start over from the display. 4 Press TUNING + or - The preset number flashes. Manual tuning preset You can manually tune in the desired station. 5 Press TUNER MEMORY. 6 Press . or > repeatedly to select the preset number you want to tune... to stop scanning. Notes • When "CD POWER OFF" is selected, disc access time is increased. • You cannot change the setting in "Manual tuning preset" (page 14). repeatedly to store the station. Tip Press x to select "FM" or "AM". 3 Press TUNING MODE repeatedly until "AUTO...
Operating Instructions
Page 15
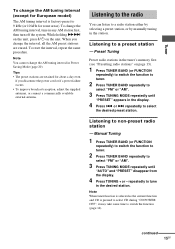
... POWER OFF", it may take some areas). Preset Tuning Preset radio stations in the tuner's memory first (see "Presetting radio stations" on the unit. Manual Tuning 1 Press TUNER BAND (or FUNCTION repeatedly) to switch the function to tuner. 2 Press TUNER BAND repeatedly to select "FM" or "AM". ...for some time to tune in the display. 4 Press . or > repeatedly to a radio station either by selecting a preset station, or by manually tuning in the station. repeatedly to switch the function (page 14). To reset the interval, repeat the same procedure. To change the AM tuning ...
... POWER OFF", it may take some areas). Preset Tuning Preset radio stations in the tuner's memory first (see "Presetting radio stations" on the unit. Manual Tuning 1 Press TUNER BAND (or FUNCTION repeatedly) to switch the function to tuner. 2 Press TUNER BAND repeatedly to select "FM" or "AM". ...for some time to tune in the display. 4 Press . or > repeatedly to a radio station either by selecting a preset station, or by manually tuning in the station. repeatedly to switch the function (page 14). To reset the interval, repeat the same procedure. To change the AM tuning ...
Operating Instructions
Page 23
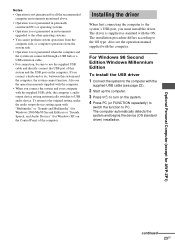
... again with "Multimedia" or "Sounds and Multimedia" (for Windows 2000/Me/98 Second Edition) or "Sounds, Speech, and Audio Devices" (for AWP-ZP1) continued 23GB The driver is not guaranteed when the computer and the system are connected through a USB hub or a USB extension cable. &#... USB cable and directly connect the USB port of the computer. Also see the operation manual supplied with the computer. • When you must install the driver. Also see the operation manuals supplied with the computer. Optional Personal Computer (except for Windows XP) on the Control...
... again with "Multimedia" or "Sounds and Multimedia" (for Windows 2000/Me/98 Second Edition) or "Sounds, Speech, and Audio Devices" (for AWP-ZP1) continued 23GB The driver is not guaranteed when the computer and the system are connected through a USB hub or a USB extension cable. &#... USB cable and directly connect the USB port of the computer. Also see the operation manual supplied with the computer. • When you must install the driver. Also see the operation manuals supplied with the computer. Optional Personal Computer (except for Windows XP) on the Control...
Operating Instructions
Page 26
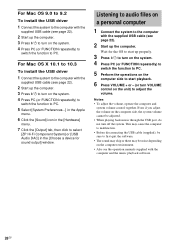
... to the computer with the computer and the music playback software. 26GB Listening to audio files on the computer environment. • Also see the operation manuals supplied with the supplied USB cable (see page 22). 2 Start up properly. 3 Press ?/1 to turn on the system. 4 Press PC (or FUNCTION repeatedly) to switch...
... to the computer with the computer and the music playback software. 26GB Listening to audio files on the computer environment. • Also see the operation manuals supplied with the supplied USB cable (see page 22). 2 Start up properly. 3 Press ?/1 to turn on the system. 4 Press PC (or FUNCTION repeatedly) to switch...