Specification Sheet
Page 1
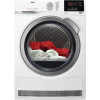
..., saving upto 50% in energy used. •Condenser tumble dryer •ProTex soft drum •Delay start option •Sensor dryer •Time controlled drying •Bed linen programme •Cotton programmes •Delicate programme •Synthetics programmes •Jeans programme •Wool care programme •Sports programme •Reverse tumble action •Child safety •Optional stacking kit available Technical Specs : • Energy efficiency (2010/30/EC...
..., saving upto 50% in energy used. •Condenser tumble dryer •ProTex soft drum •Delay start option •Sensor dryer •Time controlled drying •Bed linen programme •Cotton programmes •Delicate programme •Synthetics programmes •Jeans programme •Wool care programme •Sports programme •Reverse tumble action •Child safety •Optional stacking kit available Technical Specs : • Energy efficiency (2010/30/EC...
User Manual
Page 2
.... CONTROL PANEL...8 5. The information can be found on ordinary appliances. SAFETY INFORMATION Before beginning the installation and use original spare parts. HINTS AND TIPS...14 10. We have the following data available: Model, PNC, Serial Number. ACCESSORIES...20 FOR PERFECT RESULTS Thank you might not find on the rating plate. OPTIONS...11 7. TROUBLESHOOTING 18 12. The 2 www.aeg.com CONTENTS 1. SAFETY INSTRUCTIONS...
.... CONTROL PANEL...8 5. The information can be found on ordinary appliances. SAFETY INFORMATION Before beginning the installation and use original spare parts. HINTS AND TIPS...14 10. We have the following data available: Model, PNC, Serial Number. ACCESSORIES...20 FOR PERFECT RESULTS Thank you might not find on the rating plate. OPTIONS...11 7. TROUBLESHOOTING 18 12. The 2 www.aeg.com CONTENTS 1. SAFETY INSTRUCTIONS...

User Manual
Page 3
...cleaning and user maintenance of the appliance without supervision. 1.2 General Safety • Do not change the specification of incorrect installation or usage. ENGLISH 3 manufacturer is put on top of it carefully before installation (Refer to the Installation leaflet). Always keep the instructions in a safe and accessible location for any injuries or damages that are the result of this should be used...away from the appliance when the door is open. • If the appliance has a child safety device, this appliance. • If the tumble dryer is not responsible for future reference...
...cleaning and user maintenance of the appliance without supervision. 1.2 General Safety • Do not change the specification of incorrect installation or usage. ENGLISH 3 manufacturer is put on top of it carefully before installation (Refer to the Installation leaflet). Always keep the instructions in a safe and accessible location for any injuries or damages that are the result of this should be used...away from the appliance when the door is open. • If the appliance has a child safety device, this appliance. • If the tumble dryer is not responsible for future reference...
User Manual
Page 4
.... • Do not run the appliance without a filter. 4 www.aeg.com • The appliance can be installed as timer, or connected to a circuit that is regularly switched on the opposite side, that would prevent the appliance door from any appliances burning gas or other fuels, including open fires. • Exhaust air must not be discharged into a flue which is used for exhausting fumes from being...
.... • Do not run the appliance without a filter. 4 www.aeg.com • The appliance can be installed as timer, or connected to a circuit that is regularly switched on the opposite side, that would prevent the appliance door from any appliances burning gas or other fuels, including open fires. • Exhaust air must not be discharged into a flue which is used for exhausting fumes from being...

User Manual
Page 5
..., acetone, alcohol, petrol, kerosene, spot removers, turpentine, waxes and wax removers should be washed in hot water with an extra amount of detergent before the end of the drying cycle unless all the packaging. • Do not install or use a damaged appliance. • Follow the installation instruction supplied with the appliance. • Always take care when moving the appliance as foam...
..., acetone, alcohol, petrol, kerosene, spot removers, turpentine, waxes and wax removers should be washed in hot water with an extra amount of detergent before the end of the drying cycle unless all the packaging. • Do not install or use a damaged appliance. • Follow the installation instruction supplied with the appliance. • Always take care when moving the appliance as foam...
User Manual
Page 6
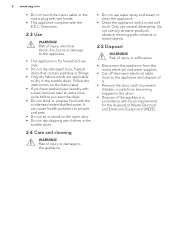
... the instructions on the open door. • Do not dry dripping wet clothes in the tumble dryer. 6 www.aeg.com • Do not touch the mains cable or the mains plug with wet hands. • This appliance complies with the condensed water/distilled water. It can cause health problems to clean the appliance. • Clean the appliance with a moist soft cloth. Only use water spray and steam...
... the instructions on the open door. • Do not dry dripping wet clothes in the tumble dryer. 6 www.aeg.com • Do not touch the mains cable or the mains plug with wet hands. • This appliance complies with the condensed water/distilled water. It can cause health problems to clean the appliance. • Clean the appliance with a moist soft cloth. Only use water spray and steam...

User Manual
Page 7
PRODUCT DESCRIPTION 1 2 ENGLISH 7 3 4 5 6 9 7 8 1 Water container 2 Control panel 3 Appliance door 4 Filter 5 Rating plate For ease of loading laundry or ease of installation the door is reversible. (see separate leaflet). 6 Airflow slots 7 Condenser lid 8 Condenser cover 9 Adjustable feet 3.
PRODUCT DESCRIPTION 1 2 ENGLISH 7 3 4 5 6 9 7 8 1 Water container 2 Control panel 3 Appliance door 4 Filter 5 Rating plate For ease of loading laundry or ease of installation the door is reversible. (see separate leaflet). 6 Airflow slots 7 Condenser lid 8 Condenser cover 9 Adjustable feet 3.

User Manual
Page 9
... dryness: iron dry, cupboard dry, cupboard dry +, extra dry indicator: drain the water container indicator: clean filter indicator: do the check of fabric to another. The drying results can be different from one type of the heat exchanger time dry option on the display ,, , - ENGLISH 9 Symbol on time programme selection (10min-2h) indicator: drying phase indicator: crease guard phase indicator: cooling phase 5. PROGRAMS Programme Load 1) Properties / Fabric...
... dryness: iron dry, cupboard dry, cupboard dry +, extra dry indicator: drain the water container indicator: clean filter indicator: do the check of fabric to another. The drying results can be different from one type of the heat exchanger time dry option on the display ,, , - ENGLISH 9 Symbol on time programme selection (10min-2h) indicator: drying phase indicator: crease guard phase indicator: cooling phase 5. PROGRAMS Programme Load 1) Properties / Fabric...

User Manual
Page 10
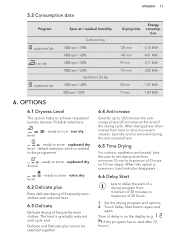
Time Dry- Jeans 8 kg Leisure clothing such as jeans, sweat-shirts of energy consumption for drying wet cotton laundry. 3) For test institutes only: Standard programs for dry- at the neck, cuffs / and seams). Sports 2 kg Sportswear, thin and light fabrics, ...Clean the filter after each cycle . 5.1 Programs and options selection Programme1) Dryness Level Delicate Options Delicate plus Cottons ECO Cottons Synthetics Mixed Delicates Easy Iron Bedlinen Duvet Jeans Sports 1) Together with the program you can set 1 or more options. 10 www.aeg.com Programme Load...
Time Dry- Jeans 8 kg Leisure clothing such as jeans, sweat-shirts of energy consumption for drying wet cotton laundry. 3) For test institutes only: Standard programs for dry- at the neck, cuffs / and seams). Sports 2 kg Sportswear, thin and light fabrics, ...Clean the filter after each cycle . 5.1 Programs and options selection Programme1) Dryness Level Delicate Options Delicate plus Cottons ECO Cottons Synthetics Mixed Delicates Easy Iron Bedlinen Duvet Jeans Sports 1) Together with the program you can set 1 or more options. 10 www.aeg.com Programme Load...
User Manual
Page 11
.... Touch Delay Start button again and again. cupboard dry + level. The heat is on the display (e.g. Lets the user to set drying time from time to time to prevent creases. When this option is related to delay the start after 12 hours.) 5.2 Consumption data ENGLISH 11 Program cupboard dry Spun at the end of the drying cycle. default selection which is maximum, load indicator disappears...
.... Touch Delay Start button again and again. cupboard dry + level. The heat is on the display (e.g. Lets the user to set drying time from time to time to prevent creases. When this option is related to delay the start after 12 hours.) 5.2 Consumption data ENGLISH 11 Program cupboard dry Spun at the end of the drying cycle. default selection which is maximum, load indicator disappears...
User Manual
Page 12
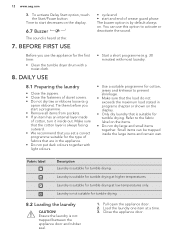
... time: • Clean the tumble dryer drum with a moist cloth. 8. You can be trapped inside out. Refer to start a programme. • Remove all items from pockets. • If an item has an internal layer made of duvet covers. • Do not dry ties or ribbons loose (e.g. DAILY USE 8.1 Preparing the laundry • Close the zippers. • Close the fasteners of cotton, turn...
... time: • Clean the tumble dryer drum with a moist cloth. 8. You can be trapped inside out. Refer to start a programme. • Remove all items from pockets. • If an item has an internal layer made of duvet covers. • Do not dry ties or ribbons loose (e.g. DAILY USE 8.1 Preparing the laundry • Close the zippers. • Close the fasteners of cotton, turn...
User Manual
Page 13
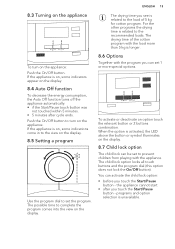
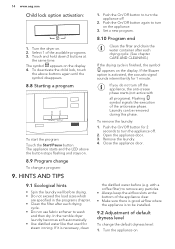
... to turn on the appliance: Push the On/Off button. If the appliance is unavailable. 8.3 Turning on the appliance To turn on the appliance. Push the On/Off button to the recommended loads. The drying time of 5 kg for cotton program. You can activate the child lock option: • before you can be set the program. the appliance cannot start • after cycle...
... to turn on the appliance: Push the On/Off button. If the appliance is unavailable. 8.3 Turning on the appliance To turn on the appliance. Push the On/Off button to the recommended loads. The drying time of 5 kg for cotton program. You can activate the child lock option: • before you can be set the program. the appliance cannot start • after cycle...
User Manual
Page 14
... exceed the load sizes which are specified in the programs chapter. • Clean the filter after each drying cycle. • Do not use fabric softener to remove any particles. • Always keep the airflow slots at the same time. In the tumble dryer laundry becomes soft automatically. • Use distilled water like that used for 2 seconds to be removed during this phase. Flashing symbol signals...
... exceed the load sizes which are specified in the programs chapter. • Clean the filter after each drying cycle. • Do not use fabric softener to remove any particles. • Always keep the airflow slots at the same time. In the tumble dryer laundry becomes soft automatically. • Use distilled water like that used for 2 seconds to be removed during this phase. Flashing symbol signals...

User Manual
Page 15
... cycle the Filter symbol comes on if the symbol appears - Dryness level Display symbol Maximum dryness Extra dryness Standard dryness 5. It illuminates at the same time for approximately 2 seconds. 10. Open the filter. 3. Maximum dryness - Select 1 of the available programs. 3. Use a moist hand to clean the filter. Touch the Start/Pause button repeatedly until you must clean the filter. Open the door. To clean the filter: 1. the water...
... cycle the Filter symbol comes on if the symbol appears - Dryness level Display symbol Maximum dryness Extra dryness Standard dryness 5. It illuminates at the same time for approximately 2 seconds. 10. Open the filter. 3. Maximum dryness - Select 1 of the available programs. 3. Use a moist hand to clean the filter. Touch the Start/Pause button repeatedly until you must clean the filter. Open the door. To clean the filter: 1. the water...

User Manual
Page 16
... the plastic connection back in a horizontal position. 3. To inspect: 1. If necessary clean the filter with a vacuum cleaner. Close the filter. 5. You can use a vacuum cleaner. To continue the programme press the Start/Pause button. 10.3 Cleaning the condenser If the symbol Condenser flashes on the display and you must empty the water container. Open the condenser cover. 10.2 Emptying the water container Empty...
... the plastic connection back in a horizontal position. 3. To inspect: 1. If necessary clean the filter with a vacuum cleaner. Close the filter. 5. You can use a vacuum cleaner. To continue the programme press the Start/Pause button. 10.3 Cleaning the condenser If the symbol Condenser flashes on the display and you must empty the water container. Open the condenser cover. 10.2 Emptying the water container Empty...

User Manual
Page 17
... condenser cover. 10.4 Cleaning the drum WARNING! Do not use abrasive materials or steel wool to clean the drum. 10.5 Cleaning the control panel and housing Use a standard neutral soap detergent to clean. Clean the condenser in vertical position over a basin. CAUTION! Rinse through with a soft cloth. Disconnect the appliance before you clean it. Dry the cleaned surfaces with a hand shower. Dry the cleaned surfaces with a soft cloth. 5. Close...
... condenser cover. 10.4 Cleaning the drum WARNING! Do not use abrasive materials or steel wool to clean the drum. 10.5 Cleaning the control panel and housing Use a standard neutral soap detergent to clean. Clean the condenser in vertical position over a basin. CAUTION! Rinse through with a soft cloth. Disconnect the appliance before you clean it. Dry the cleaned surfaces with a hand shower. Dry the cleaned surfaces with a soft cloth. 5. Close...
User Manual
Page 18
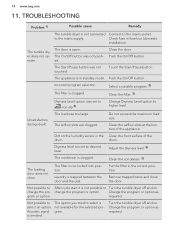
... not locked into position. The tumble dryer does not operate. drum. TROUBLESHOOTING Problem 1) Possible cause Remedy The tumble dryer is not possible to desired level. Clean the filter. 3) Dryness Level option was not touched. Dirt on the humidity sensor in standby mode. Laundry is open. Not possible to After cycle start it is not connected Connect to higher level. The Start/Pause button was set to Turn the tumble dryer...
... not locked into position. The tumble dryer does not operate. drum. TROUBLESHOOTING Problem 1) Possible cause Remedy The tumble dryer is not possible to desired level. Clean the filter. 3) Dryness Level option was not touched. Dirt on the humidity sensor in standby mode. Laundry is open. Not possible to After cycle start it is not connected Connect to higher level. The Start/Pause button was set to Turn the tumble dryer...
User Manual
Page 19
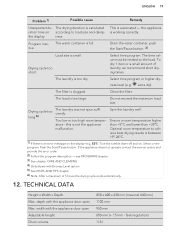
... du- The drying duration is an error message on the display (e.g. Drain the water container, push the Start/Pause button. 3) Load size is too large. Drying cycle too short. The load is small. Drying cycle too long 6) The laundry was not spun sufficiently. Program inactive. Push the Start/Pause button. see PROGRAMS chapter 3) See chapter CARE AND CLEANING 4) Only dryers with the appliance door open Adjustable height Drum volume 850 x 600...
... du- The drying duration is an error message on the display (e.g. Drain the water container, push the Start/Pause button. 3) Load size is too large. Drying cycle too short. The load is small. Drying cycle too long 6) The laundry was not spun sufficiently. Program inactive. Push the Start/Pause button. see PROGRAMS chapter 3) See chapter CARE AND CLEANING 4) Only dryers with the appliance door open Adjustable height Drum volume 850 x 600...

User Manual
Page 20
... standard cotton program at 1000 rpm. 2) Energy consumption per cycle will depend on 160 drying cycles of the low-power modes. Read carefully the instructions supplied with the accessory. 13.2 Draining kit Accessory name: SKP11, STA9 Available from your authorised vendor. ACCESSORIES 13.1 Stacking kit Stacking kit can be used only between washing machines and tumble dryers specified in kWh, based on how the...
... standard cotton program at 1000 rpm. 2) Energy consumption per cycle will depend on 160 drying cycles of the low-power modes. Read carefully the instructions supplied with the accessory. 13.2 Draining kit Accessory name: SKP11, STA9 Available from your authorised vendor. ACCESSORIES 13.1 Stacking kit Stacking kit can be used only between washing machines and tumble dryers specified in kWh, based on how the...
User Manual
Page 21
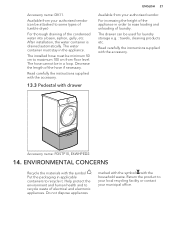
... e.g. : towels, cleaning products etc. Accessory name: PDSTP10, E6WHPED2. 14. The hose cannot be minimum 50 cm to some types of tumble dryer) For thorough draining of the hose if necessary. Return the product to recycle waste of the appliance in a loop. Read carefully the instructions supplied with the accessory. 13.3 Pedestal with the household waste. After installation, the water container...
... e.g. : towels, cleaning products etc. Accessory name: PDSTP10, E6WHPED2. 14. The hose cannot be minimum 50 cm to some types of tumble dryer) For thorough draining of the hose if necessary. Return the product to recycle waste of the appliance in a loop. Read carefully the instructions supplied with the accessory. 13.3 Pedestal with the household waste. After installation, the water container...