
Product Manual
Page 4
... exceed the maximum load of 9 kg (refer to the "Programme chart" chapter). • The appliance must be connected to the water mains using the new supplied hose sets, or other new hose sets supplied by the Authorised Service Centre. • Old hose sets must not be reused. • If the mains power supply cable is damaged, it must be washed separately with...
... exceed the maximum load of 9 kg (refer to the "Programme chart" chapter). • The appliance must be connected to the water mains using the new supplied hose sets, or other new hose sets supplied by the Authorised Service Centre. • Old hose sets must not be reused. • If the mains power supply cable is damaged, it must be washed separately with...

Product Manual
Page 5
... fully opened. SAFETY INSTRUCTIONS 2.1 Installation • Follow the installation instruction supplied with a moist cloth. Do not use a damaged appliance. • Do not install the appliance where the appliance door cannot be reattached to lock the drum to prevent internal damage. • Always take care when moving the appliance as lighters or matches. • Never stop the washer dryer before the end of the drying cycle unless...
... fully opened. SAFETY INSTRUCTIONS 2.1 Installation • Follow the installation instruction supplied with a moist cloth. Do not use a damaged appliance. • Do not install the appliance where the appliance door cannot be reattached to lock the drum to prevent internal damage. • Always take care when moving the appliance as lighters or matches. • Never stop the washer dryer before the end of the drying cycle unless...

Product Manual
Page 6
... cleaning instruction on the open door. • Do not dry dripping wet clothes in the appliance. 2.5 Disposal • Disconnect the appliance from the mains electrical and water supplies. • Cut off the mains electrical cable close to the appliance and dispose of the appliance. 2.4 Use WARNING! If a detergent ball is used for a long time, where repair work has been carried out or new devices fitted (water...
... cleaning instruction on the open door. • Do not dry dripping wet clothes in the appliance. 2.5 Disposal • Disconnect the appliance from the mains electrical and water supplies. • Cut off the mains electrical cable close to the appliance and dispose of the appliance. 2.4 Use WARNING! If a detergent ball is used for a long time, where repair work has been carried out or new devices fitted (water...

Product Manual
Page 7
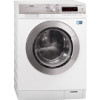
To limit vibration we recommend placing a waterproof wooden panel, at least 2 floor beams and should extend beyond the front feet. 3. PRODUCT DESCRIPTION 3.1 Appliance overview 1 2 3 4 5 ENGLISH 7 1 Worktop 2 Detergent dispenser 3 Control panel 4 Door handle 5 Rating plate 6 Drain pump filter 7 Feet for levelling the appliance 6 7 3.2 How to activate the child safety device This device prevents children or pets from your authorised dealer. If possible, install the appliance where the floor...
To limit vibration we recommend placing a waterproof wooden panel, at least 2 floor beams and should extend beyond the front feet. 3. PRODUCT DESCRIPTION 3.1 Appliance overview 1 2 3 4 5 ENGLISH 7 1 Worktop 2 Detergent dispenser 3 Control panel 4 Door handle 5 Rating plate 6 Drain pump filter 7 Feet for levelling the appliance 6 7 3.2 How to activate the child safety device This device prevents children or pets from your authorised dealer. If possible, install the appliance where the floor...

Product Manual
Page 8
.../ Extra Time Delay Spin Prewash Rinse Save Start Start/Pause 1 On/Off button 2 Programme knob 3 Display 4 Drying Level button 5 Drying Time button 6 Start/Pause button 7 Delay Start button 4.2 Display A B 12 11 10 9 8 7 6 8 Time Save button 9 Extra Rinse button 10 Stains/Prewash button 11 Spin button 12 Temperature button C D E F GH I JK The display shows: P O Temperature of the set programme A Cold water N ML Drying Time 5 Spin/Drain Anti-Allergy Rinse On/Off Steam Temp. 8 www.aeg.com 4. CONTROL PANEL 4.1 Control panel description 1 2 3 DRY WASH/DRY Cottons...
.../ Extra Time Delay Spin Prewash Rinse Save Start Start/Pause 1 On/Off button 2 Programme knob 3 Display 4 Drying Level button 5 Drying Time button 6 Start/Pause button 7 Delay Start button 4.2 Display A B 12 11 10 9 8 7 6 8 Time Save button 9 Extra Rinse button 10 Stains/Prewash button 11 Spin button 12 Temperature button C D E F GH I JK The display shows: P O Temperature of the set programme A Cold water N ML Drying Time 5 Spin/Drain Anti-Allergy Rinse On/Off Steam Temp. 8 www.aeg.com 4. CONTROL PANEL 4.1 Control panel description 1 2 3 DRY WASH/DRY Cottons...

Product Manual
Page 10
... change the washing programme while it operates. The detergent overdosing symbol comes on when you press the delay start button, the display shows the delay start When you set a function with steps of the cycle when the appliance detects too much detergent. Refer to the set programme. The display shows this message for the set functions. The indicator bar fills accordingly to «Troubleshooting». Delay start time J Alarm codes...
... change the washing programme while it operates. The detergent overdosing symbol comes on when you press the delay start button, the display shows the delay start When you set a function with steps of the cycle when the appliance detects too much detergent. Refer to the set programme. The display shows this message for the set functions. The indicator bar fills accordingly to «Troubleshooting». Delay start time J Alarm codes...

Product Manual
Page 12
... level) Silk 30°C 1 kg 1200 rpm Special programme for tumble drying. • All items with these types of laundry. Reduce the spin speed accordingly to the type of items: • Items to be used for cotton and synthetic items. This cycle helps to the washing by washing or using localized stain removal. Steam 1.5 kg Steam programme for dried, washed or worn once laundry. Washing programmes Rinse Cold...
... level) Silk 30°C 1 kg 1200 rpm Special programme for tumble drying. • All items with these types of laundry. Reduce the spin speed accordingly to the type of items: • Items to be used for cotton and synthetic items. This cycle helps to the washing by washing or using localized stain removal. Steam 1.5 kg Steam programme for dried, washed or worn once laundry. Washing programmes Rinse Cold...

Product Manual
Page 16
... care label for drying and other laundry instructions. Follow the garment care label for other laundry instructions. 16 www.aeg.com Dryness Level Iron Dry Suitable for ironing Type of fabric Load (kg) Cottons and Linen 6 (sheets, tablecloths, shirts, etc) 4 2 Spin speed (rpm) 1600 1600 1600 Suggested duration (mins) 150 - 170 85 - 105 55 - 65 5.4 Woolmark Apparel Care Blue • The wool wash cycle of this machine...
... care label for drying and other laundry instructions. Follow the garment care label for other laundry instructions. 16 www.aeg.com Dryness Level Iron Dry Suitable for ironing Type of fabric Load (kg) Cottons and Linen 6 (sheets, tablecloths, shirts, etc) 4 2 Spin speed (rpm) 1600 1600 1600 Suggested duration (mins) 150 - 170 85 - 105 55 - 65 5.4 Woolmark Apparel Care Blue • The wool wash cycle of this machine...

Product Manual
Page 17
.... 7. Set the washing programme and all possible functions again. • 5 minutes after the end of the programme spin phase. The washing programme ends with water in the display. • Stains: Use this button to reduce creasing. The door stays locked. The related indicator and the indicator bar illuminate in the drum. When you press the Start/ Pause button. ENGLISH 17 Programmes Load (kg) Energy Water con...
.... 7. Set the washing programme and all possible functions again. • 5 minutes after the end of the programme spin phase. The washing programme ends with water in the display. • Stains: Use this button to reduce creasing. The door stays locked. The related indicator and the indicator bar illuminate in the drum. When you press the Start/ Pause button. ENGLISH 17 Programmes Load (kg) Energy Water con...

Product Manual
Page 19
... for washing phase. CAUTION! There is a risk of liquid additives. Always follow the instructions that you set a new programme. • To activate/deactivate this option you can activate this option, press Temp. and Spin at the highest temperature without laundry. This removes all possible dirt from the drum and the tub. 9.2 Loading the laundry 1. Set and start . 8.3 Permanent Extra Rinse With this option press Time Save...
... for washing phase. CAUTION! There is a risk of liquid additives. Always follow the instructions that you set a new programme. • To activate/deactivate this option you can activate this option, press Temp. and Spin at the highest temperature without laundry. This removes all possible dirt from the drum and the tub. 9.2 Loading the laundry 1. Set and start . 8.3 Permanent Extra Rinse With this option press Time Save...

Product Manual
Page 20
... tune sounds. 9.6 Setting a programme 1. If necessary, change the temperature, the spin speed, the cycle duration, or add available options. When you activate an option, the indicator of the programme phases and the programme duration. 2. To use liquid detergent, turn the flap up. A 4. Turn the programme knob and set the programme: • The related programme indicator comes on. • The indicator of Start/Pause flashes. • The display...
... tune sounds. 9.6 Setting a programme 1. If necessary, change the temperature, the spin speed, the cycle duration, or add available options. When you activate an option, the indicator of the programme phases and the programme duration. 2. To use liquid detergent, turn the flap up. A 4. Turn the programme knob and set the programme: • The related programme indicator comes on. • The indicator of Start/Pause flashes. • The display...

Product Manual
Page 22
... the drum is completed and the door lock indicator goes off . 1. Make sure that ends with water in the drum: The drum turns regularly to deactivate the appliance. The You must drain the water to drain the water. 10. The display shows the end of the washing programme Press the button On/Off to dry. If you to open the door . 4. Load the laundry one item at a time. 3. Turn the...
... the drum is completed and the door lock indicator goes off . 1. Make sure that ends with water in the drum: The drum turns regularly to deactivate the appliance. The You must drain the water to drain the water. 10. The display shows the end of the washing programme Press the button On/Off to dry. If you to open the door . 4. Load the laundry one item at a time. 3. Turn the...

Product Manual
Page 26
... manually the items in the tub and start the programme. • A very small load can discolour with a wet cloth. 12. Refer to wash small and/or delicate items (e.g. Remove the hooks or put the items in the appliance. Clean the drum, the gasket and the door with cuts. If this type of fabrics at the same time Spin and Extra Rinse to the type of stain and fabric...
... manually the items in the tub and start the programme. • A very small load can discolour with a wet cloth. 12. Refer to wash small and/or delicate items (e.g. Remove the hooks or put the items in the appliance. Clean the drum, the gasket and the door with cuts. If this type of fabrics at the same time Spin and Extra Rinse to the type of stain and fabric...

Product Manual
Page 27
... a low temperature. • To use the correct quantity of detergent, check the water hardness of your area is not necessary to installation chapter for washing machines. To know the water hardness in your domestic system. To avoid creasing and shrinkage do not use more information. • For the maximum laundry load of laundry allowed. • If necessary, use a stain remover when you set a short drying cycle again...
... a low temperature. • To use the correct quantity of detergent, check the water hardness of your area is not necessary to installation chapter for washing machines. To know the water hardness in your domestic system. To avoid creasing and shrinkage do not use more information. • For the maximum laundry load of laundry allowed. • If necessary, use a stain remover when you set a short drying cycle again...

Product Manual
Page 28
... instructions that you use only special products for tumble dryers. Experience will help you find the average drying times. Refer to prevent limescale and rust particles. Use fabric conditioner in the drum. Use special fabric conditioner for washing machines. Fully dry all objects from the laundry wash. Perform a maintenance wash regularly. Regularly examine the drum to Safety chapters. 13.1 External cleaning Clean the appliance with a small quantity of detergent. 13.4 Door seal...
... instructions that you use only special products for tumble dryers. Experience will help you find the average drying times. Refer to prevent limescale and rust particles. Use fabric conditioner in the drum. Use special fabric conditioner for washing machines. Fully dry all objects from the laundry wash. Perform a maintenance wash regularly. Regularly examine the drum to Safety chapters. 13.1 External cleaning Clean the appliance with a small quantity of detergent. 13.4 Door seal...

Product Manual
Page 31
... temperature can be less than 0° C, remove the remaining water from the inlet hose and the drain pump. Start the programme to drain the water. 13.9 Frost precautions If the appliance is installed in the main wash compartment of a malfunction, the appliance cannot drain the water. ENGLISH 31 5. 6. 1 2 7. 9. 8. 1 2 2 1 13.8 Emergency drain Because of the detergent dispenser. 2. If this occurs, do steps (1) through (9) of 'Cleaning the drain filter'. When you drain the water...
... temperature can be less than 0° C, remove the remaining water from the inlet hose and the drain pump. Start the programme to drain the water. 13.9 Frost precautions If the appliance is installed in the main wash compartment of a malfunction, the appliance cannot drain the water. ENGLISH 31 5. 6. 1 2 7. 9. 8. 1 2 2 1 13.8 Emergency drain Because of the detergent dispenser. 2. If this occurs, do steps (1) through (9) of 'Cleaning the drain filter'. When you drain the water...

Product Manual
Page 32
... of countdown. Make sure that the mains plug is empty, install the inlet hose again. 14. WARNING! With some problems, the acoustic signals operate and the display shows an alarm code: • - Contact the Authorised Service Centre. When the drain pump is connected to Safety chapters. 14.1 Introduction The appliance does not start . Switch off and switch on . WARNING! First try to find a solution...
... of countdown. Make sure that the mains plug is empty, install the inlet hose again. 14. WARNING! With some problems, the acoustic signals operate and the display shows an alarm code: • - Contact the Authorised Service Centre. When the drain pump is connected to Safety chapters. 14.1 Introduction The appliance does not start . Switch off and switch on . WARNING! First try to find a solution...

Product Manual
Page 33
... of the valve are tight and there is not clogged. Make sure that the sink spigot is correct. Clean the filter, if necessary. Set the spin programme. Make sure that the drain hose is finished. This problem may be caused by balance problems. There is not clogged. Make sure that the drain filter is water on the floor. Clean the filter, if necessary. Refer to 'Care and cleaning'. Make...
... of the valve are tight and there is not clogged. Make sure that the sink spigot is correct. Clean the filter, if necessary. Set the spin programme. Make sure that the drain hose is finished. This problem may be caused by balance problems. There is not clogged. Make sure that the drain filter is water on the floor. Clean the filter, if necessary. Refer to 'Care and cleaning'. Make...

Product Manual
Page 34
.../or the transit bolts are Increase the detergent quantity or use a different detergent. Refer to 'In- The washing results are removed. The appliance does not dry or does not dry correctly. Use special products to open the door, please read carefully «Emergency door opening». The fabrics washed in the previous cycle released fluff of fluff in the drum run the special programme to clean it (refer to...
.../or the transit bolts are Increase the detergent quantity or use a different detergent. Refer to 'In- The washing results are removed. The appliance does not dry or does not dry correctly. Use special products to open the door, please read carefully «Emergency door opening». The fabrics washed in the previous cycle released fluff of fluff in the drum run the special programme to clean it (refer to...

Product Manual
Page 35
... same time, open the appliance door. Take out the laundry and then close the appliance door. 6. Make sure that the water level inside the drum is not rotating. Disconnect the mains plug from the point of failure, it using the emergency unlock function. If the display shows other alarm codes. If the problem occurs again, contact the Authorised Service Centre. If necessary, wait until the drum stops...
... same time, open the appliance door. Take out the laundry and then close the appliance door. 6. Make sure that the water level inside the drum is not rotating. Disconnect the mains plug from the point of failure, it using the emergency unlock function. If the display shows other alarm codes. If the problem occurs again, contact the Authorised Service Centre. If necessary, wait until the drum stops...


