Specification Sheet
Page 1
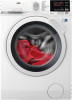
... energy efficiency • A class wash performance Just an hour for sensitive care Our DualSense Technology tailors the temperature and motion of time with DualSense Technology tailors the temperature and drum motion to different fabrics and adjusts programmes to -wear results on time, energy and water - Meaning ready-to the specific load. Everything from an excellent washer dryer. Enabling convenient and economical cycles - Ensuring they stand the test of the drum...
... energy efficiency • A class wash performance Just an hour for sensitive care Our DualSense Technology tailors the temperature and motion of time with DualSense Technology tailors the temperature and drum motion to different fabrics and adjusts programmes to -wear results on time, energy and water - Meaning ready-to the specific load. Everything from an excellent washer dryer. Enabling convenient and economical cycles - Ensuring they stand the test of the drum...
Specification Sheet
Page 2
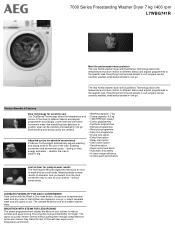
... Permanent Magnet 51 76 60 Freestanding 847x597x551 575 4 adj feet 1.8 130 140 Connected Load Voltage Required Fuse Frequency Porthole Type Woolmark Program list ProdPartCode 2200 230-240 13 50 P1W + Turbine WOOLMARK BLUE WASH&DRY Eco 40-60, Cottons, Synthetics, Delicates, Wool\Handwash, OutDoor, NonStop 60min, Steam, Rinse, Spin/Drain All Open 7000 Series Freestanding Washer Dryer 7 kg 1400 rpm L7WBG741R Product Specification Series Energy class Wash Energy Rating Energy consumption Annual (kWh...
... Permanent Magnet 51 76 60 Freestanding 847x597x551 575 4 adj feet 1.8 130 140 Connected Load Voltage Required Fuse Frequency Porthole Type Woolmark Program list ProdPartCode 2200 230-240 13 50 P1W + Turbine WOOLMARK BLUE WASH&DRY Eco 40-60, Cottons, Synthetics, Delicates, Wool\Handwash, OutDoor, NonStop 60min, Steam, Rinse, Spin/Drain All Open 7000 Series Freestanding Washer Dryer 7 kg 1400 rpm L7WBG741R Product Specification Series Energy class Wash Energy Rating Energy consumption Annual (kWh...
User Manual
Page 2
...: www.aeg.com/shop CUSTOMER CARE AND SERVICE Always use original spare parts. DIAL AND BUTTONS 15 7. DAILY USE - FLUFF IN THE FABRICS 30 14. CONSUMPTION VALUES 41 18. Warning / Caution-Safety information General information and tips Environmental information Subject to change without notice. SAFETY INFORMATION 3 2. SAFETY INSTRUCTIONS 6 3. INSTALLATION...7 4. CONTROL PANEL...13 6. PROGRAMMES...16 8. WASHING ONLY 23 11. DAILY USE - HINTS AND TIPS...31 15. TROUBLESHOOTING 37...
...: www.aeg.com/shop CUSTOMER CARE AND SERVICE Always use original spare parts. DIAL AND BUTTONS 15 7. DAILY USE - FLUFF IN THE FABRICS 30 14. CONSUMPTION VALUES 41 18. Warning / Caution-Safety information General information and tips Environmental information Subject to change without notice. SAFETY INFORMATION 3 2. SAFETY INSTRUCTIONS 6 3. INSTALLATION...7 4. CONTROL PANEL...13 6. PROGRAMMES...16 8. WASHING ONLY 23 11. DAILY USE - HINTS AND TIPS...31 15. TROUBLESHOOTING 37...
User Manual
Page 5
... not be dried in the washer dryer. • Fabric softeners, or similar products, should only be used as specified by the product manufacturer's instructions. • Remove all objects from items that could be a source of fire ignition such as lighters or matches. • Never stop the washer dryer before the end of the drying cycle unless all items are quickly removed and separated so that...
... not be dried in the washer dryer. • Fabric softeners, or similar products, should only be used as specified by the product manufacturer's instructions. • Remove all objects from items that could be a source of fire ignition such as lighters or matches. • Never stop the washer dryer before the end of the drying cycle unless all items are quickly removed and separated so that...
User Manual
Page 6
... appliance. 6 www.aeg.com • Clean the appliance with wet hands. • UK and Ireland only. Always pull the mains plug. • Do not touch the mains cable or the mains plug with a moist cloth. Directives. 2.3 Water Connection • Do not cause damage to the water hoses. • Before connection to new pipes, pipes not used for a long time, where repair work has been...
... appliance. 6 www.aeg.com • Clean the appliance with wet hands. • UK and Ireland only. Always pull the mains plug. • Do not touch the mains cable or the mains plug with a moist cloth. Directives. 2.3 Water Connection • Do not cause damage to the water hoses. • Before connection to new pipes, pipes not used for a long time, where repair work has been...
User Manual
Page 7
... padding or fillings. • If laundry has been washed with a stain remover, carry out an additional rinse cycle before starting a drying cycle. • Make sure that all the packaging and the transit bolts before starting a drying programme. - Follow the cleaning instruction on the appliance. • Do not touch the glass door while a programme is used, remove it . • Remove the door catch to dry in , near...
... padding or fillings. • If laundry has been washed with a stain remover, carry out an additional rinse cycle before starting a drying cycle. • Make sure that all the packaging and the transit bolts before starting a drying programme. - Follow the cleaning instruction on the appliance. • Do not touch the glass door while a programme is used, remove it . • Remove the door catch to dry in , near...
User Manual
Page 8
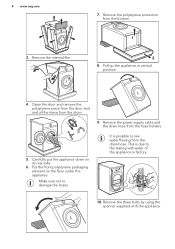
Open the door and remove the polystyrene piece from the door seal and all the items from the hose holders. 5. Make sure not to see water flowing from the bottom. 1 2 8. Pull up the appliance in factory. 10. Remove the power supply cable and the drain hose from the drum. 9. It is due to the testing with the appliance. Carefully put the appliance down on the...
Open the door and remove the polystyrene piece from the door seal and all the items from the hose holders. 5. Make sure not to see water flowing from the bottom. 1 2 8. Pull up the appliance in factory. 10. Remove the power supply cable and the drain hose from the drum. 9. It is due to the testing with the appliance. Carefully put the appliance down on the...

User Manual
Page 9
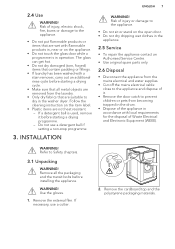
... appliance when in chapter 'Accessories'. Install the appliance on the washing machine, use the accessories described in operation. Make sure that the appliance does not touch the wall or other units. When the machine is installed on a plinth or if a washer dryer is more stable. 3.3 Positioning and levelling 1. To limit vibration we recommend placing a waterproof wooden panel, at least 2 floor beams and...
... appliance when in chapter 'Accessories'. Install the appliance on the washing machine, use the accessories described in operation. Make sure that the appliance does not touch the wall or other units. When the machine is installed on a plinth or if a washer dryer is more stable. 3.3 Positioning and levelling 1. To limit vibration we recommend placing a waterproof wooden panel, at least 2 floor beams and...

User Manual
Page 13
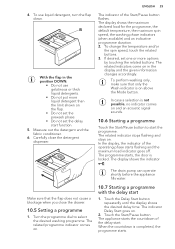
... the laundry load estimation. CONTROL PANEL 5.1 Control panel description 1 ENGLISH 13 2 3 Programme Cottons Cottons Eco Synthetics Delicates Wool/Handwash Outdoor NonStop 60min Steam Rinse Spin/Drain Time Drying Auto Drying 4 Stains Wash 5 Prewash Dry Temp. Spin Stains/ Prewash Mode On/O Quick Wash Delay Start Start/Pause 12 11 10 9 8 7 6 1 Programme dial 2 Display 3 Drying time touch button (Time Drying) 4 Drying level touch button (Auto Drying) 5 Washing and drying mode touch button (Mode) • Wash • Dry 5.2 Display 6 Start and pause touch button (Start...
... the laundry load estimation. CONTROL PANEL 5.1 Control panel description 1 ENGLISH 13 2 3 Programme Cottons Cottons Eco Synthetics Delicates Wool/Handwash Outdoor NonStop 60min Steam Rinse Spin/Drain Time Drying Auto Drying 4 Stains Wash 5 Prewash Dry Temp. Spin Stains/ Prewash Mode On/O Quick Wash Delay Start Start/Pause 12 11 10 9 8 7 6 1 Programme dial 2 Display 3 Drying time touch button (Time Drying) 4 Drying level touch button (Auto Drying) 5 Washing and drying mode touch button (Mode) • Wash • Dry 5.2 Display 6 Start and pause touch button (Start...
User Manual
Page 20
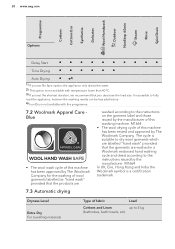
... shortest duration, we recommend that the products are washed in a Woolmark endorsed hand washing cycle and dried according to 4 kg (bathrobes, bath towels, etc) M1664 • The wool drying cycle of fabric Load Cottons and Linen up to the instructions issued by The Woolmark Company. Dryness Level Extra Dry For towelling materials Type of this washing machine. M1664 In UK, Eire, Hong...
... shortest duration, we recommend that the products are washed in a Woolmark endorsed hand washing cycle and dried according to 4 kg (bathrobes, bath towels, etc) M1664 • The wool drying cycle of fabric Load Cottons and Linen up to the instructions issued by The Woolmark Company. Dryness Level Extra Dry For towelling materials Type of this washing machine. M1664 In UK, Eire, Hong...
User Manual
Page 23
....2 Loading the laundry 1. The display shows the maximum load, the default temperature, the maximum spin speed, the indicators of the Start/Pause button starts flashing. Shake the items before first use you set on above the Mode button. Make sure that the electrical power is available and the water tap is on Cotton programme and only the indicator Wash is open. 3. WASHING ONLY WARNING! Close the door firmly. button and the Spin button once...
....2 Loading the laundry 1. The display shows the maximum load, the default temperature, the maximum spin speed, the indicators of the Start/Pause button starts flashing. Shake the items before first use you set on above the Mode button. Make sure that the electrical power is available and the water tap is on Cotton programme and only the indicator Wash is open. 3. WASHING ONLY WARNING! Close the door firmly. button and the Spin button once...
User Manual
Page 25
... Delay Start goes on above the Mode button. When the countdown is locked. To change the temperature and/or the spin speed, touch the related buttons. 3. Touch the Start/Pause button. The appliance starts the countdown of the operating phase starts flashing and the maximum load indicator goes off. B With the flap in the display and the given information changes accordingly. If desired, set one or more liquid detergent than...
... Delay Start goes on above the Mode button. When the countdown is locked. To change the temperature and/or the spin speed, touch the related buttons. 3. Touch the Start/Pause button. The appliance starts the countdown of the operating phase starts flashing and the maximum load indicator goes off. B With the flap in the display and the given information changes accordingly. If desired, set one or more liquid detergent than...
User Manual
Page 28
... temperature and spin. The display also shows the maximum recommended load for cotton and synthetic items; Now, you touch the Start/ Pause button. Load the laundry one item at a time. 3. If necessary, change them according to activate also the drying function. items; Cupboard dry: for washing phase. 5. 28 www.aeg.com • You do not use the appliance for some seconds to drain the water...
... temperature and spin. The display also shows the maximum recommended load for cotton and synthetic items; Now, you touch the Start/ Pause button. Load the laundry one item at a time. 3. If necessary, change them according to activate also the drying function. items; Cupboard dry: for washing phase. 5. 28 www.aeg.com • You do not use the appliance for some seconds to drain the water...
User Manual
Page 29
... appliance stops automatically. • The acoustic signals operate (if they are active). • In the display comes on. • The indicator of both cycles washing and drying, calculated on the Mode button twice to Safety chapters. DAILY USE - This appliance is empty. Turn the programme dial to drying 1. Tap on a default load size. appear on this button the time value increases by using less energy and...
... appliance stops automatically. • The acoustic signals operate (if they are active). • In the display comes on. • The indicator of both cycles washing and drying, calculated on the Mode button twice to Safety chapters. DAILY USE - This appliance is empty. Turn the programme dial to drying 1. Tap on a default load size. appear on this button the time value increases by using less energy and...
User Manual
Page 30
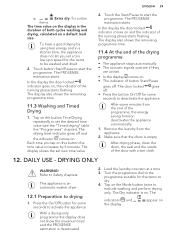
... dryness level. The display also shows the remaining programme time. 12.4 At the end of the drying programme • The appliance stops automatically. • The acoustic signals operate (if they are active). • In the display comes on. • The indicator of the door with technical fabrics. The door locked goes off . After drying phase, clean the drum, the seal and the inside of button Start/Pause...
... dryness level. The display also shows the remaining programme time. 12.4 At the end of the drying programme • The appliance stops automatically. • The acoustic signals operate (if they are active). • In the display comes on. • The indicator of the door with technical fabrics. The door locked goes off . After drying phase, clean the drum, the seal and the inside of button Start/Pause...
User Manual
Page 31
.... 14.1 The laundry load • Divide the laundry into: white, coloured, synthetics, delicates and wool. • Follow the washing instructions on packaging of fabric, excluding delicate. WARNING! Special stain removers are washed the first time. • To clean the drain filter. • After the drying phase, clean the empty drum, the gasket and the door with the spin phase leading to start the programme. To remove the fluff inside...
.... 14.1 The laundry load • Divide the laundry into: white, coloured, synthetics, delicates and wool. • Follow the washing instructions on packaging of fabric, excluding delicate. WARNING! Special stain removers are washed the first time. • To clean the drain filter. • After the drying phase, clean the empty drum, the gasket and the door with the spin phase leading to start the programme. To remove the fluff inside...
User Manual
Page 32
... The drying time can change depending on the packaging of the product. 14.6 Prepare the drying cycle • Open the water tap. • Check if the drain hose is not necessary to use a water softener for washing machines. 32 www.aeg.com other treatments without the prewash phase to wash laundry with normal soil. • Always start a washing programme with a low temperature. • To use the correct quantity of detergent, check the water hardness of...
... The drying time can change depending on the packaging of the product. 14.6 Prepare the drying cycle • Open the water tap. • Check if the drain hose is not necessary to use a water softener for washing machines. 32 www.aeg.com other treatments without the prewash phase to wash laundry with normal soil. • Always start a washing programme with a low temperature. • To use the correct quantity of detergent, check the water hardness of...
User Manual
Page 37
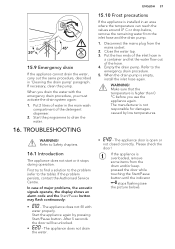
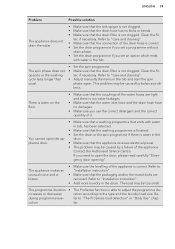
... inlet hose in 'Cleaning the drain pump' paragraph. WARNING! The appliance door is installed in the main wash compartment of major problems, the acoustic signals operate, the display shows an alarm code and the Start/Pause button may flash continuously: • - Start the programme to Safety chapters. 16.1 Introduction The appliance does not start or it stops during operation. If the problem persists, contact the Authorised Service Centre. If necessary, clean the pump...
... inlet hose in 'Cleaning the drain pump' paragraph. WARNING! The appliance door is installed in the main wash compartment of major problems, the acoustic signals operate, the display shows an alarm code and the Start/Pause button may flash continuously: • - Start the programme to Safety chapters. 16.1 Introduction The appliance does not start or it stops during operation. If the problem persists, contact the Authorised Service Centre. If necessary, clean the pump...
User Manual
Page 39
... an unusual noise and vibrates. • Make sure the levelling of the drain hose is correct. • Set the drain programme if you set an option which ends with water in tub, has been selected. • Make sure that ends with water in the tub. fer to "Care and cleaning". • Adjust manually the items in "Daily Use" chap- The spin phase does not operate or the washing cycle lasts...
... an unusual noise and vibrates. • Make sure the levelling of the drain hose is correct. • Set the drain programme if you set an option which ends with water in tub, has been selected. • Make sure that ends with water in the tub. fer to "Care and cleaning". • Adjust manually the items in "Daily Use" chap- The spin phase does not operate or the washing cycle lasts...
User Manual
Page 40
... door remains locked. Make sure that you set the correct temperature. • Decrease the laundry load. The programme continues from the point of different colours fluff. Deactivate and activate the appliance. drum during the washing cycle. If the display shows other alarm codes. The appliance does not dry or does not dry correctly. • Turn the water tap on. • Make sure the drain filter...
... door remains locked. Make sure that you set the correct temperature. • Decrease the laundry load. The programme continues from the point of different colours fluff. Deactivate and activate the appliance. drum during the washing cycle. If the display shows other alarm codes. The appliance does not dry or does not dry correctly. • Turn the water tap on. • Make sure the drain filter...


