

Owners Manual
Page 6
... switches ...4-2 Throttle lever ...4-3 Speed limiter ...4-3 Front brake lever ...4-4 Rear brake lever ...4-5 Parking brake ...4-5 Drive select lever ...4-6 Fuel tank cap ...4-7 Fuel ...4-7 Fuel cock ...4-8 Starter (choke) ...4-10 Seat ...4-10 Front carrier ...4-11 Rear carrier ...4-11 PRE-OPERATION CHECKS ...5-1 Fuel ...5-3 Engine oil ...5-3 Transmission oil ...5-3 Front and rear brakes ...5-3 Throttle lever ...5-3 Drive chain ...5-3 Tires ...5-3 Chassis fasteners ...5-5 Instruments, lights and switches ...5-6 Battery ...5-6 OPERATION...6-1 Starting a cold engine ...6-1 Starting a warm engine...
... switches ...4-2 Throttle lever ...4-3 Speed limiter ...4-3 Front brake lever ...4-4 Rear brake lever ...4-5 Parking brake ...4-5 Drive select lever ...4-6 Fuel tank cap ...4-7 Fuel ...4-7 Fuel cock ...4-8 Starter (choke) ...4-10 Seat ...4-10 Front carrier ...4-11 Rear carrier ...4-11 PRE-OPERATION CHECKS ...5-1 Fuel ...5-3 Engine oil ...5-3 Transmission oil ...5-3 Front and rear brakes ...5-3 Throttle lever ...5-3 Drive chain ...5-3 Tires ...5-3 Chassis fasteners ...5-5 Instruments, lights and switches ...5-6 Battery ...5-6 OPERATION...6-1 Starting a cold engine ...6-1 Starting a warm engine...
Owners Manual
Page 7
... ...8-1 Owner's manual and tool kit ...8-1 Periodic maintenance chart for the emission control system ...8-3 General maintenance and lubrication chart ...8-5 Checking the spark plug ...8-8 Engine oil ...8-10 Transmission oil ...8-13 Cleaning the engine and V-belt case air filter elements ...8-15 Cleaning the spark arrester ...8-22 V-belt case drain plug ...8-23 Adjusting the carburetor ...8-24 Adjusting the engine idling speed ...8-24 Adjusting the throttle cable free play ...8-25 Valve clearance ...8-26 Brakes ...8-26 Checking the front and rear brake shoes...
... ...8-1 Owner's manual and tool kit ...8-1 Periodic maintenance chart for the emission control system ...8-3 General maintenance and lubrication chart ...8-5 Checking the spark plug ...8-8 Engine oil ...8-10 Transmission oil ...8-13 Cleaning the engine and V-belt case air filter elements ...8-15 Cleaning the spark arrester ...8-22 V-belt case drain plug ...8-23 Adjusting the carburetor ...8-24 Adjusting the engine idling speed ...8-24 Adjusting the throttle cable free play ...8-25 Valve clearance ...8-26 Brakes ...8-26 Checking the front and rear brake shoes...
Owners Manual
Page 8
ATV LIMITED WARRANTY ...11-6 YAMAHA EXTENDED SERVICE (Y.E.S.) ...11-8 Adjusting a headlight beam ...Replacing the tail/brake light bulb ...Removing a wheel ...Installing a wheel ...Troubleshooting ...Troubleshooting chart ... 8-45 8-45 8-46 8-47 8-48 8-49 CLEANING AND STORAGE...9-1 Cleaning ...9-1 Storage ...9-2 SPECIFICATIONS ...10-1 CONSUMER INFORMATION ...11-1 Identification numbers ...11-1 Noise regulation ...11-4 Maintenance record ...11-5 YAMAHA MOTOR CORPORATION, U.S.A.
ATV LIMITED WARRANTY ...11-6 YAMAHA EXTENDED SERVICE (Y.E.S.) ...11-8 Adjusting a headlight beam ...Replacing the tail/brake light bulb ...Removing a wheel ...Installing a wheel ...Troubleshooting ...Troubleshooting chart ... 8-45 8-45 8-46 8-47 8-48 8-49 CLEANING AND STORAGE...9-1 Cleaning ...9-1 Storage ...9-2 SPECIFICATIONS ...10-1 CONSUMER INFORMATION ...11-1 Identification numbers ...11-1 Noise regulation ...11-4 Maintenance record ...11-5 YAMAHA MOTOR CORPORATION, U.S.A.
Owners Manual
Page 12
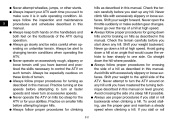
... file with another vehicle. LOCATE AND READ OWNER'S MANUAL. 7 1 2 3 4 8 DRIVE SELECT LEVER Read owner's manual carefully before operating. When shifting the drive select lever, always be sure to stop the ATV and apply the rear brake. 5YT-2151E-30 WARNING Improper AT V use proper riding techniques to an approved ATV action plan submitted by YAMAHA and on public roads - at speeds too fast for...
... file with another vehicle. LOCATE AND READ OWNER'S MANUAL. 7 1 2 3 4 8 DRIVE SELECT LEVER Read owner's manual carefully before operating. When shifting the drive select lever, always be sure to stop the ATV and apply the rear brake. 5YT-2151E-30 WARNING Improper AT V use proper riding techniques to an approved ATV action plan submitted by YAMAHA and on public roads - at speeds too fast for...
Owners Manual
Page 14
... in this manual. G G 1 2 3 4 5 6 7 8 9 G G G G 10 11 G G Never attempt wheelies, jumps, or other stunts. Shift your weight forward. Go straight down hills and for turning as described in safe operating condition. Shift your weight to changing terrain conditions when operating the ATV. Always inspect your abilities. Always follow proper procedures for braking on excessively rough, slippery or loose terrain until you start up...
... in this manual. G G 1 2 3 4 5 6 7 8 9 G G G G 10 11 G G Never attempt wheelies, jumps, or other stunts. Shift your weight forward. Go straight down hills and for turning as described in safe operating condition. Shift your weight to changing terrain conditions when operating the ATV. Always inspect your abilities. Always follow proper procedures for braking on excessively rough, slippery or loose terrain until you start up...
Owners Manual
Page 15
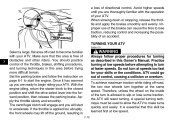
...do not see or smell any engine exhaust. Always be properly distributed and securely attached. Test your brakes after leaving water. Always maintain proper tire pressure as described in order to save yourself. Never exceed the stated load capacity for braking described in this manual. G G G G G ...use the size and type of tires specified in this manual. Allow greater distance for carrying cargo or pulling a trailer. Reduce speed and follow proper procedures when operating over large obstacles, such as ice, go slowly. Deadly levels of control. Breathing ...
...do not see or smell any engine exhaust. Always be properly distributed and securely attached. Test your brakes after leaving water. Always maintain proper tire pressure as described in order to save yourself. Never exceed the stated load capacity for braking described in this manual. G G G G G ...use the size and type of tires specified in this manual. Allow greater distance for carrying cargo or pulling a trailer. Reduce speed and follow proper procedures when operating over large obstacles, such as ice, go slowly. Deadly levels of control. Breathing ...
Owners Manual
Page 21
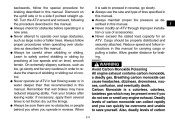
... the engine with an adjustable speed limiter. Because the throttle is released. Regulate the speed of the throttle lever will return to an idle any time the hand is running, movement of the ATV by varying the 4-3 Speed limiter Your ATV was delivered with the starter. EBU18101 Start switch " " Push this switch to turn on the low beams and the taillight. See page 8-39 for an extended...
... the engine with an adjustable speed limiter. Because the throttle is released. Regulate the speed of the throttle lever will return to an idle any time the hand is running, movement of the ATV by varying the 4-3 Speed limiter Your ATV was delivered with the starter. EBU18101 Start switch " " Push this switch to turn on the low beams and the taillight. See page 8-39 for an extended...
Owners Manual
Page 26
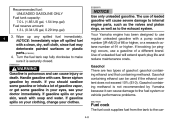
... well as to the fuel system or vehicle performance problems. EBU18820 WARNING Gasoline is securely closed. Use of gasoline vapor, or get some gasoline in your eyes, see your doctor immediately. Handle gasoline with a clean, dry, soft cloth, since fuel may deteriorate painted surfaces or plastic parts.[ECB00981] 4. If gasoline spills on your clothes. Turn the fuel tank cap fully clockwise to...
... well as to the fuel system or vehicle performance problems. EBU18820 WARNING Gasoline is securely closed. Use of gasoline vapor, or get some gasoline in your eyes, see your doctor immediately. Handle gasoline with a clean, dry, soft cloth, since fuel may deteriorate painted surfaces or plastic parts.[ECB00981] 4. If gasoline spills on your clothes. Turn the fuel tank cap fully clockwise to...
Owners Manual
Page 29
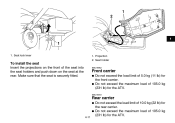
... (231 lb) for the ATV. Projection 2. EBU18972 Rear carrier G G 4-11 Do not exceed the load limit of 105.0 kg (231 lb) for the ATV. Do not exceed the maximum load of 10.0 kg (22 lb) for the front carrier. Seat lock lever 5 1. Make sure that the seat is securely fitted. 1 2 1 2 3 4 1 1. Front... carrier G G Do not exceed the load limit of 5.0 kg (11 lb) for the rear carrier.
... (231 lb) for the ATV. Projection 2. EBU18972 Rear carrier G G 4-11 Do not exceed the load limit of 105.0 kg (231 lb) for the ATV. Do not exceed the maximum load of 10.0 kg (22 lb) for the front carrier. Seat lock lever 5 1. Make sure that the seat is securely fitted. 1 2 1 2 3 4 1 1. Front... carrier G G Do not exceed the load limit of 5.0 kg (11 lb) for the rear carrier.
Owners Manual
Page 33
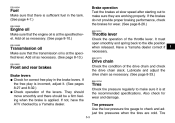
... must open smoothly and spring back to make sure they are cold. Also check for wear. (See page 8-26.) EBU19761 1 2 3 4 5 6 7 8 9 10 11 Engine oil Make sure that the transmission oil is sufficient fuel in the brake levers. EBU19770 Transmission oil Make sure that the engine oil is applied. Tire 5-3 Add oil as necessary. (See page 8-13.) EBU19651 Drive chain Front and rear brakes Brake levers Check for correct free...
... must open smoothly and spring back to make sure they are cold. Also check for wear. (See page 8-26.) EBU19761 1 2 3 4 5 6 7 8 9 10 11 Engine oil Make sure that the transmission oil is sufficient fuel in the brake levers. EBU19770 Transmission oil Make sure that the engine oil is applied. Tire 5-3 Add oil as necessary. (See page 8-13.) EBU19651 Drive chain Front and rear brakes Brake levers Check for correct free...
Owners Manual
Page 37
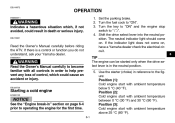
... parking brake. 2. If the indicator light does not come on , have a Yamaha dealer check the electrical circuit. 1 2 3 4 5 6 WARNING Read the Owner's Manual carefully to help prevent any loss of control, which , if not avoided, could cause an accident or injury. Turn the fuel cock to " ". 4. Position (3): Cold engine start with all controls in the neutral position. 5. Use the starter (choke) in reference to the figure: Position (1): Cold engine start...
... parking brake. 2. If the indicator light does not come on , have a Yamaha dealer check the electrical circuit. 1 2 3 4 5 6 WARNING Read the Owner's Manual carefully to help prevent any loss of control, which , if not avoided, could cause an accident or injury. Turn the fuel cock to " ". 4. Position (3): Cold engine start with all controls in the neutral position. 5. Use the starter (choke) in reference to the figure: Position (1): Cold engine start...
Owners Manual
Page 39
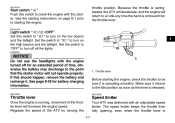
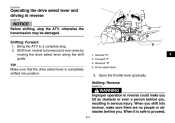
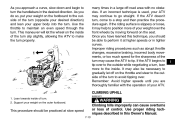
...vice versa by moving the drive select lever along the shift guide. 4 1. 2. 3. 4. When it is completely shifted into reverse, make you hit an obstacle or even a person behind you shift into position. 3. Shifting: Reverse EWB00720 WARNING Improper operation in reverse ... ATV to a complete stop the ATV, otherwise the transmission may be damaged. When you . Shift from neutral to proceed, 6-3 EBU20361 Operating the drive select lever and driving in reverse ECB00170 1 3 2 1 2 3 4 NOTICE Before shifting, stop . 2. Shifting: Forward 1. Open the throttle lever gradually.
...vice versa by moving the drive select lever along the shift guide. 4 1. 2. 3. 4. When it is completely shifted into reverse, make you hit an obstacle or even a person behind you shift into position. 3. Shifting: Reverse EWB00720 WARNING Improper operation in reverse ... ATV to a complete stop the ATV, otherwise the transmission may be damaged. When you . Shift from neutral to proceed, 6-3 EBU20361 Operating the drive select lever and driving in reverse ECB00170 1 3 2 1 2 3 4 NOTICE Before shifting, stop . 2. Shifting: Forward 1. Open the throttle lever gradually.
Owners Manual
Page 40
Apply the parking brake. 3. The various parts in the engine wear and polish themselves to reverse and vice versa by moving the drive select lever along the shift guide. Vary the speed of riding. Shift from neutral to the correct operating clearances. Open the throttle lever gradually and continue to watch to a complete stop unless the rear brake lever or parking brake is never...
Apply the parking brake. 3. The various parts in the engine wear and polish themselves to reverse and vice versa by moving the drive select lever along the shift guide. Vary the speed of riding. Shift from neutral to the correct operating clearances. Open the throttle lever gradually and continue to watch to a complete stop unless the rear brake lever or parking brake is never...
Owners Manual
Page 56
... lift off the ground, resulting in 7-12 WARNING Always follow the instruction on the inside of the brakes can cause the tires to the closed position and shift the drive select lever into the forward position, then release the parking brake. To achieve maximum traction while riding off -road to start to begin riding your skills or the conditions. Improper use of the turn...
... lift off the ground, resulting in 7-12 WARNING Always follow the instruction on the inside of the brakes can cause the tires to the closed position and shift the drive select lever into the forward position, then release the parking brake. To achieve maximum traction while riding off -road to start to begin riding your skills or the conditions. Improper use of the turn...
Owners Manual
Page 57
... gradually let off -road area with the operation of the turn may also be able to perform it may continue to go straight. Use proper riding techniques described in this technique, you should be practiced at higher speeds or in the desired direction. Improper riding procedures such as abrupt throttle changes, excessive braking, incorrect body movements, or too...
... gradually let off -road area with the operation of the turn may also be able to perform it may continue to go straight. Use proper riding techniques described in this technique, you should be practiced at higher speeds or in the desired direction. Improper riding procedures such as abrupt throttle changes, excessive braking, incorrect body movements, or too...
Owners Manual
Page 116
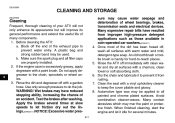
... may mar the paint or protective finish. Rinse the dirt and degreaser off the end of the exhaust pipe to prevent water entry. Use only enough pressure to the chain, sprockets or wheel axles. 3. sure may cause water seepage and deterioration of an accident. Many expensive repair bills have reduced stopping ability, increasing the chance of wheel bearings, brakes, transmission seals and electrical devices. Before...
... may mar the paint or protective finish. Rinse the dirt and degreaser off the end of the exhaust pipe to prevent water entry. Use only enough pressure to the chain, sprockets or wheel axles. 3. sure may cause water seepage and deterioration of an accident. Many expensive repair bills have reduced stopping ability, increasing the chance of wheel bearings, brakes, transmission seals and electrical devices. Before...
Owners Manual
Page 128
... maintenance, such as a result of owner abuse and/or lack of charge, repair or replace any subsequent purchaser(s), it not to remain in materials and workmanship which arise solely as spark plugs, oil, oil filter, air filter, and brake shoes. EMISSION CONTROL SYSTEM WARRANTY Yamaha Motor Corporation, USA also warrants to the ultimate purchaser and each subsequent purchaser of each 2006 and later model Yamaha ATV covered by this warranty...
... maintenance, such as a result of owner abuse and/or lack of charge, repair or replace any subsequent purchaser(s), it not to remain in materials and workmanship which arise solely as spark plugs, oil, oil filter, air filter, and brake shoes. EMISSION CONTROL SYSTEM WARRANTY Yamaha Motor Corporation, USA also warrants to the ultimate purchaser and each subsequent purchaser of each 2006 and later model Yamaha ATV covered by this warranty...

Owners Manual
Page 129
... you. A. The unit has to be done by an authorized Yamaha ATV dealer for his setup, service and warranty repair work. Since all first purchasers against the possibility of normal maintenance services, non-warranty repairs, accident and collision damages, and oil, oil filters, air filters, spark plugs, and brake shoes. Box 6555 Cypress, California 90630 When contacting Yamaha Motor Corporation, U.S.A. P.O. WARRANTY QUESTIONS AND ANSWERS Q. A. No. What responsibility does my dealer...
... you. A. The unit has to be done by an authorized Yamaha ATV dealer for his setup, service and warranty repair work. Since all first purchasers against the possibility of normal maintenance services, non-warranty repairs, accident and collision damages, and oil, oil filters, air filters, spark plugs, and brake shoes. Box 6555 Cypress, California 90630 When contacting Yamaha Motor Corporation, U.S.A. P.O. WARRANTY QUESTIONS AND ANSWERS Q. A. No. What responsibility does my dealer...
Owners Manual
Page 133
...belt filter cleaning ...8-15 E Engine break-in ...6-4 Engine, cold start ...6-1 Engine idling speed...8-24 Engine oil ...5-3, 8-10 Engine, starting a warm ...6-2 Engine stop switch ...4-2 B Battery...5-6, 8-39 Brake lever free play, adjusting the front...8-27 Brake lever free play (rear), adjusting ...8-32 Brake lever, front...4-4 Brake lever, rear...4-5 Brake levers, checking and lubricating...8-36 Brakes ...8-26 Brakes, front and rear ...5-3 Brake shoes, checking the front and rear ...8-26 F Front knuckle pivots, lubricating...8-38 Fuel ...4-7, 5-3 Fuel cock...4-8 Fuel tank cap...4-7 Fuse...
...belt filter cleaning ...8-15 E Engine break-in ...6-4 Engine, cold start ...6-1 Engine idling speed...8-24 Engine oil ...5-3, 8-10 Engine, starting a warm ...6-2 Engine stop switch ...4-2 B Battery...5-6, 8-39 Brake lever free play, adjusting the front...8-27 Brake lever free play (rear), adjusting ...8-32 Brake lever, front...4-4 Brake lever, rear...4-5 Brake levers, checking and lubricating...8-36 Brakes ...8-26 Brakes, front and rear ...5-3 Brake shoes, checking the front and rear ...8-26 F Front knuckle pivots, lubricating...8-38 Fuel ...4-7, 5-3 Fuel cock...4-8 Fuel tank cap...4-7 Fuse...
Owners Manual
Page 134
......11-5 Model label...11-2 Suspension, lubricating the upper and lower arm pivots...8-37 T Tail/brake light bulb, replacing ...8-45 Throttle cable free play, adjusting ...8-25 Throttle lever ...4-3, 5-3 Tires ...5-3 Transmission oil ...5-3, 8-13 Troubleshooting ...8-48 Troubleshooting chart ...8-49 N Neutral indicator light ...4-2 Noise regulation ...11-4 O Owner's manual and tool kit...8-1 V Valve clearance...8-26 V-belt case drain plug ...8-23 Vehicle Emission Control Information label...11-2 Vehicle identification number ...11-1 P Parking ...6-5 Parking brake ...4-5 Parking on a slope...
......11-5 Model label...11-2 Suspension, lubricating the upper and lower arm pivots...8-37 T Tail/brake light bulb, replacing ...8-45 Throttle cable free play, adjusting ...8-25 Throttle lever ...4-3, 5-3 Tires ...5-3 Transmission oil ...5-3, 8-13 Troubleshooting ...8-48 Troubleshooting chart ...8-49 N Neutral indicator light ...4-2 Noise regulation ...11-4 O Owner's manual and tool kit...8-1 V Valve clearance...8-26 V-belt case drain plug ...8-23 Vehicle Emission Control Information label...11-2 Vehicle identification number ...11-1 P Parking ...6-5 Parking brake ...4-5 Parking on a slope...