
Owners Manual
Page 6
...OF THE WARNING AND SPECIFICATION LABELS...1-1 SAFETY INFORMATION...2-1 DESCRIPTION AND MACHINE IDENTIFICATION ...3-1 Identification number records...3-2 Key identification number...3-2 Vehicle identification number ...3-3 Model label ...3-3 2 3 CONTROL FUNCTIONS...4-1 Main switch ...4-1 Indicator lights...4-2 Handlebar switches ...4-2 Throttle lever ...4-4 Speed limiter ...4-5 Front brake lever...4-6 Brake pedal and rear brake lever ...4-6 Parking brake...4-8 Shift pedal ...4-9 Drive select lever ...4-9 Recoil starter...4-10 Fuel tank cap ...4-11 Fuel cock...4-12 Starter (choke) ...4-13 Seat...
...OF THE WARNING AND SPECIFICATION LABELS...1-1 SAFETY INFORMATION...2-1 DESCRIPTION AND MACHINE IDENTIFICATION ...3-1 Identification number records...3-2 Key identification number...3-2 Vehicle identification number ...3-3 Model label ...3-3 2 3 CONTROL FUNCTIONS...4-1 Main switch ...4-1 Indicator lights...4-2 Handlebar switches ...4-2 Throttle lever ...4-4 Speed limiter ...4-5 Front brake lever...4-6 Brake pedal and rear brake lever ...4-6 Parking brake...4-8 Shift pedal ...4-9 Drive select lever ...4-9 Recoil starter...4-10 Fuel tank cap ...4-11 Fuel cock...4-12 Starter (choke) ...4-13 Seat...
Owners Manual
Page 7
...PRE-OPERATION CHECKS ...5-1 Front and rear brakes ...5-3 Fuel ...5-5 Engine oil ...5-7 Final gear oil...5-7 Throttle lever ...5-7 Fittings and fasteners...5-8 Lights...5-8 Switches...5-8 Battery...5-8 Tires ...5-9 How to measure tire pressure...5-11 Tire wear limit...5-12 OPERATION...6-1 Starting a cold engine ...6-1 Starting a warm engine...6-3 Warming up...6-3 Drive select lever operation and reverse driving...6-4 Shifting ...6-5 To start out and accelerate ...6-6 To decelerate ...6-7 Engine break-in ...6-7 Parking...6-8 Parking on a slope...6-9 Accessories and loading ...6-10 7 RIDING YOUR...
...PRE-OPERATION CHECKS ...5-1 Front and rear brakes ...5-3 Fuel ...5-5 Engine oil ...5-7 Final gear oil...5-7 Throttle lever ...5-7 Fittings and fasteners...5-8 Lights...5-8 Switches...5-8 Battery...5-8 Tires ...5-9 How to measure tire pressure...5-11 Tire wear limit...5-12 OPERATION...6-1 Starting a cold engine ...6-1 Starting a warm engine...6-3 Warming up...6-3 Drive select lever operation and reverse driving...6-4 Shifting ...6-5 To start out and accelerate ...6-6 To decelerate ...6-7 Engine break-in ...6-7 Parking...6-8 Parking on a slope...6-9 Accessories and loading ...6-10 7 RIDING YOUR...

Owners Manual
Page 8
...'s manual and tool kit...8-1 Periodic maintenance chart for the emission control system...8-3 General maintenance and lubrication chart ...8-4 Engine oil and oil filter element ...8-6 Final gear oil ...8-12 Spark plug inspection...8-15 Air filter element cleaning...8-18 Spark arrester cleaning ...8-22 Carburetor adjustment...8-23 Idle speed adjustment ...8-24 Valve clearance adjustment ...8-24 Throttle lever adjustment...8-25 Select lever safety system cable adjustment...8-25 Front brake pad check ...8-26 Rear brake shoe inspection ...8-26 Brake fluid level check...8-27 Brake fluid replacement...
...'s manual and tool kit...8-1 Periodic maintenance chart for the emission control system...8-3 General maintenance and lubrication chart ...8-4 Engine oil and oil filter element ...8-6 Final gear oil ...8-12 Spark plug inspection...8-15 Air filter element cleaning...8-18 Spark arrester cleaning ...8-22 Carburetor adjustment...8-23 Idle speed adjustment ...8-24 Valve clearance adjustment ...8-24 Throttle lever adjustment...8-25 Select lever safety system cable adjustment...8-25 Front brake pad check ...8-26 Rear brake shoe inspection ...8-26 Brake fluid level check...8-27 Brake fluid replacement...

Owners Manual
Page 20
Rear shock absorber spring preload adjusting ring 17. Main switch 25. Front brake lever NOTE: The machine you have purchased may differ slightly from those shown in the figures of this manual. 3-1 Parking brake 22. Starter (choke) 23. Drive select lever 24. Fuel tank cap 26. Tail/brake light 16. Shift pedal 19. Handlebar switches 21. Spark arrester Storage compartment Air filter case Engine oil dipstick Front brake fluid reservoir Brake pedal Clutch adjusting bolt Engine oil filter element Rear brake light switch Headlight Fuel cock Recoil starter Fuses Battery 15...
Rear shock absorber spring preload adjusting ring 17. Main switch 25. Front brake lever NOTE: The machine you have purchased may differ slightly from those shown in the figures of this manual. 3-1 Parking brake 22. Starter (choke) 23. Drive select lever 24. Fuel tank cap 26. Tail/brake light 16. Shift pedal 19. Handlebar switches 21. Spark arrester Storage compartment Air filter case Engine oil dipstick Front brake fluid reservoir Brake pedal Clutch adjusting bolt Engine oil filter element Rear brake light switch Headlight Fuel cock Recoil starter Fuses Battery 15...

Owners Manual
Page 24
Engine stop switch controls ignition and can be used at all times to " " before starting the engine. EBU00603 Neutral indicator light "N" This indicator light comes on when the drive select lever is in an emergency. Neutral indicator light "N" 1. Light switch "OFF/ / 2. The engine will not start or run when the engine stop switch is set to stop switch is set to " ". The engine stop switch " / 3. EBU00043 EBU00053 Indicator lights Handlebar switches 1. Reverse indicator light "R" 2. Start switch " " EBU12050 " " EBU12500 Reverse...
Engine stop switch controls ignition and can be used at all times to " " before starting the engine. EBU00603 Neutral indicator light "N" This indicator light comes on when the drive select lever is in an emergency. Neutral indicator light "N" 1. Light switch "OFF/ / 2. The engine will not start or run when the engine stop switch is set to stop switch is set to " ". The engine stop switch " / 3. EBU00043 EBU00053 Indicator lights Handlebar switches 1. Reverse indicator light "R" 2. Start switch " " EBU12050 " " EBU12500 Reverse...

Owners Manual
Page 26
Regulate the speed of throttle. WARNING POTENTIAL HAZARD Malfunction of the machine by varying the throttle position. Consult a Yamaha dealer if you start the engine. Before starting the engine, check the throttle to be hard to operate, making it returns to the idle position as soon as the lever is released. This could be sure it does not work smoothly, check for the cause. Throttle lever...
Regulate the speed of throttle. WARNING POTENTIAL HAZARD Malfunction of the machine by varying the throttle position. Consult a Yamaha dealer if you start the engine. Before starting the engine, check the throttle to be hard to operate, making it returns to the idle position as soon as the lever is released. This could be sure it does not work smoothly, check for the cause. Throttle lever...
Owners Manual
Page 43
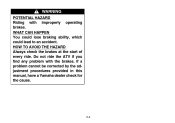
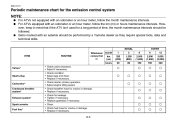
WHAT CAN HAPPEN You could lose braking ability, which could lead to an accident. HOW TO AVOID THE HAZARD Always check the brakes at the start of every ride. Do not ride the ATV if you find any problem with improperly operating brakes. WARNING POTENTIAL HAZARD Riding with the brakes. If a problem cannot be corrected by the adjustment procedures provided in this manual, have a Yamaha dealer check for the cause. 5-4
WHAT CAN HAPPEN You could lose braking ability, which could lead to an accident. HOW TO AVOID THE HAZARD Always check the brakes at the start of every ride. Do not ride the ATV if you find any problem with improperly operating brakes. WARNING POTENTIAL HAZARD Riding with the brakes. If a problem cannot be corrected by the adjustment procedures provided in this manual, have a Yamaha dealer check for the cause. 5-4

Owners Manual
Page 52
... riding in cold weather, always make sure all controls. If there is a control or function you begin riding. 1. Set the parking brake. 2. Turn the fuel cock to "ON". 3. WARNING POTENTIAL HAZARD Operating ATV without being familiar with all control cables work smoothly before you do not understand, ask your Yamaha dealer. 6-1 Shift the transmission into neutral. HOW TO AVOID THE HAZARD Read the Owner's Manual carefully.
... riding in cold weather, always make sure all controls. If there is a control or function you begin riding. 1. Set the parking brake. 2. Turn the fuel cock to "ON". 3. WARNING POTENTIAL HAZARD Operating ATV without being familiar with all control cables work smoothly before you do not understand, ask your Yamaha dealer. 6-1 Shift the transmission into neutral. HOW TO AVOID THE HAZARD Read the Owner's Manual carefully.

Owners Manual
Page 53
... light does not come on , ask a Yamaha dealer to shift into neutral before starting the engine. _ _ Position 3: Cold engine startambient temperature above 25°C (80°F) and warm engine start switch. 6-2 Completely close the throttle lever and start the engine by pushing the start position. 1 2 3 4 5 6 7 8 9 10 5. However, it is recommended to inspect it. Use the starter (choke) in any gear if the rear brake lever is in neutral, the neutral indicator light...
... light does not come on , ask a Yamaha dealer to shift into neutral before starting the engine. _ _ Position 3: Cold engine startambient temperature above 25°C (80°F) and warm engine start switch. 6-2 Completely close the throttle lever and start the engine by pushing the start position. 1 2 3 4 5 6 7 8 9 10 5. However, it is recommended to inspect it. Use the starter (choke) in any gear if the rear brake lever is in neutral, the neutral indicator light...
Owners Manual
Page 56
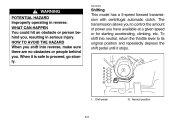
Shifting This model has a 5-speed forward transmission with centrifugal automatic clutch. EBU02000 WARNING POTENTIAL HAZARD Improperly operating in serious injury. HOW TO AVOID THE HAZARD When you shift into neutral, return the throttle lever to its original position and repeatedly depress the shift pedal until it is safe to control the amount of power you have available at a given speed or for starting accelerating, climbing, etc...
Shifting This model has a 5-speed forward transmission with centrifugal automatic clutch. EBU02000 WARNING POTENTIAL HAZARD Improperly operating in serious injury. HOW TO AVOID THE HAZARD When you shift into neutral, return the throttle lever to its original position and repeatedly depress the shift pedal until it is safe to control the amount of power you have available at a given speed or for starting accelerating, climbing, etc...
Owners Manual
Page 58
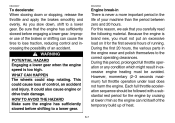
... lower r/min so the engine can cause the tires to a lower gear. 6-7 Engine break-in There is too high. However, momentary (2-3 seconds maximum) full throttle operation under load does not harm the engine. During this reason, we ask that the engine has sufficiently slowed before shifting to lose traction, reducing control and increasing the possibility of running. WARNING POTENTIAL HAZARD Engaging a lower gear when the engine speed...
... lower r/min so the engine can cause the tires to a lower gear. 6-7 Engine break-in There is too high. However, momentary (2-3 seconds maximum) full throttle operation under load does not harm the engine. During this reason, we ask that the engine has sufficiently slowed before shifting to lose traction, reducing control and increasing the possibility of running. WARNING POTENTIAL HAZARD Engaging a lower gear when the engine speed...

Owners Manual
Page 84
... the 2nd gear position. The centrifugal clutch will engage and you get on pavement. Release the shift pedal and apply the throttle smoothly. Make sure that the engine and exhaust pipe will start the engine. Be sure to perform on the ATV, be hot when riding and afterwards; Select a large, flat area off the ground resulting in a loss of directional control. As...
... the 2nd gear position. The centrifugal clutch will engage and you get on pavement. Release the shift pedal and apply the throttle smoothly. Make sure that the engine and exhaust pipe will start the engine. Be sure to perform on the ATV, be hot when riding and afterwards; Select a large, flat area off the ground resulting in a loss of directional control. As...
Owners Manual
Page 93
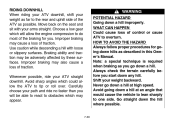
...Owner's Manual. Use caution while descending a hill with your arms straight. Shift your ATV straight downhill. Never go down any hill. Choose a low gear which will be adversely affected by these surfaces. Avoid going down the hill where possible. 7-30 Improper braking may be able to react to do most of the ATV as possible. WARNING... POTENTIAL HAZARD Going down a hill at an angle that would cause the vehicle to lean sharply to the rear and uphill side of the braking for going down a hill at high speed. Move back on the seat and sit with ...
...Owner's Manual. Use caution while descending a hill with your arms straight. Shift your ATV straight downhill. Never go down any hill. Choose a low gear which will be adversely affected by these surfaces. Avoid going down the hill where possible. 7-30 Improper braking may be able to react to do most of the ATV as possible. WARNING... POTENTIAL HAZARD Going down a hill at an angle that would cause the vehicle to lean sharply to the rear and uphill side of the braking for going down a hill at high speed. Move back on the seat and sit with ...

Owners Manual
Page 104
Have a Yamaha dealer perform service if you are not familiar with machine service. 1 2 3 EBU14510 4 5 6 7 8 9 10 11 12 13 14 WARNING POTENTIAL HAZARD Servicing an engine while it on the following pages. Electrical components can cause shocks or can catch clothing or parts of the body, causing injury. Put the owner's tool kit and low-pressure tire gauge under the seat. 1. Low-pressure tire gauge 2. PERIODIC MAINTENANCE AND ADJUSTMENT Periodic inspection, adjustment...
Have a Yamaha dealer perform service if you are not familiar with machine service. 1 2 3 EBU14510 4 5 6 7 8 9 10 11 12 13 14 WARNING POTENTIAL HAZARD Servicing an engine while it on the following pages. Electrical components can cause shocks or can catch clothing or parts of the body, causing injury. Put the owner's tool kit and low-pressure tire gauge under the seat. 1. Low-pressure tire gauge 2. PERIODIC MAINTENANCE AND ADJUSTMENT Periodic inspection, adjustment...
Owners Manual
Page 106
... month comes first km (mi) hours Valves* Spark plug Carburetor* Crankcase breather system* Exhaust system* Spark arrester Fuel line* • Check valve clearance. • Adjust if necessary. • Check condition. • Adjust gap and clean. • Replace if necessary. • Check starter (choke) operation. • Adjust engine idling speed. • Check breather hose for cracks or damage. • Replace if necessary. • Check for leakage...
... month comes first km (mi) hours Valves* Spark plug Carburetor* Crankcase breather system* Exhaust system* Spark arrester Fuel line* • Check valve clearance. • Adjust if necessary. • Check condition. • Adjust gap and clean. • Replace if necessary. • Check starter (choke) operation. • Adjust engine idling speed. • Check breather hose for cracks or damage. • Replace if necessary. • Check for leakage...

Owners Manual
Page 107
... ITEM ROUTINE Whichever month comes first km (mi) hours Air filter element Engine oil Engine oil filter element Engine oil strainer Final gear oil Front brake* Rear brake* Select lever safety system cable* Clutch* Wheels* Wheel bearings* Front and rear suspension* Steering system* • Clean. • Replace if necessary. • Replace (Warm engine before draining). • Clean. • Clean. • Check oil level/oil leakage. • Replace. • Check operation/fluid leakage/see NOTE page 8-5. • Correct if necessary...
... ITEM ROUTINE Whichever month comes first km (mi) hours Air filter element Engine oil Engine oil filter element Engine oil strainer Final gear oil Front brake* Rear brake* Select lever safety system cable* Clutch* Wheels* Wheel bearings* Front and rear suspension* Steering system* • Clean. • Replace if necessary. • Replace (Warm engine before draining). • Clean. • Clean. • Check oil level/oil leakage. • Replace. • Check operation/fluid leakage/see NOTE page 8-5. • Correct if necessary...
Owners Manual
Page 137
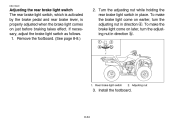
... brake light switch as follows. 1. To make the brake light come on just before braking takes effect. Rear brake light switch 2. Adjusting nut 3. Remove the footboard. (See page 8-8.) 2. Turn the adjusting nut while holding the rear brake light switch in direction a. Install the footboard. 8-34 EBU15420 Adjusting the rear brake light switch The rear brake light switch, which is activated by the brake pedal and rear brake lever, is properly adjusted when the brake light comes on earlier, turn...
... brake light switch as follows. 1. To make the brake light come on just before braking takes effect. Rear brake light switch 2. Adjusting nut 3. Remove the footboard. (See page 8-8.) 2. Turn the adjusting nut while holding the rear brake light switch in direction a. Install the footboard. 8-34 EBU15420 Adjusting the rear brake light switch The rear brake light switch, which is activated by the brake pedal and rear brake lever, is properly adjusted when the brake light comes on earlier, turn...

Owners Manual
Page 139
Recommended lubricant: Lithium-soap-based grease (all-purpose grease) 8-36 EBU00717 Lubricate the inner cables and the cable ends. If the cables do not operate smoothly, ask a Yamaha dealer to replace them. Recommended lubricant: Yamaha chain and cable lube or SAE 10W30 motor oil Brake lever and brake pedal lubrication Lubricate the pivoting parts.
Recommended lubricant: Lithium-soap-based grease (all-purpose grease) 8-36 EBU00717 Lubricate the inner cables and the cable ends. If the cables do not operate smoothly, ask a Yamaha dealer to replace them. Recommended lubricant: Yamaha chain and cable lube or SAE 10W30 motor oil Brake lever and brake pedal lubrication Lubricate the pivoting parts.

Owners Manual
Page 155
...appearance but will improve its general performance and extend the useful life of the exhaust pipe to -get-at places. 5. Rinse the dirt and degreaser off , wash all filler caps are properly installed. 2. An...water entry. Many expensive repair bills have resulted from improper high pressure detergent applications such as those available in coin-operated car washers. 4. Once the majority of wheel bearings, brakes, transmission seals and electrical devices. Block off immediately with clean water and dry all surfaces with a garden hose. Use only enough pressure to the wheel axles...
...appearance but will improve its general performance and extend the useful life of the exhaust pipe to -get-at places. 5. Rinse the dirt and degreaser off , wash all filler caps are properly installed. 2. An...water entry. Many expensive repair bills have resulted from improper high pressure detergent applications such as those available in coin-operated car washers. 4. Once the majority of wheel bearings, brakes, transmission seals and electrical devices. Block off immediately with clean water and dry all surfaces with a garden hose. Use only enough pressure to the wheel axles...
Owners Manual
Page 157
... or 20W40 motor oil in a humid or salt-air atmosphere, coat all exposed metal surfaces with fresh fuel and add the specified amount of your machine will require some preventive procedures to be drained instead. _ _ 2. Ground the spark plug wire and turn the engine over the exhaust pipe outlet to coat the cylinder wall with oil. 3. Tie a plastic bag over several times to prevent...
... or 20W40 motor oil in a humid or salt-air atmosphere, coat all exposed metal surfaces with fresh fuel and add the specified amount of your machine will require some preventive procedures to be drained instead. _ _ 2. Ground the spark plug wire and turn the engine over the exhaust pipe outlet to coat the cylinder wall with oil. 3. Tie a plastic bag over several times to prevent...