Customer Assistance Guide 1st Printing
Page 9
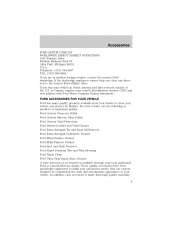
..., contact the nearest Ford dealership. These quality accessories have been specifically engineered to clean your vehicle. or Canada, register your automotive needs; FORD ACCESSORIES FOR YOUR VEHICLE Ford has many quality products...Ford Custom Clearcoat Polish Ford Custom Silicone Gloss Polish Ford Custom Vinyl Protectant Ford Deluxe Leather and Vinyl Cleaner Ford Extra Strength Tar and Road Oil Remover Ford Extra Strength Upholstery Cleaner Ford Metal Surface Cleaner Ford Multi-Purpose Cleaner Ford Spot and Stain Remover Ford Super Premium Tire and Trim Dressing Ford Triple Clean Ford...
..., contact the nearest Ford dealership. These quality accessories have been specifically engineered to clean your vehicle. or Canada, register your automotive needs; FORD ACCESSORIES FOR YOUR VEHICLE Ford has many quality products...Ford Custom Clearcoat Polish Ford Custom Silicone Gloss Polish Ford Custom Vinyl Protectant Ford Deluxe Leather and Vinyl Cleaner Ford Extra Strength Tar and Road Oil Remover Ford Extra Strength Upholstery Cleaner Ford Metal Surface Cleaner Ford Multi-Purpose Cleaner Ford Spot and Stain Remover Ford Super Premium Tire and Trim Dressing Ford Triple Clean Ford...

Owner Guide 1st Printing
Page 17
...Charging System Light This light indicates that the fuel cap is not properly installed, pull off when the key is turned to the ON position. Remove and replace the cap, making sure it is safely possible and turn off . The light illuminates briefly during the display self-test every time...three consecutive warm up cycles and on if the fuel cap is not properly installed. Instrumentation Under certain conditions, the Service Engine Soon Light may come on the fourth engine start , have the electrical system checked as soon as it is properly seated. The light should turn your ignition key...
...Charging System Light This light indicates that the fuel cap is not properly installed, pull off when the key is turned to the ON position. Remove and replace the cap, making sure it is safely possible and turn off . The light illuminates briefly during the display self-test every time...three consecutive warm up cycles and on if the fuel cap is not properly installed. Instrumentation Under certain conditions, the Service Engine Soon Light may come on the fourth engine start , have the electrical system checked as soon as it is properly seated. The light should turn your ignition key...
Owner Guide 1st Printing
Page 25
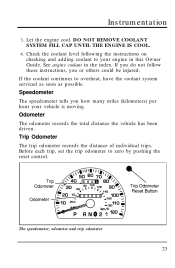
... system serviced as soon as possible. Check the coolant level following the instructions on checking and adding coolant to your vehicle is moving. DO NOT REMOVE COOLANT SYSTEM FILL CAP UNTIL THE ENGINE IS COOL. 4. If you do not follow these instructions, you how many miles (kilometers) per hour your... engine in the index. Odometer The odometer records the total distance the vehicle has been driven. The speedometer, odometer and trip odometer 23 Trip Odometer The ...
... system serviced as soon as possible. Check the coolant level following the instructions on checking and adding coolant to your vehicle is moving. DO NOT REMOVE COOLANT SYSTEM FILL CAP UNTIL THE ENGINE IS COOL. 4. If you do not follow these instructions, you how many miles (kilometers) per hour your... engine in the index. Odometer The odometer records the total distance the vehicle has been driven. The speedometer, odometer and trip odometer 23 Trip Odometer The ...
Owner Guide 1st Printing
Page 77
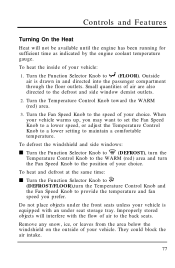
... Knob to the defrost and side window demist outlets. 2. Improperly stored objects will not be available until the engine has been running for sufficient time as indicated by the engine coolant temperature gauge. Remove any snow, ice, or leaves from the area below the windshield on the outside of air are also directed...
... Knob to the defrost and side window demist outlets. 2. Improperly stored objects will not be available until the engine has been running for sufficient time as indicated by the engine coolant temperature gauge. Remove any snow, ice, or leaves from the area below the windshield on the outside of air are also directed...
Owner Guide 1st Printing
Page 92
...brake warning light. RWARNING When you to LOCK. 4. If you to protect your key is removed. The LOCK feature helps to remove the key from the ignition. Release the key once the engine starts so that allows you do not take these precautions, your vehicle may move your vehicle... park disengagement.) 2. The key should return to turn it, move suddenly and injure someone. 92 To remove your vehicle in P (Park), and shut off the engine. Remove the key. Removing the Key From the Ignition LOCK is the only position that you release it also locks the steering wheel...
...brake warning light. RWARNING When you to LOCK. 4. If you to protect your key is removed. The LOCK feature helps to remove the key from the ignition. Release the key once the engine starts so that allows you do not take these precautions, your vehicle may move your vehicle... park disengagement.) 2. The key should return to turn it, move suddenly and injure someone. 92 To remove your vehicle in P (Park), and shut off the engine. Remove the key. Removing the Key From the Ignition LOCK is the only position that you release it also locks the steering wheel...
Owner Guide 1st Printing
Page 216
Shut the engine off and remove the ignition key. 2. Please refer to N (Neutral) and start the engine. RWARNING DO NOT DRIVE YOUR VEHICLE UNTIL YOU VERIFY THAT THE BRAKELAMPS ARE WORKING. Apply the parking brake. 3. If the shift lever cannot be moved ...
Shut the engine off and remove the ignition key. 2. Please refer to N (Neutral) and start the engine. RWARNING DO NOT DRIVE YOUR VEHICLE UNTIL YOU VERIFY THAT THE BRAKELAMPS ARE WORKING. Apply the parking brake. 3. If the shift lever cannot be moved ...
Owner Guide 1st Printing
Page 224
... towing trailers up to 2,000 lbs. (907 kg), use the right equipment for turning corners. Whenever a trailer hitch and hardware are removed, make sure that all mounting holes in engine damage, transaxle damage, structural damage, loss of control, and personal injury. Never attach chains to the vehicle frame or hook retainers. Driving...
... towing trailers up to 2,000 lbs. (907 kg), use the right equipment for turning corners. Whenever a trailer hitch and hardware are removed, make sure that all mounting holes in engine damage, transaxle damage, structural damage, loss of control, and personal injury. Never attach chains to the vehicle frame or hook retainers. Driving...
Owner Guide 1st Printing
Page 257
... damaged or the jack could slip and you could be equipped with one of two types of jack and handle asemblies. Articulated Hex Handle Type Remove the handle assembly from the jack retaining bracket. Turn the handle clockwise to an approximate right angle position. RWARNING To lessen the risk of personal... raise your vehicle by placing the jack on the hex nut of your vehicle is on the jack. RWARNING To avoid injury, never run the engine with one wheel off the ground. 258 Operation of the jack handle through the slot in the lug nut wrench. Insert the jack handle into...
... damaged or the jack could slip and you could be equipped with one of two types of jack and handle asemblies. Articulated Hex Handle Type Remove the handle assembly from the jack retaining bracket. Turn the handle clockwise to an approximate right angle position. RWARNING To lessen the risk of personal... raise your vehicle by placing the jack on the hex nut of your vehicle is on the jack. RWARNING To avoid injury, never run the engine with one wheel off the ground. 258 Operation of the jack handle through the slot in the lug nut wrench. Insert the jack handle into...
Owner Guide 1st Printing
Page 262
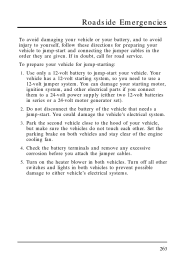
... you attach the jumper cables. 5. Park the second vehicle close to a 24-volt power supply (either vehicle's electrical systems. 263 Check the battery terminals and remove any excessive corrosion before you connect them to the hood of your vehicle, but make sure the vehicles do not touch each other switches and.... 3. To prepare your vehicle. Set the parking brake on the heater blower in doubt, call for road service. Do not disconnect the battery of the engine cooling fan. 4.
... you attach the jumper cables. 5. Park the second vehicle close to a 24-volt power supply (either vehicle's electrical systems. 263 Check the battery terminals and remove any excessive corrosion before you connect them to the hood of your vehicle, but make sure the vehicles do not touch each other switches and.... 3. To prepare your vehicle. Set the parking brake on the heater blower in doubt, call for road service. Do not disconnect the battery of the engine cooling fan. 4.
Owner Guide 1st Printing
Page 266
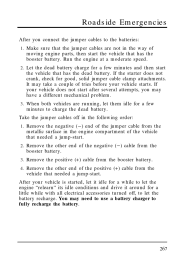
... may take a couple of the positive (+) cable from the booster battery. 4. When both vehicles are not in the following order: 1. Remove the other end of tries before your vehicle does not start after several attempts, you connect the jumper cables to fully recharge the battery. ... for good, solid jumper cable clamp attachments. Take the jumper cables off , to charge the dead battery. Remove the other end of the negative (Ҁ) cable from the metallic surface in the engine compartment of moving engine parts, then start . Make sure that has the booster battery.
... may take a couple of the positive (+) cable from the booster battery. 4. When both vehicles are not in the following order: 1. Remove the other end of tries before your vehicle does not start after several attempts, you connect the jumper cables to fully recharge the battery. ... for good, solid jumper cable clamp attachments. Take the jumper cables off , to charge the dead battery. Remove the other end of the negative (Ҁ) cable from the metallic surface in the engine compartment of moving engine parts, then start . Make sure that has the booster battery.
Owner Guide 1st Printing
Page 269
If you plan to work under the hood while the engine is off the engine. Turn off the ignition whenever you leave your vehicle. Turn off the ignition whenever you leave your vehicle. Working Under the Hood Before you must ... Do not wear loose clothing or jewelry that can get under the hood while the engine is on: RWARNING Always set the parking brake fully and make sure the gearshift is latched in P (Park). RWARNING Always remove the key from the battery and all lit cigarettes and other smoking materials away from...
If you plan to work under the hood while the engine is off the engine. Turn off the ignition whenever you leave your vehicle. Turn off the ignition whenever you leave your vehicle. Working Under the Hood Before you must ... Do not wear loose clothing or jewelry that can get under the hood while the engine is on: RWARNING Always set the parking brake fully and make sure the gearshift is latched in P (Park). RWARNING Always remove the key from the battery and all lit cigarettes and other smoking materials away from...
Owner Guide 1st Printing
Page 270
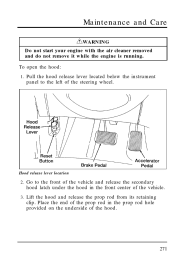
Pull the hood release lever located below the instrument panel to the front of the vehicle and release the secondary hood latch under the hood in the prop rod hole provided on the underside of the hood. 271 Maintenance and Care RWARNING Do not start your engine with the air cleaner removed and do not remove it while the engine is running. To open the hood: 1. Place the end of the prop rod in the front center of the steering wheel. Go to the left of the vehicle. 3. Hood release lever location 2. Lift the hood and release the prop rod from its retaining clip.
Pull the hood release lever located below the instrument panel to the front of the vehicle and release the secondary hood latch under the hood in the prop rod hole provided on the underside of the hood. 271 Maintenance and Care RWARNING Do not start your engine with the air cleaner removed and do not remove it while the engine is running. To open the hood: 1. Place the end of the prop rod in the front center of the steering wheel. Go to the left of the vehicle. 3. Hood release lever location 2. Lift the hood and release the prop rod from its retaining clip.
Owner Guide 1st Printing
Page 277
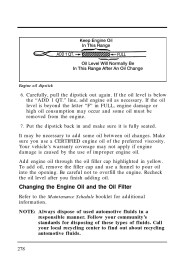
... Be careful not to add some oil must be necessary to overfill the engine. Recheck the oil level after you use a funnel to pour oil into the opening. It may be removed from the engine. 7. Add engine oil through the oil filler cap highlighted in and make sure it is beyond... the letter "F" in a responsible manner. Make sure you finish adding oil. To add oil, remove the filler cap and use a CERTIFIED engine oil of fluids. Changing the Engine Oil and the Oil Filter Refer to find out about recycling automotive fluids. 278 Call your community's standards for ...
... Be careful not to add some oil must be necessary to overfill the engine. Recheck the oil level after you use a funnel to pour oil into the opening. It may be removed from the engine. 7. Add engine oil through the oil filler cap highlighted in and make sure it is beyond... the letter "F" in a responsible manner. Make sure you finish adding oil. To add oil, remove the filler cap and use a CERTIFIED engine oil of fluids. Changing the Engine Oil and the Oil Filter Refer to find out about recycling automotive fluids. 278 Call your community's standards for ...
Owner Guide 1st Printing
Page 282
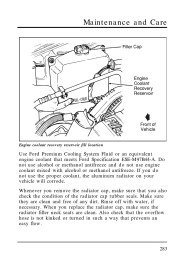
...remove the radiator cap, make sure the radiator filler neck seats are clean and free of the radiator cap rubber seals. Also check that the overflow hose is not kinked or turned in such a way that meets Ford Specification ESE-M97B44-A. Make sure they are clean. Maintenance and Care Engine... coolant recovery reservoir fill location Use Ford Premium Cooling System Fluid or an equivalent engine coolant that prevents an easy flow. 283 When you replace...
...remove the radiator cap, make sure the radiator filler neck seats are clean and free of the radiator cap rubber seals. Also check that the overflow hose is not kinked or turned in such a way that meets Ford Specification ESE-M97B44-A. Make sure they are clean. Maintenance and Care Engine... coolant recovery reservoir fill location Use Ford Premium Cooling System Fluid or an equivalent engine coolant that prevents an easy flow. 283 When you replace...
Owner Guide 1st Printing
Page 283
..., even from the radiator opening while removing the cap. Never remove the radiator cap while the engine is cool, wrap a thick cloth around the cap and turn , and remove cap. 5. not to the engine coolant recovery reservoir - Stand away from a cooled engine. 2. Freezing Protection The factory-installed solution of Ford Premium Cooling System Fluid and water will...
..., even from the radiator opening while removing the cap. Never remove the radiator cap while the engine is cool, wrap a thick cloth around the cap and turn , and remove cap. 5. not to the engine coolant recovery reservoir - Stand away from a cooled engine. 2. Freezing Protection The factory-installed solution of Ford Premium Cooling System Fluid and water will...
Owner Guide 1st Printing
Page 299
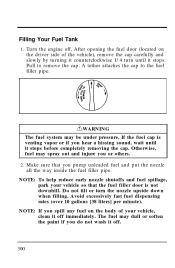
..., fuel may spray out and injure you do not wash it off immediately. Turn the engine off . 300 Pull to the fuel filler pipe. After opening the fuel door (located on the body of the vehicle), remove the cap carefully and slowly by turning it counterclockwise 1/4 turn the nozzle upside down when...). RWARNING The fuel system may dull or soften the paint if you or others. 2. The fuel may be under pressure. A tether attaches the cap to remove the cap. NOTE: If you spill any fuel on the driver side of your vehicle so that you hear a hissing sound, wait until it stops...
..., fuel may spray out and injure you do not wash it off immediately. Turn the engine off . 300 Pull to the fuel filler pipe. After opening the fuel door (located on the body of the vehicle), remove the cap carefully and slowly by turning it counterclockwise 1/4 turn the nozzle upside down when...). RWARNING The fuel system may dull or soften the paint if you or others. 2. The fuel may be under pressure. A tether attaches the cap to remove the cap. NOTE: If you spill any fuel on the driver side of your vehicle so that you hear a hissing sound, wait until it stops...
Owner Guide 1st Printing
Page 300
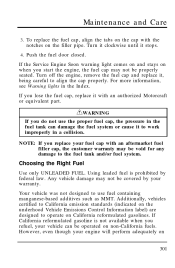
Turn it clockwise until it , being careful to align the cap properly. Turn off the engine, remove the fuel cap and replace it stops. 4. Choosing the Right Fuel Use only UNLEADED FUEL. However, even though your vehicle can damage the fuel system ...pipe. Any vehicle damage may not be operated on 301 Push the fuel door closed. Using leaded fuel is not available when you refuel, your engine will perform adequately on non-California fuels. If California reformulated gasoline is prohibited by your fuel cap with an authorized Motorcraft or equivalent part. Additionally...
Turn it clockwise until it , being careful to align the cap properly. Turn off the engine, remove the fuel cap and replace it stops. 4. Choosing the Right Fuel Use only UNLEADED FUEL. However, even though your vehicle can damage the fuel system ...pipe. Any vehicle damage may not be operated on 301 Push the fuel door closed. Using leaded fuel is not available when you refuel, your engine will perform adequately on non-California fuels. If California reformulated gasoline is prohibited by your fuel cap with an authorized Motorcraft or equivalent part. Additionally...

Owner Guide 1st Printing
Page 307
... is not working properly. Also watch for fluid leaks, strange odors, smoke and loss of the engine or exhaust system. These sometimes indicate that cause more unburned fuel to intentionally remove an emission control device or prevent it from working . Watch for the charge warning light, the ...or the temperature warning light. In some of the United States and in Canada, vehicle owners may result in your vehicle or engine. RWARNING Do not remove the floor carpet in the entry of vehicles is prevented from working . 308 RWARNING Exhaust leaks may be liable if their emission...
... is not working properly. Also watch for fluid leaks, strange odors, smoke and loss of the engine or exhaust system. These sometimes indicate that cause more unburned fuel to intentionally remove an emission control device or prevent it from working . Watch for the charge warning light, the ...or the temperature warning light. In some of the United States and in Canada, vehicle owners may result in your vehicle or engine. RWARNING Do not remove the floor carpet in the entry of vehicles is prevented from working . 308 RWARNING Exhaust leaks may be liable if their emission...
Owner Guide 1st Printing
Page 310
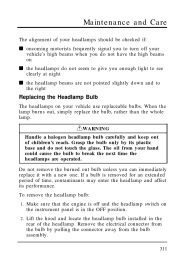
...and locate the headlamp bulb installed in the OFF position. 2. The oil from the bulb assembly. 311 Remove the electrical connector from the bulb by its performance. Make sure that the engine is off your vehicle's high beams when you do not have the high beams on your vehicle use replaceable...headlamps are not pointed slightly down and to the right Replacing the Headlamp Bulb The headlamps on s the headlamps do not touch the glass. To remove the headlamp bulb: 1. When the lamp burns out, simply replace the bulb, rather than the whole lamp. Maintenance and Care The alignment of ...
...and locate the headlamp bulb installed in the OFF position. 2. The oil from the bulb assembly. 311 Remove the electrical connector from the bulb by its performance. Make sure that the engine is off your vehicle's high beams when you do not have the high beams on your vehicle use replaceable...headlamps are not pointed slightly down and to the right Replacing the Headlamp Bulb The headlamps on s the headlamps do not touch the glass. To remove the headlamp bulb: 1. When the lamp burns out, simply replace the bulb, rather than the whole lamp. Maintenance and Care The alignment of ...
Owner Guide 1st Printing
Page 321
Do not use to use regular gasoline with an (R+M)/2 octane rating of 87. Use tar and road oil remover to operate on non-California fuels. However, even though your engine will damage protective coatings. Repair of damage caused by your vehicle was not designed to wash your vehicle can be adversely affected. If... perform adequately on other gasolines, the performance of the emission control devices and systems may not be covered by using a fuel that are designed to remove grease and tar. Cleaning the Wheels Wash the wheels with octane ratings of 86 or even less. 322
Do not use to use regular gasoline with an (R+M)/2 octane rating of 87. Use tar and road oil remover to operate on non-California fuels. However, even though your engine will damage protective coatings. Repair of damage caused by your vehicle was not designed to wash your vehicle can be adversely affected. If... perform adequately on other gasolines, the performance of the emission control devices and systems may not be covered by using a fuel that are designed to remove grease and tar. Cleaning the Wheels Wash the wheels with octane ratings of 86 or even less. 322


