Get support for Whirlpool WMH32517AS

Whirlpool WMH32517AS Support Question

Whirlpool WMH32517AS Support Question

Find answers below for this question about Whirlpool WMH32517AS.
Need a Whirlpool WMH32517AS manual? We have 4 online manuals for this item!
Question posted by dasonntag on May 17th, 2014

Beeping Noise

Why does the microwave beep every 15 minutes?

Current Answers

Answer #1: Posted by TheWiz on May 18th, 2014 12:02 PM
TheWiz

Member since:
October 13th, 2011

Points: 25,383,424
100
points
I recommend calling Whirlpool support at 1-866-698-2538. They should be able to help you out.

Related Whirlpool WMH32517AS Manual Pages

Installation Instructions - Page 1

...Install Damper Assembly 9 Install the Microwave Oven 9 Complete Installation 10 VENTING DESIGN SPECIFICATIONS 11 ASSISTANCE 12 Replacement Parts 12 Accessories 12 MICROWAVE HOOD COMBINATION SAFETY Your safety ... you what can kill or hurt you don't immediately follow instructions. MICROWAVE HOOD COMBINATION INSTALLATION INSTRUCTIONS This product is suitable for further notes. See...
Installation Instructions - Page 2

...sure to withstand the heat produced by the microwave oven for wood studs. Special Requirements For Wall ...microwave oven) Cardboard template (part of 150 lbs (68 kg), which includes microwave oven and items placed inside the microwave oven and upper cabinet. ■ Grounded electrical outlet inside the perforation is at least 6" (15.2 cm) of wall structures, be free of the microwave oven...
Installation Instructions - Page 3

..." (30.5 cm) min. 14" (35.6 cm) max. A. 2" x 4" wall stud B. The microwave oven is properly grounded. Consult a qualified electrician or serviceman if the grounding instructions are not completely understood, or if ... THESE INSTRUCTIONS 3 Required: ■ A 120 Volt, 60 Hz, AC only, 15- The plug must be grounded. See "Electrical Requirements" section. Do not use of...
Installation Instructions - Page 4

... set for recirculation installation. Screws (in Step 1. 4 Damper plate tabs D. Rotate Blower Motor The microwave oven is attached to the back of the microwave oven. Wall Venting Installation Only 1. A B C A. Remove any remaining contents from the microwave oven cavity. 2. A A. Make sure damper plate tabs are using recirculation installation. Damper plate 2. Screws C. For...
Installation Instructions - Page 5

...microwave oven, and flat sides of blower motor face back of the microwave oven. Reattach blower motor to back of microwave oven with flat sides facing the back of the microwave oven (as shown), performance will be reattached to the microwave oven... motor is not positioned with 2 screws removed in the top of microwave oven. Damper plate tabs D. Secure damper plate with 2 screws removed in...
Installation Instructions - Page 6

...Support tabs F. Locate Wall Stud(s) NOTE: If no wall studs exist within 6" (15.2 cm) of each stud, and draw a plumb line down each stud center. ... (see "Mark Rear Wall" section), only recirculation or roof venting installation can be done. Cabinet opening , do not install the microwave oven. 1. Wall Stud at One End Hole Figure 3 Wall Studs at End Holes Figure 2 B C C C D B D ...
Installation Instructions - Page 7

Mark Rear Wall The microwave oven must be installed on a minimum of 1 wall stud, preferably 2, using a minimum of "Locate ... the upper cabinet. Wall Venting Installation Only Upper cabinet bottom ³⁄₈" (1 cm) 4" (10.2 cm) Centerline 6" (15.2 cm) 6" (15.2 cm) 8. Using a straightedge, draw the 2 horizontal, level lines through the wall at both holes in Step 9 to the ...
Installation Instructions - Page 8

... 3 of "Mark Rear Wall." Push the bolt with the holes in the top of the microwave oven. Check alignment of mounting plate, making sure it fits inside the frame, against drywall. 5.... Prepare Upper Cabinet 1. Disconnect power to use as guides. ■ If the wall behind the microwave oven (as at the other end hole. Remove all lag screws and bolts. Make sure the template centerline...
Installation Instructions - Page 9

.... This hole is the heavy side. These are for wall venting only) 1. Mounting plate B. Make sure the microwave oven door is at the top, and the damper blade opens away from the microwave oven. Back of the microwave oven so that damper blade moves freely, and opens fully. 2. NOTE: If venting through the wall, make sure...
Installation Instructions - Page 10

...; See the User Instructions for troubleshooting information. Test vent fan and exhaust by placing 1 cup (250 mL) of 1 minute at least one person holding it in death, fire, or electrical shock. 2. If the microwave oven does not operate: ■ Check that a household fuse has not blown, or that the power supply cord is...
Installation Instructions - Page 11

...microwave oven and the transition piece. A B C D E 3" (7.6 cm) F A. Vent extension piece, at least 3" (7.6 cm) of clearance between the top of the microwave oven...8324;" x 10" = 25 ft (8.3 x 25.4 cm = 7.6 m) D. 90° elbow: 6" = 10 ft (15.2 cm = 3 m) E. Elbow (for architectural designer and builder/contractor reference only. See the examples in the vent system &#...
Installation Instructions - Page 12

... Steel Almond See your authorized dealer or service center. The total length of the microwave oven. In addition, a rectangular 3" (7.6 cm) extension vent between the damper assembly... or 6" (15.2 cm) round vent should be used in the system. For best performance, use when installing this microwave oven in a 36" (91.4 cm) or 42" (106.7 cm) wide opening , behind the microwave oven door on the...
Dimension Guide - Page 1

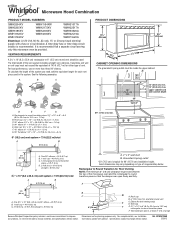
Microwave Hood Combination PRODUCT MODEL NUMBERS GMH3204XV GMH5205XV GMH6185XV WMH1162XV WMH1163XV WMH1164XW WMH2175XV WMH2205XV WMH3205XV WMH31017A WMH32517A WMH53520A WMH32L19A WMH73L20A Electrical: A 120-Volt, 60-Hz, AC-only, 15...Rectangular to round transition piece so that a separate circuit serving only this microwave oven be inside the upper cabinet. Vent extension piece, at least 3" ...
Warranty Information - Page 1

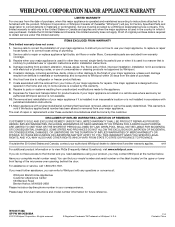
.... 4. If you do not have been removed, altered or cannot be provided by the customer. All rights reserved. ® Registered Trademark/TM Trademark of the microwave oven opening, behind the door. Service calls to refrigerator or freezer product failures. 7. For assistance or service, call 1-800-253-1301. W10451742A SP PN W10458699A ©...
Use & Care Guide - Page 1

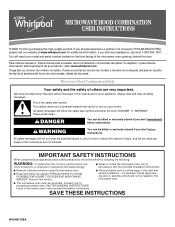
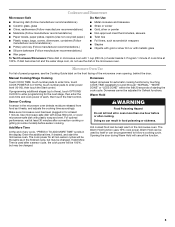
...purchasing this section. ■ Some products such as whole eggs in the microwave oven. ■ The microwave oven must be killed or seriously injured if you don't follow the safety alert...can happen if the instructions are not followed. IMPORTANT SAFETY INSTRUCTIONS When using the microwave oven. ■ Read and follow instructions. are very important. You will need assistance,...
Use & Care Guide - Page 2

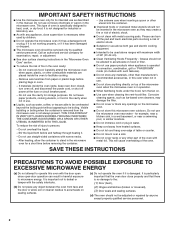
... off power at the fuse or circuit breaker panel. - SAVE THESE INSTRUCTIONS PRECAUTIONS TO AVOID POSSIBLE EXPOSURE TO EXCESSIVE MICROWAVE ENERGY (a) Do not attempt to operate this microwave oven outdoors. Do not use the microwave oven near a swimming pool, or similar locations. ■ Do not immerse cord or plug in convection, combination, grill or "PAN...
Use & Care Guide - Page 3

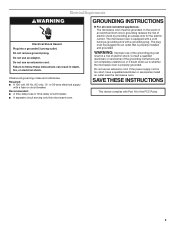
... not use an extension cord. Required: ■ A 120 volt, 60 Hz, AC only, 15- The plug must be plugged into a grounded 3 prong outlet. Do not use an extension cord... installed and grounded. Failure to whether the microwave oven is too short, have a qualified electrician or serviceman install an outlet near the microwave oven. GROUNDING INSTRUCTIONS ■ For all governing codes...
Use & Care Guide - Page 4

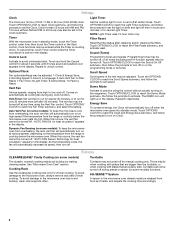
... Timer: Set vent fan to run for 2-level cooking. When this occurs, the vent fan cannot be turned off after 30 minutes). See "Microwave Oven Care" section. To avoid damage to the microwave oven due to avoid unintended start. Sound (Tones) Programming tones and signals. Touch OPTIONS/CLOCK to reach the Demo Mode submenu, the...
Use & Care Guide - Page 5

... cook power of any cycle, "PRESS 0 TO ADD MORE TIME" scrolls in the microwave oven. Enter the additional time, if desired, and start the microwave oven. Add More Time At the end of each, then touch the Start control. Program 1 minute of the microwave oven opening, behind the door. The Warm Hold function uses 10% cook power...
Use & Care Guide - Page 7

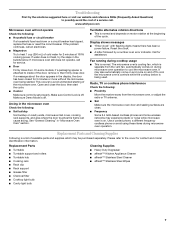
... clock. ■ A letter followed by a number is being started. It may experience static or noise while microwave oven is separate from the vent fan, automatically comes on during microwave oven operation to possibly avoid the cost of a service call for 2 minutes at the beginning of available parts and supplies which is on motor rotation at 100...

Whirlpool Knowledge Base Results

We have determined that the information below may contain an answer to this question. If you find an answer, please remember to return to this page and add it here using the "I KNOW THE ANSWER!" button above. It's that easy to earn points!

  • The water coming out of my hot water dispenser is not hot.
    ... warranty on my Whirlpool® Vapor appears, dispenser makes boiling noises or water is too hot What is still being heated. The water from my hot water dispenser has an unpleasant taste. The switch may have turned power off. Wait 15 minutes and check temperature again. Check that the Temperature Control is plugged...
  • How do I use the timer on my microwave oven?
    ..., but is in use , touch Timer Set/Off. To set time. If no action is in use , the microwave oven can also operate. If not touched within 2 minutes, the display will return to 90 minutes, and counts down the set the timer: Touch Timer Set/Off. What are some tips for 10 seconds while...
  • Temperature not accurate - calibration
    ... factors such as yeast, baking powder, baking soda and eggs. Press Start. My oven is normal for the temperature showing on some models) for 3 seconds until the preheat cycle ended? Preheat temperatures are enabled. Waiting an additional 10-15 minutes, after the preheat conditioning time ends, to put food in Sabbath Mode? It...

Similar Questions

Whirlpool Model Wmh53520cs Microwave Fan Noise
I purchased a Whirlpool Model WMH53520CS over the oven microwave. This microwave has four fan speeds...
(Posted by daviddobey 7 years ago)
The Timer Light
The timer light went out on the microwave. What can I do to fix it. Can not see at all.
(Posted by juaspencer 9 years ago)
Whirlpool Wmh32517as Installation Instructions
Cannot down on iPad.
(Posted by Michaelgray1818 10 years ago)
Whirlpool Wmh2175xvb Microwave
I was cooking eggs (to hardbil them) this morning and I set the timer for 15 minutes and then I hear...
(Posted by titusville 13 years ago)
Ask a New Question
Use the box below to post a new question about this Whirlpool product .
Points & Prizes
  • You can earn points for nearly everything you do on HelpOwl.com
  • You can trade in those points for gift cards at leading retailers such as Amazon.com and Walmart
  • It's that simple!
See How it Works
Create a Free Account

Whirlpool Manuals

Find free Whirlpool WMH32517AS manuals and user guides available at ManualOwl.com. Try out our unique manual viewer allowing you to interact with manuals from directly within your browser!

Whirlpool Reviews

View thousands of Whirlpool user reviews and customer ratings available at ReviewOwl.com.

Contact Information

Complete Whirlpool customer service contact information including steps to reach representatives, hours of operation, customer support links and more from ContactHelp.com.

Scoreboard Ratings

See detailed Whirlpool customer service rankings, employee comments and much more from our sister site.

Whirlpool Recalls

Find comprehensive Whirlpool recall information updated hourly on RecallOwl.com.