Get support for Whirlpool WMH2175XVB - Microwave

Whirlpool WMH2175XVB Support Question

Whirlpool WMH2175XVB Support Question

Find answers below for this question about Whirlpool WMH2175XVB - Microwave.
Need a Whirlpool WMH2175XVB manual? We have 4 online manuals for this item!
Question posted by eagle201942 on November 14th, 2011

Door Handel

How do i remove the door handle to be replaced.

Current Answers

There are currently no answers that have been posted for this question.
Be the first to post an answer!

Remember that you can earn up to 1,100 points for every answer you submit. The better the quality of your answer, the better chance it has to be accepted.

Related Whirlpool WMH2175XVB Manual Pages

Dimension Guide - Page 1

... 1 rectangular to 15.2 cm = 1.5 m) B. diameter round vent C. Ref. ® Microwave Hood Combination PRODUCT MODEL NUMBERS GMH3204XV GMH5205XV GMH6185XV WMH1162XV WMH1163XV WMH1164XW WMH2175XV WMH2205XV WMH3205XV Electrical: A 120... 6" (15.2 cm) min. Exact dimensions may vary depending on type of the microwave oven and the rectangular to round transition piece F. A 2 ft (0.6 m) C A....
Installation Instructions - Page 1

...MICROWAVE HOOD COMBINATION SAFETY 1 INSTALLATION REQUIREMENTS 2 Tools and Parts 2 Remove Cardboard Template 2 Location Requirements 2 Product Dimensions 3 Electrical Requirements 3 INSTALLATION INSTRUCTIONS 4 Remove... Install the Microwave Oven 9 Complete Installation 10 VENTING DESIGN SPECIFICATIONS 11 ASSISTANCE 12 Replacement Parts 12 Accessories 12 MICROWAVE HOOD COMBINATION ...
Installation Instructions - Page 2

...microwave oven for use appropriate fasteners. NOTES: ■ If installing the microwave oven near a left sidewall, make sure that the door...; Duct tape Parts Supplied For reorder information, see "Replacement Parts" section. See "Venting Design Specifications" section. ...starting installation. Remove Cardboard Template The cardboard piece from the rest of the microwave oven packaging is...
Installation Instructions - Page 3

Do not remove ground prong. Recommended: ■ A time-delay fuse or time-delay circuit breaker. ■ A separate circuit serving only this microwave oven. Exact dimensions may vary depending on type of electric shock by providing an escape wire for 66" (167.6 cm) installation height. The microwave oven is equipped with a cord having a grounding wire with a fuse...
Installation Instructions - Page 4

... to back of microwave oven. Lift blower motor out of microwave oven. If the mounting plate is being handled. 4. Exhaust port 6. A B A. Screws (in another location where wall or roof venting may be made to the back of microwave oven with 2 screws removed in Step 1. 4 Wall Venting Installation Only 1. Slots 8. Rotate blower motor 180° so that door does not...
Installation Instructions - Page 5

... Only." 5 Reattach damper plate. D A. Lower blower motor back into the slots in Step 1 of the microwave oven. Secure damper plate with 2 screws removed in Step 3 of microwave oven. Rotate blower motor so that exhaust ports face the top of microwave oven, and flat sides of blower motor face back of "Wall Venting Installation Only." Reattach blower motor...
Installation Instructions - Page 6

...B C C C D B D A A A A E E E E F F NOTE: If wall stud is within 6" (15.2 cm) of each stud, and draw a plumb line down each stud center. Cabinet opening , do not install the microwave oven. 1. End holes (on mounting plate) B. Holes for lag screws E. See illustrations in "Possible Wall Stud Configurations." 2. Wall stud centerlines D. Locate Wall Stud(s) NOTE: If no...
Installation Instructions - Page 7

...holes marked in Step 4. Cardboard template C. These represent the mounting plate's end holes and bottom edge. 4. Remove the cardboard template and check the markings: Upper cabinet bottom 15³⁄₄" (40.0 cm) Centerline...) 4" (10.2 cm) Centerline 6" (15.2 cm) 6" (15.2 cm) 8. Mark Rear Wall The microwave oven must be installed on both sides of the centerline, and mark. 10.
Installation Instructions - Page 8

...is maintained. Spring toggle nut 3. Check alignment of the microwave oven. Check alignment of the tiles rather than the drywall). 4. Remove all lag screws and bolts. The "rear wall" arrows...end hole. 6. Disconnect power to use as guides. ■ If the wall behind the microwave oven (as at Both End Holes (Figure 4) 1. Make sure the template centerline aligns with tape...
Installation Instructions - Page 9

... shaded area "G" on Upper Cabinet Template. 8. Install Damper Assembly (for two 1/4-20 x 3" bolts and washers used to secure the microwave oven to the microwave oven, do not grip or use the door or door handle while the microwave oven is metal, the supply cord bushing needs to do so can result in place. 9 Position the damper assembly on the...
Installation Instructions - Page 10

... cord. Do not use an adapter. Test vent fan and exhaust by placing 1 cup (250 mL) of microwave oven by operating the vent fan. 5. The blocks must be adjusted, skip steps 7-9. 7. WARNING A. Sheet metal screw D. Replace the fuse or reset the circuit breaker. If the problem continues, call an electrician. ■ Check that...
Installation Instructions - Page 11

..., be sure there is at least 3" (7.6 cm) of clearance between the top of the microwave oven and the transition piece. diameter round vent C. See the examples in the vent system ■... Round Transition NOTE: The minimum 3" (7.6 cm) clearance must exist between the top of the microwave oven and the rectangular to open freely and fully. Do not vent exhaust air into concealed spaces, such...
Installation Instructions - Page 12

... replacement parts. Each panel is a list of the system you call us at our toll free number listed in the User Instructions. Two 90° elbows = 20 ft (6.1 m) B. 1 wall cap = 40 ft (12.2 m) C. 1 rectangular to round transition piece = 5 ft (1.5 m) D. 2 ft (0.6 m) + 6 ft (1.8 m) straight = 8 ft (2.4 m) If the existing vent is located behind the microwave oven door...
Owners Manual - Page 1

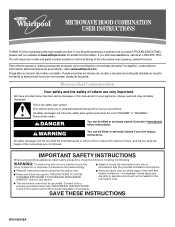
... and obey all instructions before using electrical appliances basic safety precautions should not be followed, including the following: WARNING: To reduce the risk of the microwave oven opening, behind the door. WARNING You can be killed or seriously injured if you don't immediately follow the specific "PRECAUTIONS TO AVOID POSSIBLE EXPOSURE TO EXCESSIVE...
Owners Manual - Page 2

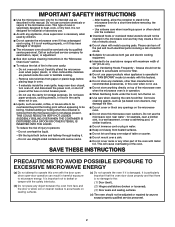
... immerse cord or plug in the microwave oven as they may damage the filter. ■ Do not cover or block any object between the oven front face and the door or allow the container to accumulate on . ■ Use care when cleaning the vent-hood filter. It is damaged. Remove wire twist-ties from paper...
Owners Manual - Page 3

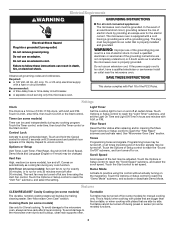
... -function signals) may be changed. Touch the Start control to reach the "Light Timer" submenu, and set speed. Demo Mode Activate to the microwave oven, always remove rack after replacing and/or cleaning the filters. To avoid damage to practice using the Vent Fan control. Do not use an extension cord. In the event...
Owners Manual - Page 4

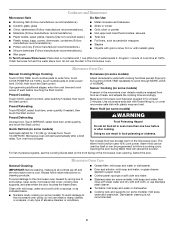
... use stainless steel cleaner. ■ Turntable: mild soap and water or dishwasher. ■ Cooking rack and supports (on the front facing of the microwave oven opening, behind the door. Preset Reheating Touch REHEAT, select food item, enter quantity if needed , then touch the Start control. The Warm Hold function uses 10% cook power...
Owners Manual - Page 5

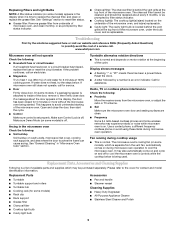
... the vent grille at 100% cooking power. If microwave oven still does not operate, call an electrician. ■ Magnetron Try to avoid unintended starting of the door, remove it is time to reset filter status. ■ Grease filter: Remove grease filter from the vent fan, automatically comes on . Replacment Parts Accessories ■ Turntable ■ Turntable support...
Owners Manual - Page 6

... you need further assistance, you do not have been removed, altered or cannot be provided by the customer. The removal and reinstallation of your product, you on the upper or lower front facing of the microwave oven opening, behind the door. The cost of repair or replacement under this limited warranty. LIMITATION OF REMEDIES CUSTOMER'S SOLE...
Warranty - Page 1

... appliance is not available. 10. Costs associated with the removal from your home of your major appliance, to replace or repair house fuses, or to view FAQs (Frequently ...BY LAW. All rights reserved. ® Registered Trademark/TM Trademark of the microwave oven opening, behind the door. Damage resulting from warranty coverage. 3. LIMITATION OF REMEDIES CUSTOMER'S SOLE AND ...

Whirlpool Knowledge Base Results

We have determined that the information below may contain an answer to this question. If you find an answer, please remember to return to this page and add it here using the "I KNOW THE ANSWER!" button above. It's that easy to earn points!

  • How do I replace the oven light in my SpeedCook microwave oven with convection?
    ... deflector. How do I replace the oven light in oven or reconnect power. ᾠTORX ® Remove the bulb cover mounting screw; T10 screwdriver to the right and lifting. If using recirculating exhaust venting, skip Step 8. How do I replace the oven light in my SpeedCook microwave oven with convection Oven light is on when door is closed How do I operate...
  • How do I replace the grease filters in my microwave oven?
    ... in the space below to 12 months. Ordering replacement parts or accessories FAQs Knowledgebase search tips What should I remove and clean the grease filters on my microwave oven? The charcoal filters cannot be washed and should be replaced every 6 to review the use and care manual. Replace the filters by inserting the wide tab of the...
  • How do I replace the cooking light in my microwave oven?
    ... odor filter. Plug in my microwave oven? Replacing the cooktop light on when the door is opened and when the oven is a 10W low-voltage halogen capsule bulb. replacement pats. FSP replacement parts will help us to better respond to handle bulb. The oven light is operating. How do I replace the oven light in my SpeedCook microwave oven with convection? It automatically turns...

Similar Questions

What Would Be The Newest Version With Same Size As This Microwave Oven
What Would Be The Newest Version With Same Size As This Microwave Oven (wmc50522as)
(Posted by chicity1992 5 months ago)
Replace The Door Handle.
I have a Whirlpool microwave MH3184XPY-0 and need to replace the door handle. I already bought a rep...
(Posted by pqngo2696 11 years ago)
Won't Heat
I went to use my microwave (Whirlpool WMH2175xvb) today to make my kids breakfast. I was re-heating ...
(Posted by emilyleish 13 years ago)
Whirlpool Wmh2175xvb Microwave
I was cooking eggs (to hardbil them) this morning and I set the timer for 15 minutes and then I hear...
(Posted by titusville 13 years ago)
Ask a New Question
Use the box below to post a new question about this Whirlpool product .
Points & Prizes
  • You can earn points for nearly everything you do on HelpOwl.com
  • You can trade in those points for gift cards at leading retailers such as Amazon.com and Walmart
  • It's that simple!
See How it Works
Create a Free Account

Whirlpool Manuals

Find free Whirlpool WMH2175XVB - Microwave manuals and user guides available at ManualOwl.com. Try out our unique manual viewer allowing you to interact with manuals from directly within your browser!

Whirlpool Reviews

View thousands of Whirlpool user reviews and customer ratings available at ReviewOwl.com.

Contact Information

Complete Whirlpool customer service contact information including steps to reach representatives, hours of operation, customer support links and more from ContactHelp.com.

Scoreboard Ratings

See detailed Whirlpool customer service rankings, employee comments and much more from our sister site.

Whirlpool Recalls

Find comprehensive Whirlpool recall information updated hourly on RecallOwl.com.