Whirlpool WMC50522AS Support Question
Whirlpool WMC50522AS Support Question
Find answers below for this question about Whirlpool WMC50522AS.Need a Whirlpool WMC50522AS manual? We have 3 online manuals for this item!
Question posted by pastor66497 on December 9th, 2021
Frame For Cabinet Install
I need a new face Frame for the cabinet install what part number is that?
Current Answers
Related Whirlpool WMC50522AS Manual Pages
Use & Care Guide - Page 1
or visit our website at... www.whirlpool.com
Table of Contents 2
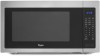
Model WMC50522
W10434259C
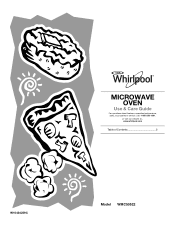
MICROWAVE OVEN
Use & Care Guide
For questions about features, operation/performance, parts, accessories or service, call: 1-800-253-1301.
Use & Care Guide - Page 2
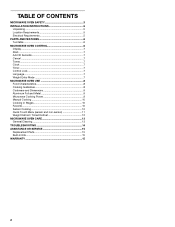
TABLE OF CONTENTS
MICROWAVE OVEN SAFETY 3 INSTALLATION INSTRUCTIONS 5
Unpacking 5 Location Requirements 5 Electrical Requirements 5 PARTS AND FEATURES 6 Turntable 6 MICROWAVE OVEN CONTROL 6 Display 7 Start 7 Add 30 Seconds 7 Cancel 7 Tones 7 Clock 7 Timer 7 Control Lock 7 Language 7 Weight Entry Mode 7 MICROWAVE OVEN USE 8 Food Characteristics 8 Cooking Guidelines 8 Cookware ...
Use & Care Guide - Page 3
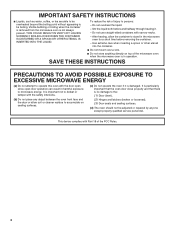
... with any openings on your appliance. All safety messages will follow the specific "PRECAUTIONS TO AVOID POSSIBLE EXPOSURE TO EXCESSIVE MICROWAVE ENERGY" found in the "INSTALLATION INSTRUCTIONS" section.
■ Install or locate the microwave oven only in water.
■ Keep cord away from paper or plastic bags before using electrical appliances basic safety precautions should...
Use & Care Guide - Page 4
... bubbling or boiling when the container is removed from the microwave oven is important not to defeat or tamper with Part 18 of injury to persons: -
This device complies with the safety interlocks.
(b) Do not place any object between the oven front face and the door or allow the container to stand in harmful...
Use & Care Guide - Page 5
...microwave oven on a cart, counter, table or shelf
that is strong enough to hold the microwave oven and the food and utensils you place inside with a fuse or circuit breaker. The microwave oven should be built into a wall or cabinet...9632; The microwave oven should work properly once it and made any needed repairs. If...the microwave oven, as well as to move and install microwave oven. ...
Use & Care Guide - Page 6
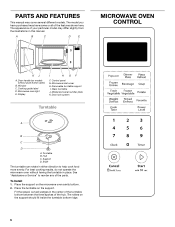
... the parts. Place the support on the support. Place the turntable on the microwave oven cavity bottom. 2. Model and serial number plate K. Cooking guide label D. Display
I . Hub C.
Fit the raised, curved wedges in either direction to reorder any of the hub. To Install: 1.
The rollers on models without having the turntable in this manual...
Use & Care Guide - Page 7
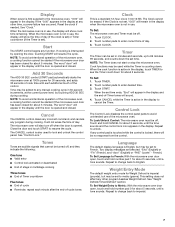
...Repeat to change back to imperial.
7 Repeat to change back to English. Reset the clock if needed. NOTE: To avoid unintentional operation of the control.
The Clock cannot be off , and they... remaining. To Set Weight Entry to Metric: With the microwave oven door open , touch and hold number pad 1 for about 5 minutes. When the microwave oven is not in the display. The word "door" will...
Use & Care Guide - Page 8

..., should not be turned back at once, the longer the cook time needed.
Stirring and Turning Stirring and turning redistribute heat evenly to and absorbed by the natural conduction of the recommended cook time, potatoes should be dried in microwave oven.
■ Paraffin wax will heat faster than the same size of food...
Use & Care Guide - Page 9
... manufacturer's recommendations. To Test Cookware or Dinnerware for use in the microwave oven. Place cookware or dinnerware in microwave oven with another metal object during a cooking cycle, touch POWER LEVEL. Cook...
■ Always use cookware or dinnerware if it .
2. Cooking and heating foods that need a cook power lower than high. Defrosting bread, fish, meats, poultry and Low, Defrost...
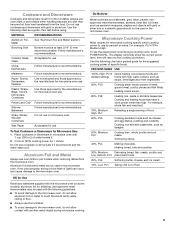
Use & Care Guide - Page 13
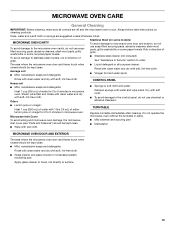
... soft, lint-free cloth. TURNTABLE
Replace turntable immediately after cleaning. Rub in place. ■ Mild cleanser and scouring pad ■ Dishwasher
MICROWAVE OVEN DOOR AND EXTERIOR
The area where the microwave oven door and frame touch when closed should be kept clean. ■ Wipe with soft cloth.
■ To avoid damage to 5 minutes in direction...
Use & Care Guide - Page 14
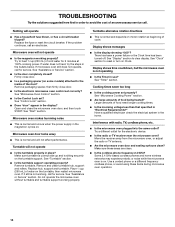
...Microwave Cooking Power" section.
■ Are large amounts of food need longer cooking times.
■ Is the incoming voltage less than that specified in the bullets below. Make sure these items during microwave oven operation.
14
Microwave oven... Try to clear display. Place 1 cup (250 mL) of cycle. Microwave oven makes humming noise
■ This is normal and will operate
■ ...
Use & Care Guide - Page 15
...
affresh® Kitchen Appliance Cleaner Part Number W10355010
affresh® Stainless Steel Cleaner Part Number W10355016
affresh® Stainless Steel Wipes Part Number W10355049
Heavy Duty Degreaser Part Number 31552A
Built-In Kits
This countertop microwave oven can be provided by using one -year limited warranty of appliances.
■ Installation information.
■ Use and maintenance...
Use & Care Guide - Page 16
... of purchase or installation date for in a manner contrary to published user or operator instructions and/or installation instructions.
5. Repairs to correct the installation of consumables or ...Care Guide. The consultant will need it is void if the factory applied serial number has been altered or removed from your Whirlpool® Countertop Microwave should be properly packaged to ...
Warranty Information - Page 1

...Number W10355010
affresh® Stainless Steel Cleaner Part Number W10355016
affresh® Stainless Steel Wipes Part Number W10355049
Heavy Duty Degreaser Part Number 31552A
Built-In Kits
This countertop microwave oven can be provided by kit model number.
KIT SIZE
KIT MODEL NUMBERS... to build every new WHIRLPOOL® appliance. It may save you can be installed over any questions ...
Warranty Information - Page 2

...number has been altered or removed from warranty coverage.
3. LIMITATION OF REMEDIES; This warranty gives you specific legal rights, and you reside in -warranty service. Additional help you obtain assistance or service if you need service, first see the "Troubleshooting" section of God, improper installation, installation... forward the product to microwave product failure.
8.
All...
Installation Guide - Page 1

...largeur
Table of Contents / Table des matières
MICROWAVE OVEN SAFETY 1
INSTALLATION INSTRUCTIONS 2 Tools and Parts 2 Location Requirements 2 Required Cutout Dimensions 2 Trim Kit Frame Dimensions 2 Electrical Requirements 3 Prepare Microwave Oven 3 Prepare Cutout/Cabinet Opening 3 Install the Microwave Oven 4 Install Trim Kit Frame 5
SÉCURITÉ DU FOUR À MICRO-ONDES...
Installation Guide - Page 2
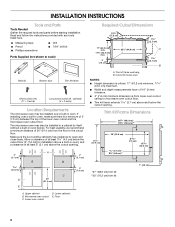
... 2.7 cm)
17" (43.2 cm) min.
17¹⁄₈" (43.5 cm) max.
3" (7.6 cm)
Width
25¹⁄₂" (64.8 cm)
A
1 2.7 cm)
B
A.
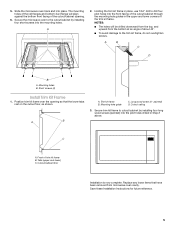
The microwave oven may be installed in a cabinet by itself (without a built-in oven. Upper cabinet B. Lower oven cutout
D. Trim kit frame overhang B. Make sure the surrounding cabinetry has clearance to scale)
Rails (2)
Bottom duct
Trim kit...
Installation Guide - Page 3
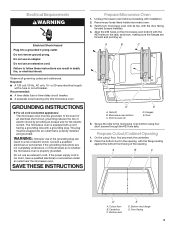
..., 15- Observe all cord connected appliances: The microwave oven must be grounded. Front facing
3 A
B
C
D
A.
Bottom duct flange E. WARNING: Improper use an extension cord. Prepare Cutout/Cabinet Opening
1. The microwave oven is properly grounded. Align the #33 holes on the microwave oven bottom with installation.
2.
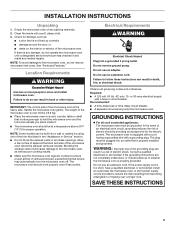
Electrical Requirements
WARNING
Electrical Shock Hazard Plug...
Installation Guide - Page 4
... an adapter. A
B
A. Bottom duct mounting holes
5.
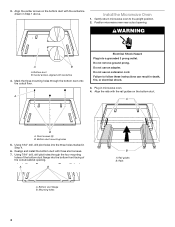
Mark the three mounting holes through the four mounting
holes of the bottom duct flange into the bottom front facing of the cutout/cabinet opening . Short screws (3) B. Install the Microwave Oven
1. Position microwave oven near cutout opening . Bottom duct flange B. 3. Plug in death, fire, or electrical shock.
3.
Installation Guide - Page 5
...Tabs (upper and lower) C. NOTES:
■ The holes will align against the bottom front facing of trim kit frame B. Short screws (4)
Install Trim Kit Frame
1. Cutout ceiling
3.
Secure the microwave oven to cutout/cabinet by installing four short screws into the front facing of the cutout/cabinet through the mounting hole guides in Step 2 above. C
A. A
2. Position trim kit...
Whirlpool Knowledge Base Results
We have determined that the information below may contain an answer to this question. If you find an answer, please remember to return to this page and add it here using the "I KNOW THE ANSWER!" button above. It's that easy to earn points!-
How does the Style 1 freestanding electronic oven control display operate on my electric range?
...power failure has occurred. The display on my microwave oven is a 12-hour clock that shows a.m. or p.m. Press Off/Cancel and reset the clock if needed. Clock On some models, press Clock or ...showing messages How do I set the clock on your model number in the space below. Press Clock. Depending on my SpeedCook microwave oven with convection? Press Clock (on the display. To set... -
The display on my microwave oven is showing messages
...or Timer countdown. See "Clock" section below to reset the clock or to the microwave oven, a ":" will blink in use (standby mode), the display shows the time of day. Touch the number pads to stop the blinking. Find a local service provider: Product Category Washer or ...; See "Display" section below . Touch Cancel Off or Cancel, and reset the clock if needed. -
How do I replace the grease filters in my microwave oven?
... the filter frame inward, and pull down until it 's time to review the use and care manual. NOTE: Do not operate the oven without the filters in my microwave oven? How do I remove and replace the charcoal filter on my microwave oven? Give your representative Promo Code F9A75Q4 to receive a 10% discount on your model number in...
Similar Questions

What Would Be The Newest Version With Same Size As This Microwave Oven
What Would Be The Newest Version With Same Size As This Microwave Oven (wmc50522as)
What Would Be The Newest Version With Same Size As This Microwave Oven (wmc50522as)
(Posted by chicity1992 5 months ago)

Display Not Showing Correctly.
The numbers on the display are not completely formed and the middle : is flashing even on clock.
The numbers on the display are not completely formed and the middle : is flashing even on clock.
(Posted by Dawnkalfon7 2 years ago)

Microwave Has Power The Light Quit Working And Will Not Turn On
(Posted by sgee3006 4 years ago)

New Microwave Oven Installed 5.20.17-----today, Blower Came On Without Pressing
New product installed 5.20.17. has been operating normally but today fan came on by itself. Help!!
New product installed 5.20.17. has been operating normally but today fan came on by itself. Help!!
(Posted by wdenmark 6 years ago)

In Need An Instruction Manual For The Wmh2175xvq-2 Microwave Oven
(Posted by wasick 12 years ago)