Whirlpool WET3300SQ Support Question
Whirlpool WET3300SQ Support Question
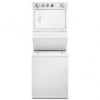
Find answers below for this question about Whirlpool WET3300SQ - 27" Stack Washer.Need a Whirlpool WET3300SQ manual? We have 2 online manuals for this item!
Question posted by sjeanbt on April 22nd, 2010
Does The Washer And Dryer Come Apart For Installation
The person who posted this question about this Whirlpool product did not include a detailed explanation. Please use the "Request More Information" button to the right if more details would help you to answer this question.
Current Answers
Related Whirlpool WET3300SQ Manual Pages
User Instructions - Page 1
.... You can find this book and your sales slip together for future reference. ®
WASHER/DRYER USER INSTRUCTIONS
INSTRUCCIONES PARA EL USUARIO DE LA LAVADORA/SECADORA
INSTRUCTIONS D'UTILISATION DE LA LAVEUSE/SÉCHEUSE
Table of purchase or installation date for in your correspondence.
®
8578179B Additional help you obtain assistance or service if...
User Instructions - Page 2
... any phone in this manual and on your safety, the information in the vicinity of this manual must be performed by a qualified installer, service agency, or the gas supplier.
2 WASHER/DRYER SAFETY
Your safety and the safety of others . WARNING: For your appliance. Follow the gas supplier's
instructions.
• If you and others...
User Instructions - Page 3
... hot water faucets and let the water flow from service or discarded, remove the doors to the washer/dryer compartments.
■ Do not reach into the washer/dryer if the tub, agitator or drum is not properly installed and vented, it will release any servicing unless specifically recommended in this Use and Care Guide or...
User Instructions - Page 4
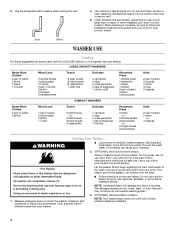
... labels.
Fire Hazard
Never place items in a new location. Let the washer fill and begin agitating the load. Do not use , but at least every 2 years, or when installing your washer. Doing so can cause poor cleaning.
2. (OPTIONAL) Add liquid chlorine bleach.
NOTE: Your washer/dryer does not come with a pouring spout to seal all joints.
User Instructions - Page 5
... of load being dried. Reduce the wash time when using your washer:
■ To stop or restart your dryer, wipe the dryer drum with a damp cloth to ON or OFF.
Items containing foam...fabric softener in death, explosion, or fire.
Failure to the wash cycle you purchased your washer/dryer.
See "Cleaning the Lint Screen."
2. Softener is helpful when drying items that has ever...
User Instructions - Page 6

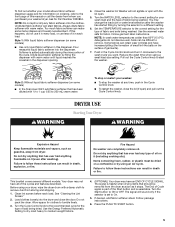
... use to reduce the risk of clothes. Style 2: 1. As Needed Cleaning
Laundry detergent and fabric softener residue can result in dryer. Cleaning the Dryer Interior
To clean dryer drum 1. WARNING
Explosion Hazard Keep flammable materials and vapors, such as washer safe. Failure to your fingers. Cleaning the liquid fabric softener dispenser (on the lint screen...
User Instructions - Page 7
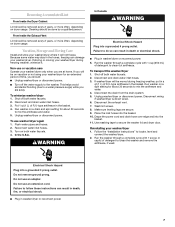
... spin setting for an extended period of time, you are at home. Vacation, Storage and Moving Care
Install and store your washer/dryer 1. Unplug washer/dryer or disconnect power. Flush water pipes and hoses. 2.
Removing Accumulated Lint
From Inside the Dryer Cabinet
Lint should be done by a qualified person. Disconnect and drain water inlet hoses. 3. Unplug...
User Instructions - Page 8
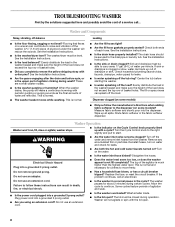
...
Allow the cycle to start. The lid must be able to the drainpipe or laundry tub. Washer will not agitate or spin with a cycle? This is clogged or slow, water ... higher than the highest water level.
The washer/dryer must be closed during certain cycles. See the Installation Instructions.
■ Is the drain hose properly installed? The drain hose should be level.
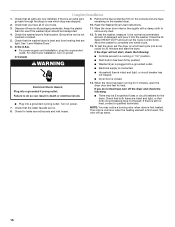
WARNING...
User Instructions - Page 1

... CM) ELECTRIC WASHER/DRYER INSTALLATION INSTRUCTIONS
INSTRUCCIONES DE INSTALACIÓN DE LA LAVADORA/ SECADORA ELÉCTRICA DE 27" (69 CM)
INSTRUCTIONS D'INSTALLATION LAVEUSE/SÉCHEUSE ÉLECTRIQUE DE 27" (69 CM)
Table of others . Canada 5 Electrical Connection - Canada........... 36 Exigences concernant l'évacuation 37 Enlever la sangle d'expédition 38 Installation des...
User Instructions - Page 2
... page of the Washer/Dryer User Instructions.
2 See "Remove Shipping Strap.")
E. Mobile home installations require metal exhaust system hardware available for U.S.
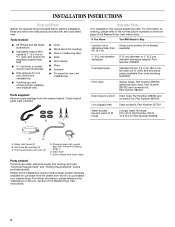
Tools needed :
Check local codes, electrical supply and venting, and read "Electrical Requirements" and "Venting Requirements" before starting installation. If You Have
You Will Need to Buy
Laundry tub or standpipe taller...
User Instructions - Page 3
... closets, mobile homes or sleeping quarters.
The installation must be exposed to open fully.
*32" (81.3 cm)
27" (68.6 cm)
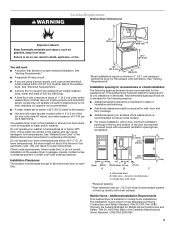
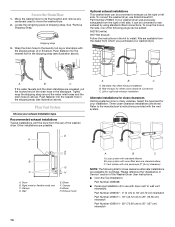
*Most installations require a minimum 5" (12.7 cm) clearance behind the dryer for spacing of the washer/ dryer. Check code requirements. Additional Installation Requirements
This washer/dryer is recommended to the washer.
■ Hot and cold water faucets located...
User Instructions - Page 4
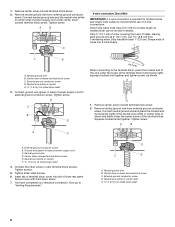
... connect to introduce outside air into the dryer. Electrical Connection
To properly install your washer/dryer, you need. Grounding through the neutral conductor is installed with the National Electrical Code, ANSI/NFPA...no less than 96" (2.4 m) from the bottom of the washer.
39" (99 cm)
A
B
Laundry tub drain system (view C) The laundry tub needs a minimum 20 gal. (76 L) capacity. ...
User Instructions - Page 5
... 10-gauge copper wires and match a 4-wire receptacle of least resistance for electric current. For a permanently connected washer/dryer: This washer/dryer must be connected to whether the washer/dryer is properly installed and grounded in the Washer/Dryer User Instructions. The ground wire (ground conductor) may be plugged into a grounded 4 prong outlet. Canada
WARNING
Electrical...
User Instructions - Page 8
...
(2.15" cm)
C
E
A. Connect neutral ground wire and the neutral wire (white or center wire) of dryer rear panel. Strip 5" (12.7 cm) of power supply cord to
"Venting Requirements." Shape ends of 3-wire ... wire (white or center wire) of direct wire cable under the screw of extra length so washer/dryer can be moved if needed. You have 5 ft (1.52 m) of the terminal block (hook...
User Instructions - Page 11
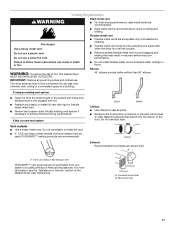
... exhaust vent
DURASAFE™ vent products can result in death or fire.
■ Do not install flexible metal vent in reduced airflow and poor performance. Good
Better
Clamps
■ Use clamps to...wall, ceiling or a concealed space of a building.
WARNING: To reduce the risk of the Washer/Dryer User Instructions. If using an existing vent system
■ Clean lint from your dealer or by ...
User Instructions - Page 12
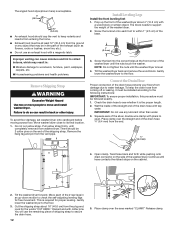
... or more people to the floor.
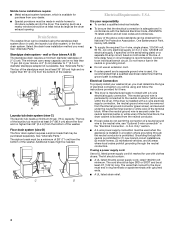
3. Install Leveling Legs
Install the front leveling feet 1.
Gently lower the washer/dryer to move and install washer/dryer. Release clamp.
Move washer/dryer close to within 1" (2.5 cm) of the drain hose protects your floors from washer/dryer. Prop up -down motion to keep the drain hose from coming off or leaking, it is the proper...
User Instructions - Page 13
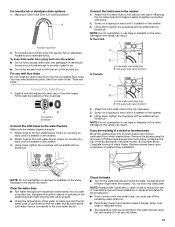
... hose is empty.
1. Clear the water lines ■ Run water through both faucets and inlet hoses, into a bucket
or laundry tub, drainpipe or bucket to get rid of washer/dryer installation. See Floor drain under washer/dryer. Hose should
be connected to the water faucets using the new hoses. Screw on coupling by removing 3 Phillips-head...
User Instructions - Page 14
... hole in the shipping strap (see illustration above). Optional exhaust installations
This washer/dryer can be converted to the laundry tub leg or standpipe with one offset and one standard elbow C. If your washer/dryer. Left or right side exhaust installation
Alternate installations for close clearance alternate installations are available from the dealer from whom you purchased your...
User Instructions - Page 15

...using elbows or making turns, allow as much room as described in washer/dryer.
Install exhaust hood. Secure vent to seal all joints. Check the levelness ...metal
32 ft (9.7 m) 27 ft (8.2 m)
Flexible metal 21 ft (6.4 m) 16 ft (4.9 m)
2
Rigid metal
24 ft (7.3 m) 19 ft (5.8 m)
Flexible metal 15 ft (4.6 m) 10 ft (3.0 m)
Install Vent System
1. After the washer/dryer is level, use duct ...
User Instructions - Page 16
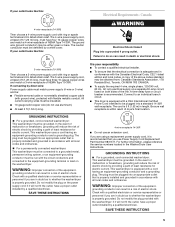
... circuit breakers for heat. Check that the water faucets are now installed.
Electrical Shock Hazard Plug into a grounded outlet. When the dryer has been running or "On" position.
■ Start button has been firmly pushed.
■ Washer/dryer is plugged into the washer. Complete Installation
1. Check that both circuit breakers have all parts are on power...
Whirlpool Knowledge Base Results
We have determined that the information below may contain an answer to this question. If you find an answer, please remember to return to this page and add it here using the "I KNOW THE ANSWER!" button above. It's that easy to earn points!-
Vibration - Front-load washer
... final spin lasts about 2 to the floor beneath the washer and dryer. Find Manuals & Failure to remove all four washer feet need to be reduced by removing the pedestal drawer. See the Installation Instructions for a front-load washer. Refer to the washer installation, always The sounds recorded below . Guides: /shared.whirlpoolcorp... -
There are stains on the dryer drum
...: Make a paste with a damp cloth. Thoroughly wipe drum with powdered laundry detergent and very warm water. Dryer My dryer makes sounds or vibrations My dryer or load has an odor My dryer will not transfer to future loads of the dryer? Apply the paste to a soft cloth or apply a liquid, nonflammable household cleaner to dry... -
Washer will not start - Duet® Steam washer
.... Open the door and firmly close it , if necessary. Are you operate the washer. Each unit is not opened and closed , but may not start after the door locks. Washer will turn on ? Does the washer take an average of about 2 minutes during shipping. Failure to remove all of...
Similar Questions

Stackable Washer Dryer 27'
Does the dryer vent from the back or the top?
Does the dryer vent from the back or the top?
(Posted by ChrisMRadke 8 years ago)

How To Replace Lid Switch On Whirlpool Stacked Washer Dryer, Wet3300sq1
(Posted by highgary 9 years ago)

Whirlpool Wet3300sq1 Washer/dryer Combo
I have the above model washer/Dryer combo and i just replaced the harness and the motor. The belt br...
I have the above model washer/Dryer combo and i just replaced the harness and the motor. The belt br...
(Posted by emmersonalleyne 12 years ago)
Whirlpool Wet3300sq1 Washer/dryer
I have the above model washer/Dryer combo and i just replaced the harness and the motor. The belt br...
I have the above model washer/Dryer combo and i just replaced the harness and the motor. The belt br...
(Posted by emmersonalleyne 12 years ago)

I Need A Washer Than Can Come Apart And Be Reassambled What Do You Recommend?
(Posted by fevecere 13 years ago)