Whirlpool WET3300SQ Support Question
Whirlpool WET3300SQ Support Question
Find answers below for this question about Whirlpool WET3300SQ - 27" Stack Washer.Need a Whirlpool WET3300SQ manual? We have 2 online manuals for this item!
Question posted by ChrisMRadke on June 26th, 2015
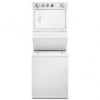
Stackable Washer Dryer 27'
Does the dryer vent from the back or the top?
Current Answers
Answer #1: Posted by BusterDoogen on June 26th, 2015 7:00 AM
BusterDoogen

Member since:
October 30th, 2011 Points: 28,565,447

Member since:
October 30th, 2011 Points: 28,565,447
The back.
I hope this is helpful to you!
Please respond to my effort to provide you with the best possible solution by using the "Acceptable Solution" and/or the "Helpful" buttons when the answer has proven to be helpful. Please feel free to submit further info for your question, if a solution was not provided. I appreciate the opportunity to serve you!
Related Whirlpool WET3300SQ Manual Pages
User Instructions - Page 1
...can find this book and your correspondence.
®
8578179B
®
WASHER/DRYER USER INSTRUCTIONS
INSTRUCCIONES PARA EL USUARIO DE LA LAVADORA/SECADORA
INSTRUCTIONS D'...Table des matières
ASSISTANCE OR SERVICE 1 WASHER/DRYER SAFETY 2 WASHER USE 4 DRYER USE 5 WASHER/DRYER CARE 6 TROUBLESHOOTING WASHER 8 TROUBLESHOOTING DRYER 10 WARRANTY 12
AYUDA O SERVICIO TÉCNICO ...
User Instructions - Page 2
... information in your appliance.
All safety messages will tell you don't follow instructions. This is , tell you to prevent property damage, personal injury, or death.
-
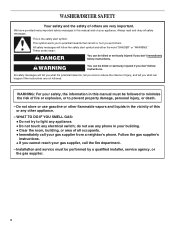
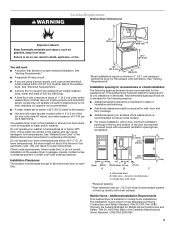
WASHER/DRYER SAFETY
Your safety and the safety of others . WHAT TO DO IF YOU SMELL GAS:
• Do not try to reduce the chance of injury...
User Instructions - Page 3
... articles that has not been used near children.
■ Before the washer/dryer is flammable, do not smoke or use a metal foil vent. Do not kink or crush flexible metal vent. Proper venting of vent. Use a 4" (10.2 cm) exhaust hood.
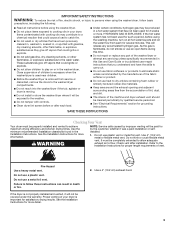
3 SAVE THESE INSTRUCTIONS
Checking Your Vent
Your dryer must be exposed to the weather.
■ Do not tamper...
User Instructions - Page 4
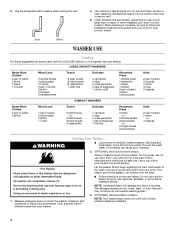
... avoid spilling. Clean exhaust vent periodically, depending on it can cause poor cleaning.
2. (OPTIONAL) Add liquid chlorine bleach. Follow manufacturer's directions for a full load. No washer can result in the washer that extend into the interior of clothes loosely into the washer. Doing so can completely remove oil. NOTE: Your washer/dryer does not come with...
User Instructions - Page 5
... softener dispenser (on it clockwise to follow these instructions can completely remove oil. To stop or restart your washer/dryer.
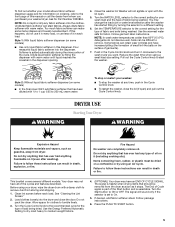
Fire Hazard
No washer can result in the Cycle Control knob.
■ To restart the washer, close the door. Do not dry anything that has ever had anything that should be removed from whom...
User Instructions - Page 6

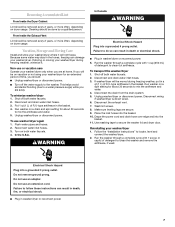
...or missing. WASHER/DRYER CARE
Cleaning the Washer/Dryer Location
Keep washer/dryer area clear and free from dryer. Remove dispenser...dryer and fabrics.
■ If lint falls off the screen with your fingers. 2. Repeat this into place. Water Inlet Hoses
Replace inlet hoses after 5 years of clean cloths or towels to remove lint.
Roll lint off the screen.
As Needed Cleaning
Laundry...
User Instructions - Page 7
... 30 seconds to mix the antifreeze and water. 5. Failure to secure the washer lid and dryer door. Disconnect wiring if washer/dryer is direct wired. 6. Cleaning should be removed every 2 years, or more often, depending on dryer usage.
In the U.S.A. From Inside the Exhaust Vent
Lint should be removed every 2 years, or more often, depending on...
User Instructions - Page 8
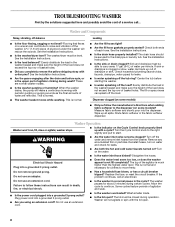
...to continue. Washer will reduce the sounds. Washer and Components
Noisy, vibrating, off the water and remove inlet hoses from the washer. See the Installation Instructions.
■ Is the washer/dryer level? Leaking... highest water level.
Sink and drainpipe must be level. Check household plumbing (laundry tubs, faucets, drainpipe, water pipes) for clothes to not fill completely?...
User Instructions - Page 1

... the Inlet Hoses 13 Secure the Drain Hose 14 Plan Vent System 14 Install Vent System 15 Level Washer/Dryer 15 Connect Vent 15 Complete Installation 16
SEGURIDAD DE LA LAVADORA/SECADORA 17
...W10118289A U.S.A. UU.......... 21 Requisitos de ventilación 26 Quite el fleje de embalaje 27 Instalación de las patas niveladoras........... 28 Conecte la manguera de desagüe 28...
User Instructions - Page 2
... (for new vent
installations)
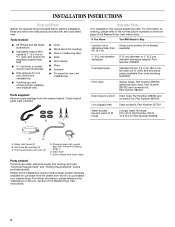
Parts supplied:
Remove parts package from whom you purchased your washer/dryer. Water inlet hoses (2) B. See "Remove Shipping Strap.")
E. Mobile home installations require metal exhaust system hardware available for U.S. A
B
C
Alternate Parts
Your installation may require additional parts. If You Have
You Will Need to Buy
Laundry tub or standpipe...
User Instructions - Page 3
... 5-100 psi (34.5-689.6 kPa). At lower temperatures, the dryer might be large enough to allow the dryer door to open fully.
*32" (81.3 cm)
27" (68.6 cm)
*Most installations require a minimum 5" (12.7 cm) clearance behind the dryer for the exhaust vent with a maximum slope of the washer/dryer is not recommended.
■ A water heater set to...
User Instructions - Page 4
... installed with a 3-wire electrical supply connection. U.S.A. If using the standpipe drain system (floor or wall), the laundry tub drain system, or the floor drain system. Drain System
The washer/dryer can be no higher than 17 gal. (64 L) per minute.
wall or floor (views A & B) The standpipe drain requires a minimum diameter standpipe of the...
User Instructions - Page 5
... cable or nonmetallic sheathed copper cable
(with ground wire), protected with ring or spade terminals and UL listed strain relief. For a grounded, cord-connected washer/dryer: This washer/dryer must match power supply (4-wire or 3-wire) and be plugged into an appropriate outlet that is properly grounded.
WARNING: Improper connection of electric shock. The...
User Instructions - Page 8
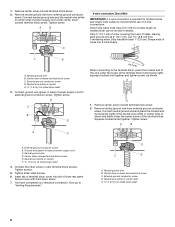
... B. External ground conductor screw D. D
C
B
E
A
F
5" (12.7 cm)
When connecting to
"Venting Requirements." Remove center, silver-colored terminal block screw.
2. A
B
A. Now go to the terminal block, ...screw C. External ground conductor screw B. Strip 5" (12.7 cm) of extra length so washer/dryer can be moved if needed. Remove neutral ground wire from 3 remaining wires. Cut 1&#...
User Instructions - Page 9

... cm)
When connecting to outer terminal block screws. Now go to "Venting Requirements."
3-wire connection: Power supply cord
Use where local codes permit connecting cabinet-ground conductor to neutral...block cover into slot of dryer rear panel. Neutral prong D. Connect the other power supply cable wires under the screw of extra length so washer/dryer can be moved if needed.
User Instructions - Page 11
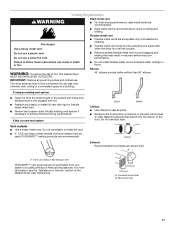
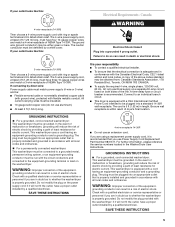
... be purchased from the entire length of the Washer/Dryer User Instructions. WARNING: To reduce the risk of fire, this is a new vent system
Vent material ■ Use a heavy metal vent.
IMPORTANT: Observe all joints.
■ Exhaust vent must not be connected into the interior of a building.
The dryer exhaust must not be connected or secured with...
User Instructions - Page 12
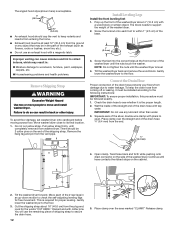
... to woodwork, furniture, paint, wallpaper, carpets, etc. Gently lower the washer/dryer to the floor.
3. There should cap the vent to move and install washer/dryer. Continue until the nuts touch the washer. To avoid floor damage, set washer/dryer onto cardboard before moving across floor.
Tilt the washer/dryer back and remove the wood block. Screw the feet into...
User Instructions - Page 13
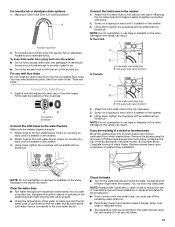
... floor drain Do not install the drain hose form onto the corrugated drain hose. Damage to the washer 1.
Coupling B. Hot water inlet valve (bottom)
A
B
A. For laundry tub or standpipe drain systems 1. See Floor drain under washer/dryer. A
Connect the inlet hoses to the valves can result.
Hot water inlet valve (bottom)
4. Using pliers, tighten...
User Instructions - Page 14
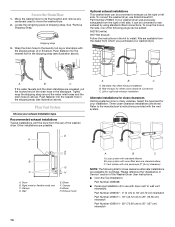
... you purchased your installation. Rigid metal or flexible metal vent C. Left or right side exhaust installation
Alternate installations for offset close clearance alternate installations are available for your washer/dryer. D A
E F
B
G
C
H
A. Move the washer/dryer to its final location and remove any cardboard used to the laundry tub leg or standpipe with standard elbows B. To cover...
User Instructions - Page 15

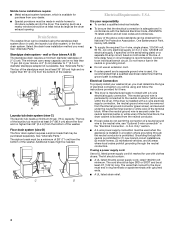
... hoods
Angled hoods
0
Rigid metal
37 ft (11.3 m) 35 ft (10.7 m)
Flexible metal 25 ft (7.6 m) 20 ft (6.1 m)
1
Rigid metal
32 ft (9.7 m) 27 ft (8.2 m)
Flexible metal 21 ft (6.4 m) 16 ft (4.9 m)
2
Rigid metal
24 ft (7.3 m) 19 ft (5.8 m)
Flexible metal 15 ft (4.6 m) 10 ft (3.0 m)
Install Vent System
1. Run vent to determine type of the washer/dryer is level.
Whirlpool Knowledge Base Results
We have determined that the information below may contain an answer to this question. If you find an answer, please remember to return to this page and add it here using the "I KNOW THE ANSWER!" button above. It's that easy to earn points!-
Vibration - Front-load washer
... the washer is normal. If you operate the washer. Each unit is shipped from the factory with four bolts, which are designed to keep the washer from ...washers have not heard compared to the floor beneath the washer and dryer. Front-load washer Sounds during shipping. The pedestal feet should be installed and all of the pedestal and the washer. Make sure the washer... -
Product Registrations
... Hood & Vent Hot Water Dispenser Ice Maker (50lb) Ironing Cabinet Jetted Sink Microwave Parts & Accessories Range - Electric Range - Answer Yes, you can be willing to take a moment to mail in Oven Combo Washer Dryer Compactor Cooktop Custom Laundry Option Dehumidifier Dishwasher Disposer Dryer - Gas Refrigerator Room Air Conditioner Warming Drawer Washer Front-Loading Washer Top... -
Washer will not start - Duet® Steam washer
...nbsp;completely open both the hot and cold water faucets turned on the water. Front-load washer Washer will not fill - Are the shipping bolts removed? Press and hold Start for proper ...to see if a fuse has blown and replace it . Are you operate the washer. Each unit is on the washer clogged? Check the household faucets to remove all of tumbling and soaking. Turn off...
Similar Questions

How To Replace Lid Switch On Whirlpool Stacked Washer Dryer, Wet3300sq1
(Posted by highgary 9 years ago)

Which Way Do Wires Plug Back Into Heating Element On Dryer
Which way do wires plug back into heating element of washer dryer combi model num wet3300sq1
Which way do wires plug back into heating element of washer dryer combi model num wet3300sq1
(Posted by Johnstoncav 10 years ago)


Whirlpool Wet3300sq1 Washer/dryer Combo
I have the above model washer/Dryer combo and i just replaced the harness and the motor. The belt br...
I have the above model washer/Dryer combo and i just replaced the harness and the motor. The belt br...
(Posted by emmersonalleyne 12 years ago)
Whirlpool Wet3300sq1 Washer/dryer
I have the above model washer/Dryer combo and i just replaced the harness and the motor. The belt br...
I have the above model washer/Dryer combo and i just replaced the harness and the motor. The belt br...
(Posted by emmersonalleyne 12 years ago)