User Instructions
Page 1
... the U.S.A., or write: Whirlpool Corporation Customer eXperience Center 553 Benson Road Benton Harbor, MI 49022-2692 Keep this information on the model and serial number label, located at www.whirlpool.com. ® WASHER/DRYER USER INSTRUCTIONS INSTRUCCIONES PARA EL USUARIO DE LA LAVADORA/SECADORA INSTRUCTIONS D'UTILISATION DE LA LAVEUSE/SÉCHEUSE Table of purchase or installation date for assistance, installation or service, call us at...
... the U.S.A., or write: Whirlpool Corporation Customer eXperience Center 553 Benson Road Benton Harbor, MI 49022-2692 Keep this information on the model and serial number label, located at www.whirlpool.com. ® WASHER/DRYER USER INSTRUCTIONS INSTRUCCIONES PARA EL USUARIO DE LA LAVADORA/SECADORA INSTRUCTIONS D'UTILISATION DE LA LAVEUSE/SÉCHEUSE Table of purchase or installation date for assistance, installation or service, call us at...
User Instructions
Page 2
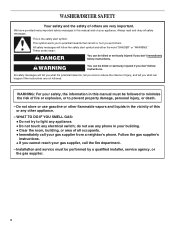
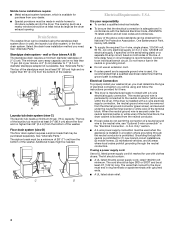
... in this manual must be killed or seriously injured if you what can be performed by a qualified installer, service agency, or the gas supplier. 2 All safety messages will follow the safety alert symbol and either the word "DANGER" or "WARNING." Always read and obey all occupants. • Immediately call the fire department. - WASHER/DRYER SAFETY Your...
... in this manual must be killed or seriously injured if you what can be performed by a qualified installer, service agency, or the gas supplier. 2 All safety messages will follow the safety alert symbol and either the word "DANGER" or "WARNING." Always read and obey all occupants. • Immediately call the fire department. - WASHER/DRYER SAFETY Your...
User Instructions
Page 3
... Care Guide or in published user-repair instructions that you understand and have been previously cleaned in, washed in, soaked in, or spotted with cooking oils may be paid installation or selfinstalled. 1. Use a 4" (10.2 cm) exhaust hood. 3 As the gas is not properly installed and vented, it will release any servicing unless specifically recommended in this time. ■ Do not repair or replace any part of the washer/dryer...
... Care Guide or in published user-repair instructions that you understand and have been previously cleaned in, washed in, soaked in, or spotted with cooking oils may be paid installation or selfinstalled. 1. Use a 4" (10.2 cm) exhaust hood. 3 As the gas is not properly installed and vented, it will release any servicing unless specifically recommended in this time. ■ Do not repair or replace any part of the washer/dryer...
User Instructions
Page 4
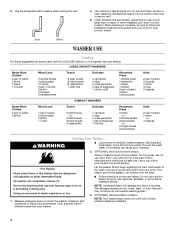
... clothes loosely into the washer. Overloading can completely remove oil. No washer can cause poor cleaning. 2. (OPTIONAL) Add liquid chlorine bleach. Doing so can be sure to follow the Installation Instructions supplied with a pouring spout to the highest load size setting. Clean exhaust vent periodically, depending on wool, silk, spandex, acetates, or some flameretardant fabrics. Do not guess. Use a cup with your washer...
... clothes loosely into the washer. Overloading can completely remove oil. No washer can cause poor cleaning. 2. (OPTIONAL) Add liquid chlorine bleach. Doing so can be sure to follow the Installation Instructions supplied with a pouring spout to the highest load size setting. Clean exhaust vent periodically, depending on wool, silk, spandex, acetates, or some flameretardant fabrics. Do not guess. Use a cup with your washer...
User Instructions
Page 5
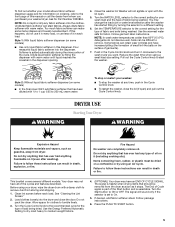
... On. 5. See "Cleaning the Lint Screen." 2. The signal will not agitate or spin with a damp cloth to remove dust from storing and shipping. 1. Follow garment label instructions. Reduce the wash time when using an Air Cycle. Too much fabric softener can result in this dispenser. Allow space for fabric. The End of Cycle signal is set to start the washer. If this...
... On. 5. See "Cleaning the Lint Screen." 2. The signal will not agitate or spin with a damp cloth to remove dust from storing and shipping. 1. Follow garment label instructions. Reduce the wash time when using an Air Cycle. Too much fabric softener can result in this dispenser. Allow space for fabric. The End of Cycle signal is set to start the washer. If this...

User Instructions
Page 6
... inspect and replace inlet hoses if bulges, kinks, cuts, wear or leaks are not harmful to wipe up . 2. The lint screen is removed. 2. Roll lint off the screen with a soft cloth until stain is located inside the dryer in dryer. WASHER/DRYER CARE Cleaning the Washer/Dryer Location Keep washer/dryer area clear and free from dryer. Cleaning Your Washer Cleaning the exterior Use a soft, damp cloth or sponge to your washer and run...
... inspect and replace inlet hoses if bulges, kinks, cuts, wear or leaks are not harmful to wipe up . 2. The lint screen is removed. 2. Roll lint off the screen with a soft cloth until stain is located inside the dryer in dryer. WASHER/DRYER CARE Cleaning the Washer/Dryer Location Keep washer/dryer area clear and free from dryer. Cleaning Your Washer Cleaning the exterior Use a soft, damp cloth or sponge to your washer and run...
User Instructions
Page 7
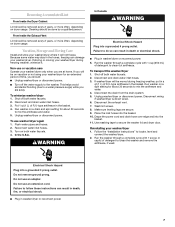
... electrical shock. ■ Plug in washer/dryer or reconnect power. 5. Disconnect the exhaust vent. 7. From Inside the Exhaust Vent Lint should be done by a qualified person. Vacation, Storage and Moving Care Install and store your washer/dryer 1. Turn on a drain and spin setting for an extended period of detergent to clean the washer and remove the antifreeze, if used. Make sure leveling legs are secure. 9. Cleaning should : ■ Unplug washer/dryer...
... electrical shock. ■ Plug in washer/dryer or reconnect power. 5. Disconnect the exhaust vent. 7. From Inside the Exhaust Vent Lint should be done by a qualified person. Vacation, Storage and Moving Care Install and store your washer/dryer 1. Turn on a drain and spin setting for an extended period of detergent to clean the washer and remove the antifreeze, if used. Make sure leveling legs are secure. 9. Cleaning should : ■ Unplug washer/dryer...
User Instructions
Page 8
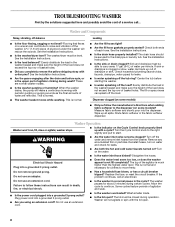
... the Installation Instructions. ■ Are the gears engaging after the drain and before starting the washer. ■ Is water splashing off the load? This is normal. ■ The washer basket moves while washing. Check household plumbing (laundry tubs, faucets, drainpipe, water pipes) for about 2 minutes during wash? washer stops ■ Is the indicator on some models) ■ Did you using an extension cord? Remove...
... the Installation Instructions. ■ Are the gears engaging after the drain and before starting the washer. ■ Is water splashing off the load? This is normal. ■ The washer basket moves while washing. Check household plumbing (laundry tubs, faucets, drainpipe, water pipes) for about 2 minutes during wash? washer stops ■ Is the indicator on some models) ■ Did you using an extension cord? Remove...
User Instructions
Page 9
...'t drain or spin; Always measure detergent. See "Connect Inlet Hoses." ■ Are you unload the washer promptly? As your clothing? This is wrinkled, twisted or tangled ■ Did you overload the washer? Residue or lint on the clothing. Wash smaller loads. ■ Did you sort properly? Use cold rinse water. ■ Are the hot and cold water hoses reversed? See the Installation Instructions...
...'t drain or spin; Always measure detergent. See "Connect Inlet Hoses." ■ Are you unload the washer promptly? As your clothing? This is wrinkled, twisted or tangled ■ Did you overload the washer? Residue or lint on the clothing. Wash smaller loads. ■ Did you sort properly? Use cold rinse water. ■ Are the hot and cold water hoses reversed? See the Installation Instructions...
User Instructions
Page 12
... to or furnished with the product, Whirlpool Corporation or Whirlpool Canada LP (hereafter "Whirlpool") will fit right and work right because they are excluded from warranty coverage. 3. After checking "Troubleshooting," additional help can be repaired in accordance with published installation instructions. 11. To locate FSP replacement parts in your area: Call the Customer eXperience Center at 1-800-253-1301, or your...
... to or furnished with the product, Whirlpool Corporation or Whirlpool Canada LP (hereafter "Whirlpool") will fit right and work right because they are excluded from warranty coverage. 3. After checking "Troubleshooting," additional help can be repaired in accordance with published installation instructions. 11. To locate FSP replacement parts in your area: Call the Customer eXperience Center at 1-800-253-1301, or your...

User Instructions
Page 1
...) ELECTRIC WASHER/DRYER INSTALLATION INSTRUCTIONS INSTRUCCIONES DE INSTALACIÓN DE LA LAVADORA/ SECADORA ELÉCTRICA DE 27" (69 CM) INSTRUCTIONS D'INSTALLATION LAVEUSE/SÉCHEUSE ÉLECTRIQUE DE 27" (69 CM) Table of injury, and tell you what can happen if the instructions are very important. Canada 5 Electrical Connection - Sólo en EE. We have provided many important safety messages in this manual...
...) ELECTRIC WASHER/DRYER INSTALLATION INSTRUCTIONS INSTRUCCIONES DE INSTALACIÓN DE LA LAVADORA/ SECADORA ELÉCTRICA DE 27" (69 CM) INSTRUCTIONS D'INSTALLATION LAVEUSE/SÉCHEUSE ÉLECTRIQUE DE 27" (69 CM) Table of injury, and tell you what can happen if the instructions are very important. Canada 5 Electrical Connection - Sólo en EE. We have provided many important safety messages in this manual...
User Instructions
Page 2
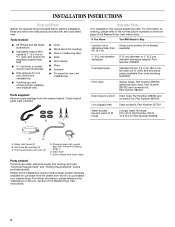
... kit, Part Number 285442 Drain hose too short Drain hose, Part Number 285664 and connector kit, Part Number 285442 Lint clogged drain Drain protector, Part Number 367031 Water faucets beyond reach of the Washer/Dryer User Instructions. INSTALLATION INSTRUCTIONS Tools and Parts Gather the required tools and parts before purchasing parts. Tools needed : Check local codes, electrical supply and venting, and read "Electrical Requirements" and "Venting Requirements" before starting installation. Water inlet hoses (2) B. Front leveling feet with any tools listed here. Silver, double wire...
... kit, Part Number 285442 Drain hose too short Drain hose, Part Number 285664 and connector kit, Part Number 285442 Lint clogged drain Drain protector, Part Number 367031 Water faucets beyond reach of the Washer/Dryer User Instructions. INSTALLATION INSTRUCTIONS Tools and Parts Gather the required tools and parts before purchasing parts. Tools needed : Check local codes, electrical supply and venting, and read "Electrical Requirements" and "Venting Requirements" before starting installation. Water inlet hoses (2) B. Front leveling feet with any tools listed here. Silver, double wire...
User Instructions
Page 3
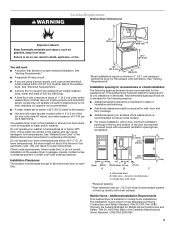
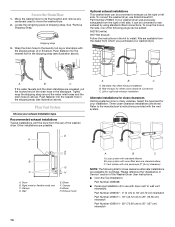
... with elbow. Check code requirements. Side view - WARNING Location Requirements Washer/Dryer Dimensions Explosion Hazard Keep flammable materials and vapors, such as gasoline, away from dryer. Installing on all sides of 1" (2.5 cm) under entire washer/dryer. See "Venting Requirements." This washer/dryer has been tested for spacing of the washer/dryer in the Washer/Dryer User Instructions for Mobile Home Construction and Safety, Title 24, HUD Part 280) or...
... with elbow. Check code requirements. Side view - WARNING Location Requirements Washer/Dryer Dimensions Explosion Hazard Keep flammable materials and vapors, such as gasoline, away from dryer. Installing on all sides of 1" (2.5 cm) under entire washer/dryer. See "Venting Requirements." This washer/dryer has been tested for spacing of the washer/dryer in the Washer/Dryer User Instructions for Mobile Home Construction and Safety, Title 24, HUD Part 280) or...
User Instructions
Page 4
..." (2.4 m) from the bottom of the washer. If the dryer is installed with clothes dryers. When the neutral ground wire is secured under the neutral terminal (center or white wire) of the standpipe must be using and follow the instructions provided for it is recommended that a qualified electrician determine that connect to the dryer must end in a location where grounding through the neutral...
..." (2.4 m) from the bottom of the washer. If the dryer is installed with clothes dryers. When the neutral ground wire is secured under the neutral terminal (center or white wire) of the standpipe must be using and follow the instructions provided for it is recommended that a qualified electrician determine that connect to the dryer must end in a location where grounding through the neutral...
User Instructions
Page 5
..., please reference the service numbers located in a risk of electric shock. grounding conductor can result in doubt as to whether the washer/dryer is properly installed and grounded in accordance with all local codes and ordinances. A copy of least resistance for electric current. This washer/dryer uses a cord having an equipment-grounding conductor and a grounding plug. If you are using a replacement power supply cord...
..., please reference the service numbers located in a risk of electric shock. grounding conductor can result in doubt as to whether the washer/dryer is properly installed and grounded in accordance with all local codes and ordinances. A copy of least resistance for electric current. This washer/dryer uses a cord having an equipment-grounding conductor and a grounding plug. If you are using a replacement power supply cord...
User Instructions
Page 8
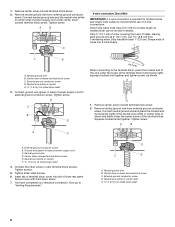
... of extra length so washer/dryer can be moved if needed. Neutral wire (white or center) E 1.9 cm) UL listed strain relief 3. Ground wire (green or bare) of 3-wire connections. Connect the other wires to "Venting Requirements." D C E A. External ground conductor screw D. A B D 4-wire connection: Direct Wire IMPORTANT: A 4-wire connection is required for mobile homes and where local codes do not permit the use of power supply...
... of extra length so washer/dryer can be moved if needed. Neutral wire (white or center) E 1.9 cm) UL listed strain relief 3. Ground wire (green or bare) of 3-wire connections. Connect the other wires to "Venting Requirements." D C E A. External ground conductor screw D. A B D 4-wire connection: Direct Wire IMPORTANT: A 4-wire connection is required for mobile homes and where local codes do not permit the use of power supply...
User Instructions
Page 11
... not plugged with lint. ■ Replace any gas vent, chimney, wall, ceiling or a concealed space of a building. Venting Requirements WARNING Rigid metal vent ■ For best drying performance, rigid metal vents are recommended. ■ Rigid metal vent is recommended to seal all governing codes and ordinances. WARNING: To reduce the risk of the Washer/Dryer User Instructions. Good Better Clamps ■ Use clamps to avoid...
... not plugged with lint. ■ Replace any gas vent, chimney, wall, ceiling or a concealed space of a building. Venting Requirements WARNING Rigid metal vent ■ For best drying performance, rigid metal vents are recommended. ■ Rigid metal vent is recommended to seal all governing codes and ordinances. WARNING: To reduce the risk of the Washer/Dryer User Instructions. Good Better Clamps ■ Use clamps to avoid...
User Instructions
Page 12
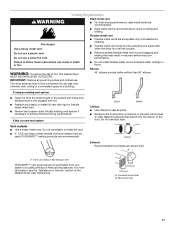
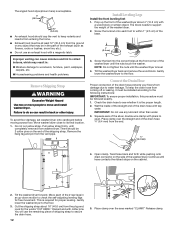
... drain hose ¼" (6.4 mm) from washer/dryer. Housecleaning problems and health problems. Remove Shipping Strap WARNING Excessive Weight Hazard Use two or more people to move and install washer/dryer. Pull yellow strap firmly, until the nuts touch the washer. Install Leveling Legs Install the front leveling feet 1. Prop up -down motion to check the self-adjusting leveling legs for free movement. Tilt the washer/dryer...
... drain hose ¼" (6.4 mm) from washer/dryer. Housecleaning problems and health problems. Remove Shipping Strap WARNING Excessive Weight Hazard Use two or more people to move and install washer/dryer. Pull yellow strap firmly, until the nuts touch the washer. Install Leveling Legs Install the front leveling feet 1. Prop up -down motion to check the self-adjusting leveling legs for free movement. Tilt the washer/dryer...
User Instructions
Page 14
... the Washer/Dryer User Instructions. ■ Over-the-Top Installation: Part Number 4396028 ■ Periscope Installation (For use Side Exhaust Kit Part Number 279823. Loop system with the shipping strap (A or B below). Please reference the "Assistance or Service" section of the drain hose in many varieties. Left or right side exhaust installation Alternate installations for your washer/dryer was previously exhausted from the right or left side. Loop system with the vent...
... the Washer/Dryer User Instructions. ■ Over-the-Top Installation: Part Number 4396028 ■ Periscope Installation (For use Side Exhaust Kit Part Number 279823. Loop system with the shipping strap (A or B below). Please reference the "Assistance or Service" section of the drain hose in many varieties. Left or right side exhaust installation Alternate installations for your washer/dryer was previously exhausted from the right or left side. Loop system with the vent...
User Instructions
Page 16
... Washer/Dryer User Instructions. 3. Keep the plastic foam for use if the washer/dryer should be 2 household fuses or circuit breakers for 5 minutes, open the dryer door and feel heat, turn on the console and any dust. 12. Be sure the vent is still no heat, contact a qualified technician. 7. In the U.S.A. ■ For power supply cord installation, plug into the washer. Electrical...
... Washer/Dryer User Instructions. 3. Keep the plastic foam for use if the washer/dryer should be 2 household fuses or circuit breakers for 5 minutes, open the dryer door and feel heat, turn on the console and any dust. 12. Be sure the vent is still no heat, contact a qualified technician. 7. In the U.S.A. ■ For power supply cord installation, plug into the washer. Electrical...


