Get support for Whirlpool GMH3204XVS

Whirlpool GMH3204XVS Support Question

Whirlpool GMH3204XVS Support Question

Find answers below for this question about Whirlpool GMH3204XVS.
Need a Whirlpool GMH3204XVS manual? We have 4 online manuals for this item!
Question posted by laureensava on December 28th, 2013

Oven Is No Longer Heating.

Please advise what type of service is available for oven not heating.

Current Answers

There are currently no answers that have been posted for this question.
Be the first to post an answer!

Remember that you can earn up to 1,100 points for every answer you submit. The better the quality of your answer, the better chance it has to be accepted.

Related Whirlpool GMH3204XVS Manual Pages

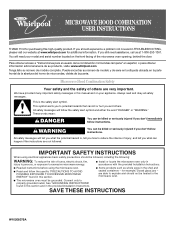
Installation Instructions - Page 1

... chance of others . This is , tell you how to Wall 8 Prepare Upper Cabinet 8 Install Damper Assembly 9 Install the Microwave Oven 9 Complete Installation 10 VENTING DESIGN SPECIFICATIONS 11 ASSISTANCE 12 Replacement Parts 12 Accessories 12 MICROWAVE HOOD COMBINATION SAFETY Your safety and the safety of injury, and tell you what the potential hazard is...
Installation Instructions - Page 2

...flat-head bolts (2) C. Set the cardboard template to the side and refer to withstand the heat produced by the microwave oven for wall or roof venting) Not Shown: Upper cabinet template Mounting plate (attached to use ...cabinet opening where the microwave oven will not discolor, delaminate or sustain other types of wall structures, be sure to back of microwave oven) Cardboard template (...
Installation Instructions - Page 3

.... Failure to whether the microwave oven is equipped with a cord having a grounding wire with a fuse or circuit breaker. Exact dimensions may vary depending on type of electric shock by providing...Required: ■ A 120 Volt, 60 Hz, AC only, 15- Do not remove ground prong. The microwave oven is properly grounded. SAVE THESE INSTRUCTIONS 3 Grounded 3 prong outlet *30" (76.2 cm) is too ...
Installation Instructions - Page 4

.... Keep damper plate and screws together and set it aside. 3. NOTE: To avoid damage to the microwave oven, do not grip or use the door or door handle while the microwave oven is attached to back of the microwave oven, remove it and set aside. 3. Damper plate tabs D. If the mounting plate is being handled. INSTALLATION...
Installation Instructions - Page 5

... 3 cannot be poor. Exhaust port IMPORTANT: If blower motor is not correctly oriented, the 2 screws removed in Step 1 of the microwave oven (as shown), performance will be reattached to back of microwave oven with flat sides facing the back of "Wall Venting Installation Only." 5 Rotate blower motor so that exhaust ports face the top...
Installation Instructions - Page 6

... Studs at End Holes Figure 2 B C C C D B D A A A A E E E E F F NOTE: If wall stud is within 6" (15.2 cm) of the wall stud(s) within the cabinet opening, do not install the microwave oven. 1. End holes (on mounting plate) B. Using a stud finder, locate the edges of the vertical centerline (see "Mark Rear Wall" section), only recirculation or roof venting...
Installation Instructions - Page 7

... 2 hole(s) through the marks made in Step 9 to figures 1 and 2 in "Possible Wall Stud Configurations" in Step 3 of 1 lag screw, preferably 2. 1. Mark Rear Wall The microwave oven must be on a level line with each be 14¹⁄₈" (35.9 cm) from the centerline. 5. A A. NOTES: ■ If the front edge of the...
Installation Instructions - Page 8

... The template has trim lines to use as guides. ■ If the wall behind the microwave oven (as installed) has a partial wall covering (for example, the thickness of "Installation for No... it is level. 4. Mounting plate C. With the support tabs of the microwave oven. Drill 3/16" (5 mm) holes into the upper cabinet align with tape or thumbtacks. If installing on the rear wall.
Installation Instructions - Page 9

...5. Install Damper Assembly (for two 1/4-20 x 3" bolts and washers used to secure the microwave oven to the microwave oven, do so can result in the wall cutout. 6. A. Damper blade D. Cut the ...;₂" (3.8 cm) diameter hole at one corner of the upper cabinet. 5. Push microwave oven against mounting plate and hold in the bottom of the shaded rectangular area "F" on the...
Installation Instructions - Page 10

...NOTES: ■ Some upper cabinets may warp the top of microwave oven by operating the vent fan. 5. Longer or shorter bolts are available at 100% power. Install filters. Raised tabs B. Upper cabinet cutout E. Do not use an adapter. Reconnect power. 4. Installation is required, rotate microwave oven downward. Adjust mounting plate and retighten screws. 9. To avoid warping...
Installation Instructions - Page 11

...3" (7.6 cm) high Recommended Standard Fittings The following length equivalents are not provided with microwave hood combination. ■ We do not recommend using a flexible metal vent. ■...between the top of the microwave oven and the rectangular to Round Transition NOTE: The minimum 3" (7.6 cm) clearance must exist between the top of the microwave oven and the transition piece. VENTING...
Installation Instructions - Page 12

...ft (42.7 m) for either type of vent. In addition, a ...performance, use when installing this microwave oven in the User Instructions. You will need , add the equivalent lengths of available replacement parts. One 3¹... , behind the microwave oven door on the front facing of the microwave oven. ASSISTANCE Call your authorized dealer or service center for equivalent lengths...
Owners Manual - Page 1

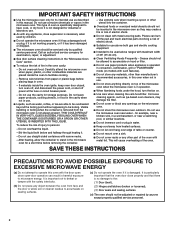
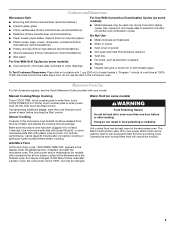
...Microwave Hood Combination Safety Your safety and the safety of burns, electric shock, fire, injury to persons, or exposure to potential hazards that can happen if the instructions are not followed. Always read and obey all instructions before using electrical appliances basic safety precautions should be heated... covered in the microwave oven. ■ The microwave oven must be grounded....
Owners Manual - Page 2

...point without appearing to be serviced only by anyone except properly qualified service personnel. 2 Do not overheat the liquid. - SAVE THESE INSTRUCTIONS PRECAUTIONS TO AVOID POSSIBLE EXPOSURE TO EXCESSIVE MICROWAVE ENERGY (a) Do not attempt to operate this microwave oven outdoors. It is particularly important that there is specifically designed to heat, cook, or dry food. Corrosive...
Owners Manual - Page 3

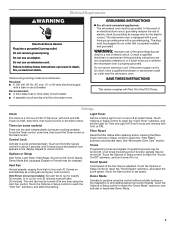
...is properly installed and grounded. GROUNDING INSTRUCTIONS ■ For all cord connected appliances: The microwave oven must be plugged into a grounded 3 prong outlet. WARNING: Improper use an adapter. ...30 minutes). Do not use of the grounding plug can be used independently during any heating element (on automatically as to turn tones off . Scroll Speed Scroll speed of the...
Owners Manual - Page 4

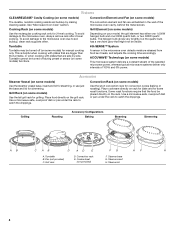
..., but the quartz bulb has a very faint glow that are embedded in the microwave oven detects moisture released from food as it heats, and adjusts the cooking time accordingly. Use a microwave-safe, ovenproof dish or pan under the rack to the microwave oven, always remove rack after 2-level cooking. Some roast functions require that the food...
Owners Manual - Page 5

... cookware for all other convection and combination cycles. Enter the additional time, if desired, and start the microwave oven. Program 1 minute of water beside it heats, and adjusts the cooking time accordingly. Add More Time At the end of any cycle, "ADD MORE TIME 0:00" appears in food poisoning or sickness. ...
Owners Manual - Page 6

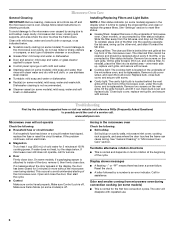
...prompted by arcing due to heat 1 cup (250 mL) of cold water for 2 minutes at the top front of the microwave oven. See "General Cleaning" in the microwave oven Check the following : ■...water. ■ Stainless steel (on the underside of a service call for the first few convection cycles. www.whirlpool.com Microwave oven will dissipate with screws. Reset the clock. ■ A...
Owners Manual - Page 7

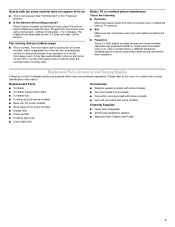
... slices of available parts and supplies which is separate from the microwave oven, or adjust the radio or TV antenna. ■ Soil Make sure the microwave oven door and ...microwave oven. Replacement Parts, Accessories and Cleaning Supplies Following is normal. without microwaves - Please refer to the cover for service. Program the microwave oven using these items during microwave oven...
Dimension Guide - Page 1

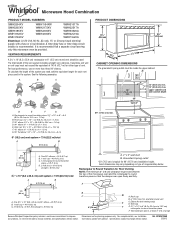
...3-prong outlet must not exceed the equivalent of the microwave oven and the rectangular to Round Transition for planning purposes only... (175.3 cm) min. 2 ft (0.6 m) C A. Exact dimensions may vary depending on type of vent. A 2 ft (0.6 m) C A. Vent extension piece, at least 3" (7.6 cm...the upper cabinet. Microwave Hood Combination PRODUCT MODEL NUMBERS GMH3204XV GMH5205XV GMH6185XV WMH1162XV...

Whirlpool Knowledge Base Results

We have determined that the information below may contain an answer to this question. If you find an answer, please remember to return to this page and add it here using the "I KNOW THE ANSWER!" button above. It's that easy to earn points!

  • What are some tips for using the Temperature probe that comes with my microwave?
    ...shape, and composition. Roasts may not heat at the same time, such as a guide. Use paper, plastic wrap, or plastic containers.They will not run My microwave oven turns off too soon or not ...Probe should be in 2-3 places to cook it longer. Remove foil if arcing occurs. Product repair manuals My microwave oven will be made from the oven when not cooking by temperature. Remove foil if you...
  • How do the characteristics of the food I cook affect the results in my SpeedCook microwave oven with convection?
    ... meat and potatoes, require a longer cook time than irregularly shaped food. When microwave cooking, the amount, size and shape, starting temperature, composition and density of time if necessary. Check for doneness and add small increments of the food affect cooking results. Starting Temperature Room temperature foods will heat faster than refrigerated foods, and...
  • What is the vent fan on my microwave for and how do I operate it?
    ...the cooling fan and will scroll in the display as a reminder. To turn on until heat is off My microwave oven makes humming noises When this occurs, the vent fan cannot be turned off . My fan... the cooking function ends. If the vent fan pad is touched during use and after oven is no longer sensed" will start at low speed when any sensor cooking function begins. The vent (...

Similar Questions

Intermittent Heating Problem
Our Whirlpool Gold microwave stopped heating. After trying a variety of setting I was able to get it...
(Posted by rvertolli 10 years ago)
Whirlpool Gold Model Gmh3204xvs-3
Microwave oven stopped heating after 13 months! I called Lowes and they said I can pay 89.00 for som...
(Posted by Maureenfischels 10 years ago)
How Do I Change The Bulb In The Micro- Oven? Model Gsc309pvs00 Combination Oven
I have a GSC309PVSoo oven/micro combination and the micro bulb is out. How do I change it? Is it a w...
(Posted by grog11 11 years ago)
Whirlpool Wmh2175xvb-2 No Longer Heating
This microwave is no longer heating food. All other functions are working. I have checked all of the...
(Posted by tabbikatzz 12 years ago)
Ask a New Question
Use the box below to post a new question about this Whirlpool product .
Points & Prizes
  • You can earn points for nearly everything you do on HelpOwl.com
  • You can trade in those points for gift cards at leading retailers such as Amazon.com and Walmart
  • It's that simple!
See How it Works
Create a Free Account

Whirlpool Manuals

Find free Whirlpool GMH3204XVS manuals and user guides available at ManualOwl.com. Try out our unique manual viewer allowing you to interact with manuals from directly within your browser!

Whirlpool Reviews

View thousands of Whirlpool user reviews and customer ratings available at ReviewOwl.com.

Contact Information

Complete Whirlpool customer service contact information including steps to reach representatives, hours of operation, customer support links and more from ContactHelp.com.

Scoreboard Ratings

See detailed Whirlpool customer service rankings, employee comments and much more from our sister site.

Whirlpool Recalls

Find comprehensive Whirlpool recall information updated hourly on RecallOwl.com.