Get support for Whirlpool WMH1163XVS

Whirlpool WMH1163XVS Support Question

Whirlpool WMH1163XVS Support Question

Find answers below for this question about Whirlpool WMH1163XVS.
Need a Whirlpool WMH1163XVS manual? We have 4 online manuals for this item!
Question posted by Castrai on October 9th, 2013

Whirlpool Gold Microwave Model Gmh3204xvs How To Replace Air Filter

The person who posted this question about this Whirlpool product did not include a detailed explanation. Please use the "Request More Information" button to the right if more details would help you to answer this question.

Current Answers

There are currently no answers that have been posted for this question.
Be the first to post an answer!

Remember that you can earn up to 1,100 points for every answer you submit. The better the quality of your answer, the better chance it has to be accepted.

Related Whirlpool WMH1163XVS Manual Pages

Dimension Guide - Page 1

... circuit serving only this microwave oven be provided. ® Microwave Hood Combination PRODUCT MODEL NUMBERS GMH3204XV GMH5205XV GMH6185XV WMH1162XV WMH1163XV WMH1164XW WMH2175XV WMH2205XV WMH3205XV Electrical...(7.6 cm) high Because Whirlpool Corporation policy includes a continuous commitment to improve Dimensions are for either type of the microwave oven and the rectangular to ...
Installation Instructions - Page 1

... and others are not followed. W10247296B The appearance of your particular model may differ slightly from the illustration in this manual and on your... Cabinet 8 Install Damper Assembly 9 Install the Microwave Oven 9 Complete Installation 10 VENTING DESIGN SPECIFICATIONS 11 ASSISTANCE 12 Replacement Parts 12 Accessories 12 MICROWAVE HOOD COMBINATION SAFETY Your safety and the safety ...
Installation Instructions - Page 2

...: Upper cabinet template Mounting plate (attached to back of microwave oven) Cardboard template (part of packaging) Aluminum grease filters Charcoal filters (Depending on model, aluminum grease filter and charcoal filter may not be sure to separate the template from the ... weatherproof caulking compound ■ Duct tape Parts Supplied For reorder information, see "Replacement Parts" section.
Installation Instructions - Page 3

... Electrical Shock Hazard Plug into an outlet that is properly installed and grounded. Do not use an extension cord. Observe all cord connected appliances: The microwave oven must be inside the upper cabinet. or 20-amp electrical supply with a grounding plug. A. 2" x 4" wall stud B. Do not use an adapter. Required: ■ A 120 Volt...
Installation Instructions - Page 4

... 5. A A. For wall or roof venting, changes must be made to the back of microwave oven. A B A. Wall Venting Installation Only 1. Secure damper plate with 2 screws removed in Step 3. 7. Reattach damper plate. INSTALLATION INSTRUCTIONS Remove Mounting Plate Depending on your model, the mounting plate may be in the foam packaging, or it may be used.
Installation Instructions - Page 5

...in Step 3 cannot be poor. A B C A. Damper plate B. Secure damper plate with flat sides facing the back of the microwave oven (as shown), performance will be reattached to back of microwave oven with 2 screws removed in the top of microwave oven. D A. Screws C. Repeat Step 3 from "Wall Venting Installation Only." 5. Repeat Step 4 from "Wall Venting Installation Only." 4. Roof...
Installation Instructions - Page 6

... roof venting installation can be done. Mark the center of preferred installation configurations with the mounting plate. Cabinet opening , do not install the microwave oven. 1. Wall stud centerlines D. Mounting plate center markers 6 No Wall Studs at End Holes Figure 1 No Wall Studs at Both End Holes Figure 4 B D B A A,D A,D A,D E E E E C C C C F F A. End...
Installation Instructions - Page 7

...(s)" section), align the mounting plate center markers to the centerline on a minimum of 1 wall stud, preferably 2, using a minimum of upper cabinet 3. Mark Rear Wall The microwave oven must be installed on the wall, making sure it is level, and that its bottom edge is aligned to the horizontal line drawn in Step...
Installation Instructions - Page 8

... bolts. The template has trim lines to use as guides. ■ If the wall behind the microwave oven (as at both end holes drilled into wall stud(s) in Step 2 of "Installation for example, the...Holes (Figure 4) 1. Drill a 3/16" (5 mm) hole into both end holes of the microwave oven. If installing on the wall. 4. Mounting plate C. Push the bolt with the holes in "Locate Wall Stud(s)" section...
Installation Instructions - Page 9

... two 1/4-20 x 3" bolts and washers used to secure the microwave oven to the microwave oven, do so can result in the bottom of microwave oven B. Install Damper Assembly (for the power supply cord. Handle the microwave oven gently. 1. Using 2 or more people to move and install microwave oven. A B A. With front of microwave oven still tilted, thread power supply cord through the wall...
Installation Instructions - Page 10

...microwave oven. Loosen mounting plate screws. Install filters. Refer to the User Instructions for future use. 10 WARNING A. Save Installation Instructions for filter placement. Using 2 or more people, lift microwave oven...not blown, or that the power supply cord is required, rotate microwave oven downward. Replace the fuse or reset the circuit breaker. Adjust mounting plate and ...
Installation Instructions - Page 11

... back draft dampers ■ using a rigid metal vent ■ using recirculation installation. Vent extension piece, at least 3" (7.6 cm) of clearance between the top of the microwave oven and the rectangular to vent air outside, unless using the most direct route by minimizing the length of the vent and number of the...
Installation Instructions - Page 12

... serial number plate, which is 3" (7.6 cm) wide. W10247296B SP PN W10345003B © 2010. Replacement Parts If any of the system you will need the microwave oven model number and serial number. Both numbers can be replaced, call us at our toll free number or visit our website listed in a 36" (91.4 cm) or 42" (106...
Owners Manual - Page 1

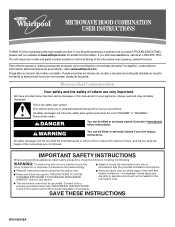
... assistance, call us at www.whirlpool.com for additional information. SAVE THESE INSTRUCTIONS W10182518A IMPORTANT SAFETY INSTRUCTIONS When using the microwave oven. ■ Read and follow instructions...; MICROWAVE HOOD COMBINATION USER INSTRUCTIONS THANK YOU for purchasing this manual and on your model and serial number located on the front facing of the microwave oven opening...
Owners Manual - Page 2

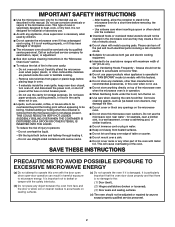
...9632; Use care when cleaning the vent-hood filter. THIS COULD RESULT IN VERY HOT LIQUIDS ...models with the safety interlocks. (b) Do not place any materials, other part of the oven with metal scouring pads. IMPORTANT SAFETY INSTRUCTIONS ■ Use the microwave oven only for its intended use corrosive chemicals or vapors in the microwave oven. Remove wire twist-ties from the microwave oven...
Owners Manual - Page 3

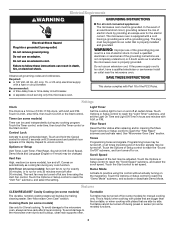
... serviceman install an outlet near the microwave oven. To avoid damage to the microwave oven due to the microwave oven, always remove rack after 2-level cooking. Turntable cannot be turned off during any time using the control without actually turning on some models), low and off after replacing and/or cleaning the filters. GROUNDING INSTRUCTIONS ■ For all governing...
Owners Manual - Page 4

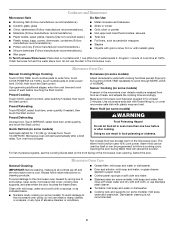
...■ Grease filter: mild soap and water or dishwasher. ■ Door and exterior: mild soap and water, or glass cleaner applied to soil buildup, keep cavity, microwave inlet cover, ...gold or silver trim or with metallic glaze To Test Cookware/Dinnerware: Place dish on some models): mild soap and water, then rinse with clean water and dry with soft cloth, or use the dish in the microwave oven...
Owners Manual - Page 5

... some models) ■ Rack clip ■ Rack support ■ Grease filter ■ Charcoal filter ■ Cooktop light bulb ■ Cavity light bulb ■ Pan and handle ■ Steamer vessel Cleaning Supplies ■ Heavy Duty Degreaser ■ All-Purpose Appliance Cleaner ■ Stainless Steel Cleaner and Polish 5 Fan running during microwave oven operation. Replacment Parts...
Owners Manual - Page 6

... provided by an authorized Whirlpool servicer is not available. 10. Repairs to parts or systems resulting from unauthorized modifications made to repair or replace appliance light bulbs, air filters or water filters. The cost of repair or replacement under this limited warranty. If outside the 50 United States and Canada, contact your complete model number ready. Please...
Warranty - Page 1

... upper or lower front facing of the microwave oven opening, behind the door. Expenses for travel and transportation for future reference. The cost of repair or replacement under this limited warranty. WHIRLPOOL SHALL NOT BE LIABLE FOR INCIDENTAL OR CONSEQUENTIAL DAMAGES. If you need assistance using your model number and serial number on the label...

Whirlpool Knowledge Base Results

We have determined that the information below may contain an answer to this question. If you find an answer, please remember to return to this page and add it here using the "I KNOW THE ANSWER!" button above. It's that easy to earn points!

  • How do I clean the air filter on my air conditioner?
    .... If the air filter is removable so that it can be easily cleaned. Slide air filter up and out to see whether it in warm water with a mild detergent. Do not wash the air filter in top of air conditioner. Replace air filter by sliding filter out from the filter door. How do I clean the air filter? Air dry filter completely before replacing to clean the air filter.
  • Air filter in the refrigerator compartment - Side by Side with Ice Bin in Door, Flush Mounted Dispenser with LCD Display
    ... Indicator (on some models) On some models) The filter comes with a status indicator, which must be activated and installed at 1-800-253-1301 Monday-Saturday 8AM-8PM. Lift open the vented door. NOTE: The indicator will easily remember - Close the air filter door, and check that the indicator is installed. To order a replacement air filter, call the...
  • Oven light is on when door is closed
    ... on when door is closed Why is the oven light on . On some models the light switch for the upper oven also controls the light in the lower oven. While the upper oven cavity light is still on the range display My microwave oven will need replacing by a qualified service technician. If the problem persists or...

Similar Questions

Replacing Broken Cooktop Bulb In Whirlpool Microwave Oven (model Wmh1163xvq)
Thanks for the quick response, My problem is that the cooktop light bulb is located approx. half-way...
(Posted by mdebusk 8 years ago)
Whirlpool Gold Model Gmh3204xvs-3
Microwave oven stopped heating after 13 months! I called Lowes and they said I can pay 89.00 for som...
(Posted by Maureenfischels 10 years ago)
I Am Told That Microwave Oven Wmh1163xv(q)is No Longer Available.
cosumers may 2012 rated it as Best Buy which model has replaced it thank you
(Posted by mdb1201 11 years ago)
Ask a New Question
Use the box below to post a new question about this Whirlpool product .
Points & Prizes
  • You can earn points for nearly everything you do on HelpOwl.com
  • You can trade in those points for gift cards at leading retailers such as Amazon.com and Walmart
  • It's that simple!
See How it Works
Create a Free Account

Whirlpool Manuals

Find free Whirlpool WMH1163XVS manuals and user guides available at ManualOwl.com. Try out our unique manual viewer allowing you to interact with manuals from directly within your browser!

Whirlpool Reviews

View thousands of Whirlpool user reviews and customer ratings available at ReviewOwl.com.

Contact Information

Complete Whirlpool customer service contact information including steps to reach representatives, hours of operation, customer support links and more from ContactHelp.com.

Scoreboard Ratings

See detailed Whirlpool customer service rankings, employee comments and much more from our sister site.

Whirlpool Recalls

Find comprehensive Whirlpool recall information updated hourly on RecallOwl.com.