Get support for Vivitar DVR 426HD

Vivitar DVR 426HD Support Question

Vivitar DVR 426HD Support Question

Find answers below for this question about Vivitar DVR 426HD.
Need a Vivitar DVR 426HD manual? We have 2 online manuals for this item!
Question posted by bigchad29 on February 12th, 2016

Which Direction Do The Batteries Go In?

which direction do the batteries go in?

Current Answers

Answer #1: Posted by TechSupport101 on February 12th, 2016 9:03 AM
This answer was accepted by the poster of the original question.
TechSupport101

Member since:
May 24th, 2013

Points: 12,171,305
1,100
points
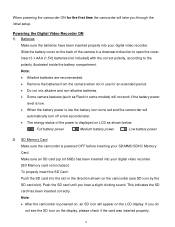
Hi. See page 6 of the camera Manual here https://www.helpowl.com/manuals/Vivitar/DVR426HD/176260

Related Vivitar DVR 426HD Manual Pages

v2 Camera Manual - Page 1

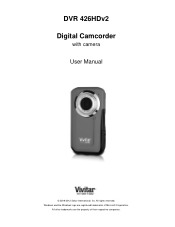
All rights reserved. DVR 426HDv2 Digital Camcorder with camera User Manual © 2009-2012 Sakar International, Inc. All other trademarks are registered trademarks of their respective companies. Windows and the Windows logo are the property of Microsoft Corporation.
v2 Camera Manual - Page 3

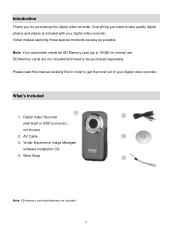
... as possible. What's Included 1. Wrist Strap Note: SD memory card and batteries not included. 2 Please read this digital video recorder. Vivitar Experience Image Manager software Installation CD 4. SD Memory cards are not included and need to take quality digital photos and videos is included with Built-in order to get the most out...
v2 Camera Manual - Page 6

...The energy status of the camera in a downward direction to the polarity illustrated inside the battery compartment. Note:  Alkaline batteries are recommended.  Remove the batteries from the camera when not in use for...sound. Make sure an SD card (up to16GB) has been inserted into your digital video recorder. (SD Memory card not included.) To properly insert the SD Card: Push ...
v2 Camera Manual - Page 9

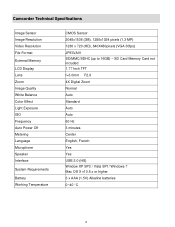
... English, French Yes Yes USB 2.0 (HS) Window XP SP3 / Vista SP1/ Windows 7 Mac OS X v10.5.x or higher 3 x AAA (1.5V) Alkaline batteries 0~40 C 8 Camcorder Technical Specifications Image Sensor Image Resolution Video Resolution File Format External Memory LCD Display Lens Zoom Image Quality White Balance Color Effect Light Exposure ISO Frequency Auto Power...
v2 Camera Manual - Page 11

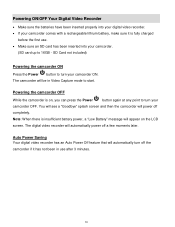
... the first use after 3 minutes. 10 SD Card not included) Powering the camcorder ON Press the Power button to 16GB - Powering ON/OFF Your Digital Video Recorder  Make sure the batteries have been inserted properly into your camcorder. (SD card up to turn your camcorder ON. Note: When there is insufficient...
v2 Camera Manual - Page 14

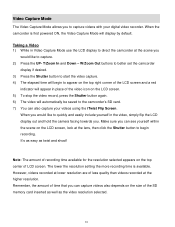
... would like to quickly and easily include yourself in Video Capture Mode use the LCD display to capture videos with your videos using the iTwist Flip Screen. Taking a Video 1) While in the video, simply flip the LCD display out and hold the camera facing towards you to direct the camcorder at the scene you can also capture...
v2 Camera Manual - Page 15

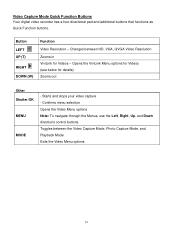
... Mode Quick Function Buttons Your digital video recorder has a four-directional pad and additional buttons that functions as Quick Function buttons. Opens the ViviLink Menu options for Videos (see below for Videos - Button LEFT UP (T) RIGHT DOWN (W) Function Video Resolution - Toggles between HD, VGA, QVGA Video Resolution Zooms in ViviLink for details) Zooms out Other Shutter...
v2 Camera Manual - Page 16

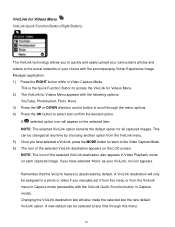
... selected site the new default ViviLink option. NOTE: The selected ViviLink option remains the default option for Videos Menu appears with the following options: YouTube, Photobucket, Flickr, None 3) Press the UP or DOWN direction control button to scroll through this menu or from the ViviLink menu in Capture mode (accessible with the...
v2 Camera Manual - Page 17

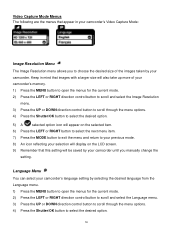
...Video Capture Mode: Image Resolution Menu The Image Resolution menu allows you to choose the desired size of your camcorder's memory. 1) Press the MENU button to open the menus for the current mode. 2) Press the LEFT or RIGHT direction...MODE button to exit the menu and return to select the desired option. 16 Video Capture Mode Menus The following are the menus that appear in mind that images...
v2 Camera Manual - Page 18

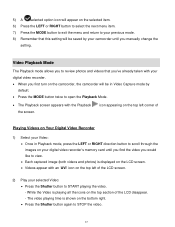
...; Press the Shutter button to START playing the video. - Video Playback Mode The Playback mode allows you to review photos and videos that this setting will be in Playback mode, press the LEFT or RIGHT direction button to scroll through the images on your digital video recorder's memory card until you manually change the setting...
v2 Camera Manual - Page 19

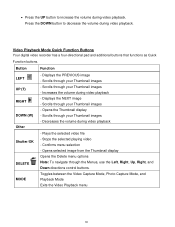
... through your Thumbnail images - Displays the NEXT image - Plays the selected video file - Button Function LEFT UP (T) RIGHT DOWN (W) Other - Increases the volume during video playback. Confirms menu selection - Scrolls through the Menus, use the Left, Right, Up, Right, and Down directions control buttons.  Press the UP button to decrease the volume...
v2 Camera Manual - Page 20

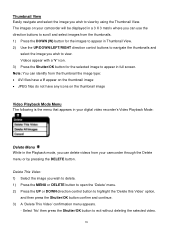
... the MENU or DELETE button to open the 'Delete' menu. 2) Press the UP or DOWN direction control button to highlight the 'Delete this Video' option, and then press the Shutter/OK button confirm and continue. 3) A 'Delete This Video' confirmation menu appears. - Select 'No' then press the Shutter/OK button to view by pressing...
v2 Camera Manual - Page 21

... photos): 1) Press the MENU or DELETE button to open the 'Delete' menu. 2) Press the UP or DOWN direction control button to exit without deleting all the images you wish to delete the selected video. Once all of your computer. 20 Select 'Yes' then press the Shutter/OK button to delete all the...
v2 Camera Manual - Page 22

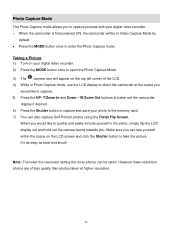
... photos are of the LCD. 4) While in Photo Capture mode, use the LCD display to direct the camcorder at higher resolution. 21 Note: The lower the resolution setting the more photos can be... flip the LCD display out and hold out the camera facing towards you would like to capture. 5) Press the UP- Taking a Picture 1) Turn on your digital video recorder. 2) Press the MODE button once to open...
v2 Camera Manual - Page 23

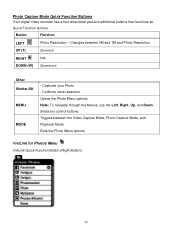
... in RIGHT DOWN (W) N/A Zooms out Other Shutter/OK MENU MODE - Changes between the Video Capture Mode, Photo Capture Mode, and Playback Mode Exits the Photo Menu options ViviLink for Photos...navigate through the Menus, use the Left, Right, Up, and Down directions control buttons. Captures your Photo - Button Function LEFT UP (T) Photo Resolution - Photo Capture Mode Quick ...
v2 Camera Manual - Page 24

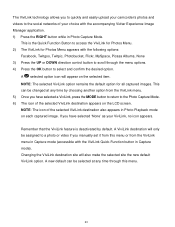
..., Twitgoo, Twitpic, Photobucket, Flickr, MySpace, Picasa Albums, None 3) Press the UP or DOWN direction control button to scroll through this menu or from the ViviLink menu. 5) Once you have selected ...The ViviLink technology allows you to quickly and easily upload your camcorder's photos and videos to the social networks of the selected ViviLink destination also appears in Photo Playback mode...
v2 Camera Manual - Page 25

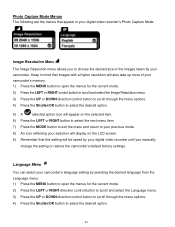
...or RIGHT control button to scroll and select the Image Resolution menu. 3) Press the UP or DOWN direction control button to scroll through the menu options. 4) Press the Shutter/OK button to select the ... UP or DOWN direction control button to scroll through the menu options. 4) Press the Shutter/OK button to choose the desired size of the images taken by your digital video recorder until you ...
v2 Camera Manual - Page 26

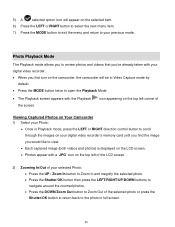
... the MODE button to exit the menu and return to view.  Each captured image (both videos and photos) is displayed on the LCD screen.  Photos appear with the Playback the screen....Photo:  Once in Playback mode, press the LEFT or RIGHT direction control button to scroll through the images on your digital video recorder's memory card until you find the image you first turn on...
v2 Camera Manual - Page 27

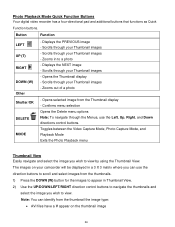
... (W) button for the images to appear in a 3 X 3 matrix where you can use the Left, Up, Right, and Down directions control buttons. Photo Playback Mode Quick Function Buttons Your digital video recorder has a four-directional pad and additional buttons that functions as Quick Function buttons. Opens the Thumbnail display - The images on the thumbnail...
v2 Camera Manual - Page 35

... them into the slot to import photos and videos directly from your iPad by following either one of time, store the digital video recorder without the batteries, in USB connector to heat sources. Apple iPad Camera Connection: For models that are compatible with the iPad, photos and videos can be purchased separately. 2) Using an iPad SD...

Similar Questions

Which Direction Do The Batteries Go Owners Manual Does Not Say
what directions do the batteries go owners manual does not say
(Posted by kathleenstory 7 years ago)
Vivitar Dvr787-pnk-kit-wm Action Digital Video Recorder, Pink Video Camera With
Vivitar's DVR 787 HD comes on when plugged in and says it has full power but cuts off when you unplu...
(Posted by jjknott82 8 years ago)
How To Charge A Vivitar Dvr 426hd
(Posted by mwaldemlorimg 10 years ago)
Ask a New Question
Use the box below to post a new question about this Vivitar product .
Points & Prizes
  • You can earn points for nearly everything you do on HelpOwl.com
  • You can trade in those points for gift cards at leading retailers such as Amazon.com and Walmart
  • It's that simple!
See How it Works
Create a Free Account

Vivitar Manuals

Find free Vivitar DVR 426HD manuals and user guides available at ManualOwl.com. Try out our unique manual viewer allowing you to interact with manuals from directly within your browser!

Vivitar Reviews

View thousands of Vivitar user reviews and customer ratings available at ReviewOwl.com.

Contact Information

Complete Vivitar customer service contact information including steps to reach representatives, hours of operation, customer support links and more from ContactHelp.com.

Scoreboard Ratings

See detailed Vivitar customer service rankings, employee comments and much more from our sister site.