Sony CMT-HPX9 Support Question
Sony CMT-HPX9 Support Question
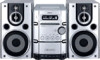
Find answers below for this question about Sony CMT-HPX9 - Micro Hi Fi Component System.Need a Sony CMT-HPX9 manual? We have 4 online manuals for this item!
Question posted by itsasnowynite on December 26th, 2010
Volume Dial
The volume dial (big round button) doesn't work properly anymore. You turn it clockwise to get higher volume, the digital numbers go down and up instead of just up. Please help. Does this mean I have to get rid of this unit, due that fixing it will probably cost too much to keep the unit. thanksss!!!
Current Answers
Related Sony CMT-HPX9 Manual Pages
Operating Instructions - Page 1
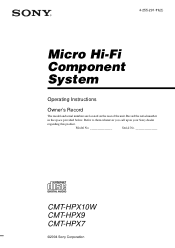
Model No
Serial No
CMT-HPX10W CMT-HPX9 CMT-HPX7
©2004 Sony Corporation 4-255-291-11(2)
Micro Hi-Fi Component System
Operating Instructions
Owner's Record
The model and serial numbers are located on the rear of the unit. Refer to them whenever you call upon your Sony dealer
regarding this product. Record the serial number
in the space provided below.
Operating Instructions - Page 4
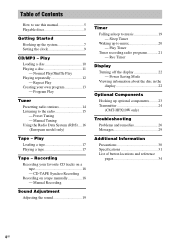
... Falling asleep to the radio 15 - Table of button locations and reference pages 34
4GB Preset Tuning - Play Loading a disc 10 Playing a disc 11 - Rec Timer
Display Turning off the display 22 - Power Saving Mode Viewing information about the disc in the display 22
Optional Components Hooking up the system 7 Setting the clock...
Operating Instructions - Page 6

....
6GB a disc recorded in Multi Session
• If the disc begins with a CD-DA session, it is recognized as a CD-DA (audio) disc, and MP3 sessions are played back without sound.
• If the disc begins with an MP3 session, it is recognized as an MP3 disc, ...
Operating Instructions - Page 8

...the wall socket, detach the supplied plug adaptor (only for models equipped with new ones. To turn on your system's VOLTAGE SELECTOR for a long period of time, remove the batteries to CD....
AM loop antenna Note To prevent noise pickup, keep the antennas away from the system and other components.
3 For models with a voltage selector, set VOLTAGE SELECTOR to a wall outlet. Refer to the...
Operating Instructions - Page 13

...
unit).
Selected track number
6 Program additional discs or tracks. appears when the total CD program time exceeds 100 minutes, or when you select an MP3 audio track. Other operations
... press ./ > repeatedly until the
desired track number appears.
Program Play
You can synchro record the programed tracks onto a cassette tape (page 18). Use buttons on the unit) to select a disc....
Operating Instructions - Page 18

...CD: To record from this Press x. Manual Recording
You can record just the portions you can press ./> to select the desired album before... To record from the optional component connected to the MD/VIDEO jacks.
• WIRELESS (CMT-HPX10W only): To record from ...then start playing the
desired source to record. Press X TAPE. Use buttons on the unit for the operation.
1 Load a recordable tape. ...
Operating Instructions - Page 20

... sound source you use the optional component connected to turn off the system.
The start playing. Notes &#... T
t TAPE PLAY T
8 Press ENTER.
Make sure you press the button, the display changes cyclically as step 5.
7 Press ./> repeatedly until "PLAY... a tape (see "Playing a tape" on page 15).
2 Adjust the volume. 3 Press CLOCK/TIMER SET. 4 Press ./> repeatedly until the
desired sound ...
Operating Instructions - Page 21

... cannot activate Play Timer and Rec Timer simultaneously.
21GB
Use buttons on the remote for the operation.
1 Tune in the ... time, Rec Timer will not be activated. • The volume is on page 9). Other operations
To Check the setting
Change the...time the system
turns on until "REC"
appears, then press ENTER. "ON" appears with a flashing hour indication.
4 Set the time to turn off the ...
Operating Instructions - Page 22

...press the button, the display switches as follows: Current track number and elapsed playing time t Current track number and remaining time or "- -.- -"* t Remaining time of the disc or "- -.- -"* t Track title (disc with MP3 audio tracks** ... operations in Power Saving
Mode. When a disc with MP3 audio tracks, album titles may
not be turned off to operate in Power Saving Mode. - Each time you...
Operating Instructions - Page 23

....
23GB Tip If you cannot select "VIDEO" by pressing FUNCTION repeatedly, turn off the system and then press ?/1 on the unit while holding down FUNCTION on the unit. Optional Components
Hooking up optional components
To enhance your system, you can then listen to the sound from the component. Listening to audio from a connected component
1 Connect audio cords.
Operating Instructions - Page 24

... by the following
procedures. Otherwise, you want to connect the transmitter to ON. Select either AUDIO IN A or AUDIO IN B hook up depending on the transmitter automatically turns off. Transmitter
(CMT-HPX10W only)
Hooking up the volume of the optional component you will activate. In this case, set the NOISE FILTER to OFF.
• While WIRELESS...
Operating Instructions - Page 25

The transmitter has a signal reception area of 1 to the headphones jack of the source component, set the volume of that component as high as possible without distorting the audio signal. • If you hold the antenna of the transmitter with walls containing steel beams. - Area with many electrical appliances capable of generating electromagnetic noise. - ...
Operating Instructions - Page 26
... line.
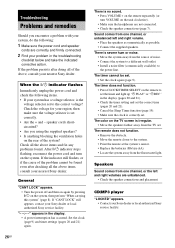
After ?/1 indicator stops flashing, reconnect the power cord and turn VOLUME on the unit clockwise). • Make sure the headphones are not connected. • Check the speaker ... If your system has a voltage selector, is no sound. • Press VOLUME + on the remote repeatedly (or turn on the system, then perform "When carrying this system" (page 8). Troubleshooting
Problems...
Operating Instructions - Page 27
...Play.
MP3 audio track cannot be played. the number of a stable...components. • Consult your nearest Sony dealer if the supplied AM antenna has come off the plastic stand. • Try turning...disc that conforms with bass sounds at high volume, the speaker vibration may take longer to...
• Set the proper band and frequency (page 14). • Connect the antenna properly (page 7). •...
Operating Instructions - Page 28

...audio reproducer, make sure that the NOISE FILTER switch is set to OFF. • Make sure that the optional component is turned on. • Turn up the volume on the connected optional component.... • Set the volume of the system. • Connect the component properly (page 23) while checking if: -
If the system still does not operate properly after performing the above measures...
Operating Instructions - Page 29

...NO DISC There is no disc in the tape deck.
Wireless (CMT-HPX10W only)
AUTO SCAN You can adjust the settings so that you hear clear audio sound.
Tape
NO TAB You cannot record the tape because the ...timer function when Play Timer or Rec Timer are set .
Other
NOT IN USE You pressed an invalid button.
TIME NG Play Timer or Rec Timer start and end times are not set the clock or timer ...
Operating Instructions - Page 30
...8226; To prevent a malfunction, do so may condense on the lens inside this system at a high volume,
the cabinet temperature of the top, side and bottom rises considerably. If you have it is located ...Remove the disc and leave the system turned on the disc is not to prevent heat build-up during operation, this occur, the system will not operate properly.
Be sure to parts inside the CD...
Operating Instructions - Page 34
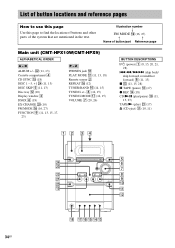
...
Use this page to find the location of buttons and other parts of button/part Reference page
Main unit (CMT-HPX10W/CMT-HPX9)
ALPHABETICAL ORDER
A - Illustration number r
FM MODE qh (16, 27)
R...(12) TUNER/BAND 0 (14, 15) TUNING +/- 8 (14, 15) TUNING MODE qj (14, 15) VOLUME 7 (20, 26)
BUTTON DESCRIPTIONS
?/1 (power) 1 (8, 15, 20, 21, 28)
.m/M> (skip back/ skip forward, rewind/fast forward...
Operating Instructions - Page 35

qa (20, 26)
BUTTON DESCRIPTIONS
?/1 (power) 1 (8, 15, 20, 21, 28)
m/M (rewind/fast forward) 7 (11, 17)
./> (skip back/skip forward) qg (9, 11, 13, 19, 20, 21)
x (stop) 8 (11, 15, 17, ... ql (11, 13, 18) REPEAT 4 (12) SLEEP wa (19) TAPE qh (17) TUNER/BAND 5 (14, 15) TUNER MEMORY qk (14) TUNING MODE ql (14, 15) VOLUME +/- Remote control
ALPHABETICAL ORDER
A -
Marketing Specifications - Page 2
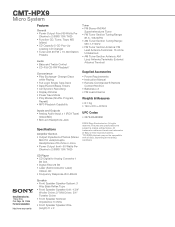
CMT-HPX9
Micro System
Features
General • Power Output Front 80 Watts Per
Channel x 2 (RMS 10% THD) • Function CD, Tuner, Tape, MD
(Video) • CD Capacity 5-CD Pop-Up
Loading CD Changer • Tuner with all discs, depending on recording conditions. All trademarks referenced herein are subject to Analog Converter 1
Bit D/A • Digital... • Analog Audio Input x 1 ...
Similar Questions

Detail Mechanism Volume Control Cmt-hpx9
Detail the mechanism of the volume control so I can understand how it works. Then I can fix it. the ...
Detail the mechanism of the volume control so I can understand how it works. Then I can fix it. the ...
(Posted by Jjandchuck 4 years ago)

How To Fix Sony Mini Hi-fi Component System Ec909ip Radio That Says Protect
(Posted by bertale 10 years ago)

How Do I Turn The Bass Up On The Sony Micro Hi-fi Component System
(Posted by Jadedkapu 10 years ago)

What Did It Cost Brand New?
(Posted by jw7260 11 years ago)

Cd Drawer Will Not Open On My Cmt-hpx9 Micro Hifi Component System.
(Posted by Mountainman569 12 years ago)