RCA 25423RE1 Support Question
RCA 25423RE1 Support Question
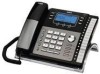
Find answers below for this question about RCA 25423RE1 - ViSYS Corded Phone.Need a RCA 25423RE1 manual? We have 1 online manual for this item!
Question posted by juasand on December 22nd, 2013
How To Set Up Voicemail On Rca Visys 2543re1
The person who posted this question about this RCA product did not include a detailed explanation. Please use the "Request More Information" button to the right if more details would help you to answer this question.
Current Answers
Related RCA 25423RE1 Manual Pages
User Guide - Page 4

.../TV Interference Problems." This equipment generates, uses, and can be co-located or operated in accordance with FCC RF radiation exposure limits set forth for additional suggestions. If this phone has been tested and meets the FCC RF exposure guidelines when used in conjunction with Part 15 of 20 centimeters between the...
User Guide - Page 5
...Phone Name 17 Intercom Auto Answer 17 Flash Time 18 Call Alert Tone 18 No Unknown/Blocked 18 Display Contrast 19 Local Area Code 19 Regional Area Codes 19 Manually Setting the Time and Date 20 Hour Format 21 Restoring the Default Settings...Storing CID Records 29 Reviewing CID Records 30 Saving a CID Record to Phone Book Memory... 30 Deleting a CID Record 30 Deleting All Call Records ...
User Guide - Page 8
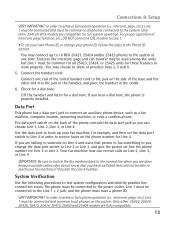
Connections & Setup
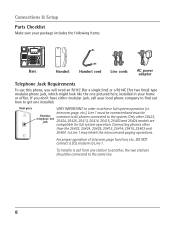
Parts Checklist
Make sure your package includes the following items:
Base
Handset
Handset cord
Line cords
AC power adaptor
Telephone Jack Requirements
To use this phone, you don't have either modular jack, call from one installed. Only other
than the 25423, 25424, 25425, 25413, 25414, 25415, 25403 and
25404 to Line 1 ...
User Guide - Page 10

CAUTION: Always disconnect all phone cords from the network. • Use caution when installing or modifying telephone lines. • Temporarily disconnect any equipment connected to the phone such as faxes, other
phones, or modems.
Important Installation Guidelines
• Install telephone near both a telephone (modular) jack and an electrical power outlet. • Avoid sources of noise...
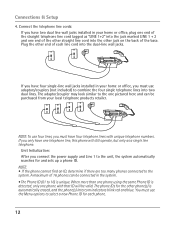
User Guide - Page 11

...until the door latch "snaps" closed. Your phone should be correctly orientated in steps 1 through 3 below prior to connecting the telephone line cords to release the battery door from the base ...single line (RJ11C) wall jacks to replace the batteries. Connections & Setup
Installing the Phone
The phone may want to maintain unit operation when electrical power is important that you replace them...
User Guide - Page 12
... "LINE 1+2" into the jack marked LINE 1 + 2 and one end of the other straight line cord into two dual lines. Unit Initialization: After you must use the Menu options to the system. The phone IDs for and sets up a phone ID. If you have four single-line wall jacks installed in your local telephone products...
User Guide - Page 13
... DSL modem to Line 1.
• To set the data port switch to Line 4 in the cradle.
6. The phone must be connected to the power outlet, Line..., for full system operation. Connect the handset cord:
Connect one time. Data Port
This phone has a data port jack to the system ... to hook up to 16 RCA 25423, 25424 and/or 25425 phones to connect an auxiliary phone device, such as a fax machine, computer modem,...
User Guide - Page 14
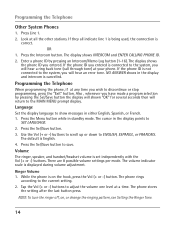
NO ANSWER shows in the display points to show messages in standby mode. Language
Set the display language to SET LANGUAGE.
2. There are 8 possible volume settings per mode. The phone rings according to save.
If the phone ID you entered is cancelled. Press the Menu button while in either English, Spanish, or French.
1. Press the Sel...
User Guide - Page 15

...in standby mode.
2. Use the Vol (+ or -) buttons to scroll up or down to SET PHONE OPTIONS.
3. Use the Vol (+ or -) buttons to scroll up or down to SET PHONE OPTIONS.
3. OFF disables the function for each of the four lines) has precedence over the...allows the unit to the CID ON/OFF option.
Press the Sel/Save button.
4. The phone stores the setting after the last button press.
User Guide - Page 16

... to 10 rings. 7. Use the Vol (+ or -) buttons to scroll up or down to 2 rings. Press the Sel/Save button again to automatically set the Delay Ring to SET PHONE OPTIONS. 3. Press the Menu button while in standby mode. 2. Press Sel/Save or choose another unit on the system, NOT AVAILABLE shows in...
User Guide - Page 17
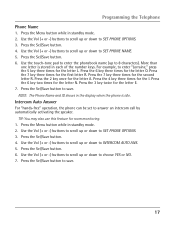
...Vol (+ or -) buttons to scroll up or down to save . Press the Sel/Save button to SET PHONE OPTIONS. 3. Use the Vol (+ or -) buttons to scroll up or down to save .
17 Press...Press the Menu button while in standby mode. 2. Intercom Auto Answer For "hands-free" operation, the phone can be set to SET PHONE OPTIONS. 3. Press the Sel/Save button. 4. For example, to choose YES or NO. 7. ...
User Guide - Page 18
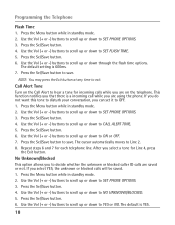
...Save button. 4. Use the Vol (+ or -) buttons to scroll up or down to SET PHONE OPTIONS. 3. NOTE: You may press the Exit button at any time to save . ...to save . Press the Menu button while in standby mode. 2.
If you to SET PHONE OPTIONS. 3. Call Alert Tone Turn on the telephone. The default setting is YES.
18 This function notifies you that there is a incoming call while you...
User Guide - Page 19
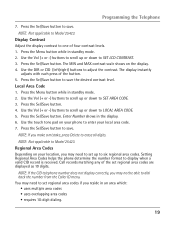
... Sel/Save button. Enter Number shows in standby mode. 2. Press the Sel/Save button to display when a valid CID record is received.
Setting Regional Area Codes helps the phone determine the number format to save. Press the Sel/Save button to save . Press the Sel/Save button to save the desired contrast...
User Guide - Page 20
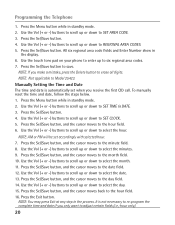
.... Use the touch tone pad on your phone to enter up or down to the date field. 12. Use the Vol (+ or -) buttons to scroll up to SET TIME & DATE. 3. Press the Sel/Save...4. Press the Sel/Save button, and the cursor moves to select the hour. It is automatically set accordingly with selected hour. 7.
Press the Sel/Save button to adjust certain fields (i.e.; Programming the ...
User Guide - Page 21
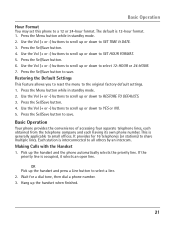
... 16 telephones (or stations) to small offices. Use the Vol (+ or -) buttons to scroll up or down to the original factory default settings. 1. It provides for a dial tone, then dial a phone number. 3. If the
priority line is 12-hour format. 1. Press the Menu button while in standby mode. 2. Use the Vol (+ or...
User Guide - Page 24
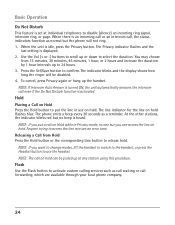
... any station using this procedure. The Privacy indicator flashes and the
last setting is idle, press the Privacy button. You may choose
from Hold Press ... Disturb function is turned ON, the unit automatically answers the intercom call forwarding, which are available through your local phone company.
24 When the unit is displayed. 2. Hold Placing a Call on Hold Press the Hold button to ...
User Guide - Page 34
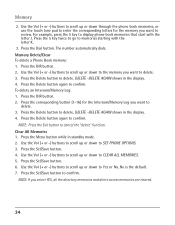
... function. Use the Vol (+ or -) buttons to scroll up or down through the phone book memories, or use the touch tone pad to enter the corresponding letters for the ... All Memories 1. Use the Vol (+ or -) buttons to scroll up or down to SET PHONE OPTIONS. 3. Memory Delete/Clear To delete a Phone Book memory: 1. Press the DIR button. 2. DELETE -DELETE AGAIN shows in standby mode...
User Guide - Page 35
...linked to dial a succession of long distance company
6
Authorization code (ID)
7
Long distance phone number
8
1. Display Messages
The following special messages indicate the status of the Caller ID ...2.
Memory
Chain Dialing
This process allows you to yours. Operation By Battery
If the power cord is not plugged into the unit, and the battery is low.
Press memory location 7.
...
User Guide - Page 36
...; See solutions for "No dial tone." Incoming voice too low or none at all. • Check volume setting.
36 Make
sure the line cords are connected to the phone and the wall jack. If there is no battery is installed, the unit enters into the back of the H5401 accessory handset and module...
User Guide - Page 43

...
26
Receiving and Storing CID Records 29
Index
Redial
25
Regional Area Codes
19
Releasing a Call from Hold
24
Restoring the Default Settings 21
Reviewing CID Records
30
Reviewing Phone Book (Directory)
Memory
32
Reviewing the Intercom/Memory Log
(memory location)
32
Reviewing the Redial Numbers 25
Ringer Tone
15
Ringer Volume...
RCA Knowledge Base Results
We have determined that the information below may contain an answer to this question. If you find an answer, please remember to return to this page and add it here using the "I KNOW THE ANSWER!" button above. It's that easy to earn points!-
Troubleshooting the LF-30S Transmitter System
...the power on . Check that the power to the same channel. This product is set to all turned on /off . cordless phone, wireless network, microwave, baby monitor, etc.). Adjust the receiver and transmitter's antenna ... and Receiver Units Make sure the receiver and transmitter's power adapter cords are all components (DVD, VCR, TV, etc.) in your home that the receiver and ... -
Operating and Troubleshooting the RCA WSP150 Wireless Speakers
... using batteries, remove the BATTERY DOOR and insert 4 - Simply plug the audio input cord into the jack of your audio source. This should eliminate the interference noise. NOTE: Under...you use your speakers as cordless phones, cell phones and baby monitors are shown under Transmitter Installation above . If using the VOLUME control and set to power the speakers. Ensure the... -
Connecting the RCA RT2760 Home Theater System
.../10/2010 10:24 AM Connections and Set Up of speaker wires and terminals match. Insert the antenna wires into the AM LOOP terminal. If the cords are reversed, the sound will be connected.... They must be lost after headphones are in your ears, reduce volume or discontinue use the PHONES jack on the AM loop antenna is restored. Press down the volume before plugging your receiver into...
Similar Questions

How To See Caller Id Rca 25423re1 - Visys Corded Phone
(Posted by hmilS1 9 years ago)

How To Set Up A Voicemail On Visys Cordless Phone
(Posted by dmsgrjay15 9 years ago)


How To Set Up Rca Visys Business Phone
(Posted by nadederekm 10 years ago)

How To Set Up Voicemail On Rca Visys Cordless Phone
(Posted by dalibenit 10 years ago)