Get support for LiftMaster 8010

LiftMaster 8010 Support Question

LiftMaster 8010 Support Question

Find answers below for this question about LiftMaster 8010.
Need a LiftMaster 8010 manual? We have 5 online manuals for this item!
Question posted by jashunt on February 2nd, 2024

Liftmaster 8010 Manuf 2020

push button on wall will not work. wired correctly followed manual but still not working.

Current Answers

Answer #1: Posted by SonuKumar on February 8th, 2024 10:10 AM
SonuKumar

Member since:
May 9th, 2021

Points: 16,595,890
100
points
I understand you're having trouble with your LiftMaster 8010 push button not working, even though you wired it correctly following the manual. Here are some troubleshooting steps you can try:

Basic Checks:

Power: Ensure the garage door opener is plugged in and receiving power. Check for any loose connections or tripped breakers.

Battery: If your push button uses a battery, replace it with a fresh one.

Wiring: Double-check your wiring connections at both the push button and the opener, ensuring they match the manual and are secure. Use a flashlight to inspect for any damage or loose wires.

Learn Button: Some LiftMaster models require programming the push button using the "learn" button. Refer to your manual for specific instructions.

Further Troubleshooting:

Test Functionality: Disconnect the wires from the push button and briefly touch them together. If the garage door opens or closes, the issue lies with the button itself. If nothing happens, the problem might be with the wiring or opener.

Bypass Button: Try bypassing the push button by momentarily connecting the wires directly to the corresponding terminals on the opener (consult the manual for the correct terminals). If the door operates, the issue is with the button.

Jumper Wire: Create a temporary jumper wire with low-voltage wire and connect one end to the push button terminals and the other to the corresponding terminals on the opener. If the door operates, the issue is likely with the button or wiring in the wall.

Check LED Light: If your push button has an LED light, check if it turns on when pressed. A lit LED might indicate a wiring issue even if the door doesn't respond.

If none of these steps resolve the issue:

Consult the Manual: Refer to your LiftMaster 8010 manual for more advanced troubleshooting steps specific to your model.

Contact LiftMaster Support: If the problem persists, consider contacting LiftMaster customer support for further assistance. They can walk you through additional troubleshooting steps or potentially offer repair options.

Remember to exercise caution when handling electrical components and consult a qualified electrician if you're unsure about any steps involved.


Please respond to my effort to provide you with the best possible solution by using the "Acceptable Solution" and/or the "Helpful" buttons when the answer has proven to be helpful.

Regards,
Sonu
Your search handyman for all e-support needs!!

Related LiftMaster 8010 Manual Pages

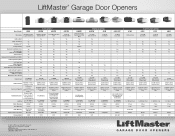
Garage Door Opener Comparison Chart Manual - Page 1

... - Yes Control Panel 888LM MyQ Control Panel 880LMW Smart Control Panel® Remote Control 893MAX 3-Button Remote Control 12 Remote Controls; LiftMaster® Garage Door Openers Model Number 8500 ELITE SERIES® 8550W 8587W Description DC Battery Backup Capable Wall Mount DC Battery Backup 3/4 HP AC Chain Drive Belt Drive Wi-Fi® Wi-Fi Built...
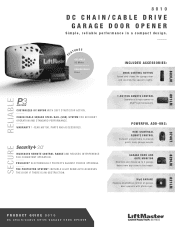
8010 Product Guide Manual - Page 1

... and portable to 4 garage doors from any room in a compact design. MyQ GARAGE Enables smartphone control of garage door openers with photo eyes. 374UT 829LM 821LM PRODUCT GUIDE 8010 TIMER-TO- EAT U R E S RELIABLE DC Motor CHAIN/CABLE Drive INCLUDED ACCESSORIES: DOOR CONTROL BUTTON Opens and closes the garage door and controls the opener's lights. POSILOCK® ELECTRONICALLY...
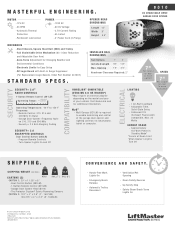
8010 Product Guide Manual - Page 2

...Hands-Free Work Lights On -- Emergency/Quick Release -- P r on g ) OPENER HEAD DIMENSIONS Length Width Height 15" 8" 5.5" 8010 DC CHAIN/CABLE DRIVE GARAGE DOOR OPENER SECURITY COMPATIBILITY ELECTRICAL MECHANICS --St e el Chassis, Sq u ar e S t eel Rai l ( S S R) an d Tr ol l e y --F ull Chai n /Cab le Dr i v e M ech an i s m ( 63: 1 Gear R ed u c t i on ( 883L M) --1-Button Remote Contr...
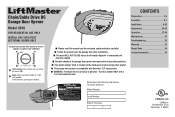
8010 Owner s Manual - Page 1

... 34 Contact Information 35 Write down the following information for future reference: Model Number: Serial Number: Date of the camera icon including the points ( ). Chain/Cable Drive DC Garage Door Opener Model 8010 FOR RESIDENTIAL USE ONLY INSTALL ON 7 OR 8 FOOT SECTIONAL DOORS ONLY Register your garage door opener. ■ This garage door opener is compatible with a 7 or 8 foot sectional...
8010 Owner s Manual - Page 2

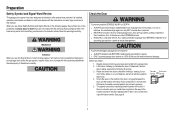
... to avoid malfunction and damage. Lift the door halfway up. Raise and lower the door to the garage door. 2. If your garage door and/or the garage door opener if you see this manual. The opener should stay in this Signal Word on the following pages, they will alert you to loosen, move or adjust garage door, door springs, cables, pulleys, brackets or their hardware...
8010 Owner s Manual - Page 3

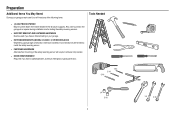
... HARDWARE Must be used if you will require hardware not provided. Preparation Additional Items You May Need: Survey your garage. l DOOR REINFORCEMENT Required if you have a finished ceiling in your garage area to position the garage door opener during installation and for testing the safety reversing sensors. l EXTENSION BRACKETS (MODEL 041A5821-1) OR WOOD BLOCKS Depending upon...
8010 Owner s Manual - Page 4

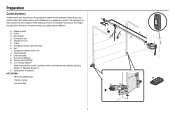
...Emergency release rope and handle H. Rail I M N O 4 Remote control (891LM) N. A. Header bracket B. Curved door arm E. Straight door arm F. Safety Sensor Brackets (2) NOT SHOWN White and red/white wire Owner's manual Hardware Bag A B F C E G D K H J L I . Trolley G. Garage door opener (motor unit) J. The Protector System® Safety reversing sensors with your specific...
8010 Owner s Manual - Page 6

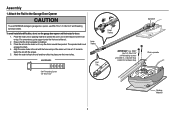
... the cover, and rest the back end of the rail on top of the rail. 2. Use a 1/4" socket to garage door opener, use ONLY the 1/4"-20x1-3/4" self-threading screws provided. Assembly 1 Attach the Rail to the Garage Door Opener To avoid SERIOUS damage to fasten the rail with the holes on top. To avoid installation difficulties, do...
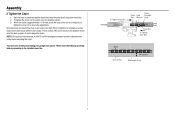
8010 Owner s Manual - Page 7

... to the position shown when the door is too loose or too tight. Please read the following warnings before adjusting the chain. Assembly 2 Tighten the Chain 1. When the chain is normal. This is approximately 1/4" (6 mm) above the base of Rail 7 You have now finished assembling your garage door opener. NOTE: During future maintenance, ALWAYS pull...
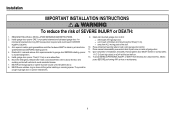
8010 Owner s Manual - Page 8

...floor. 6. Install garage door opener ONLY on inside of the door. 10. Door MUST reverse on wall next to avoid entanglement. 5. Upon completion of 5 feet (1.5 m). READ AND FOLLOW ALL INSTALLATION WARNINGS AND INSTRUCTIONS. 2. Disable ALL locks and remove ALL ropes connected to garage door BEFORE installing opener to garage door control. 11. Install wall-mounted garage door control...
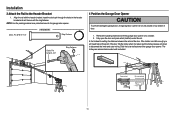
8010 Owner s Manual - Page 11

..., pull the trolley release arm down to disconnect the inner and outer trolley. Connected Disconnected 11 Remove the packing material and lift the garage door opener onto a ladder. 2. Fully open the door and place a 2x4 (laid flat) under the rail. NOTE: Use the packing material as a protective base for setting the distance between the rail...
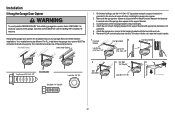
8010 Owner s Manual - Page 12

Attach the end of each side of the garage door opener to the support bracket. 3. Attach the garage door opener to the support bracket with appropriate hardware (not provided). 5. Remove the 2x4 and manually close the door. Your installation may be used if installing ANY brackets into masonry. Finished Ceiling Unfinished Ceiling 1. Below are three example ...
8010 Owner s Manual - Page 15

... the garage door opener until the trolley release arm is activated. Close the door. Attach the straight door arm to the door bracket using the clevis pin. HARDWARE Clevis Pin 5/16"x1-1/4" Clevis Pin 5/16"x1" Hex Bolt 1/4"-20x3/4" Ring Fastener Lock Nut 1/4"-20 CORRECT Straight Door Arm (Groove facing out) Curved Door Arm INCORRECT Straight Door Arm Curved Door Arm...
8010 Owner s Manual - Page 17

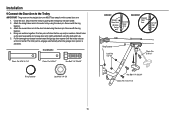
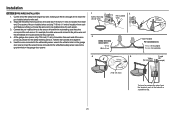
... the wall near the garage door opener. 3. Strip 7/16 inch (11 mm) of insulation from the end of the garage door. Attach the entrapment warning label on the garage door opener. Staple 3 RED WHITE WHITE GREY 17 If your garage is prewired make sure you use the same wires that are connected to the garage door opener HARDWARE Insulated Staple (Not Shown) 1. Attach the manual...
8010 Owner s Manual - Page 18

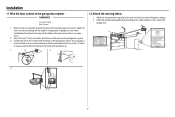
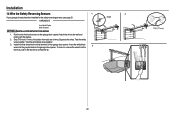
... cm) Carriage Bolt 1/4"-20 x 1/2" Wing Nut 1/4"-20 Facing the door from closing , the door will stop and reverse to the door track, the wall, or the floor. IMPORTANT INFORMATION ABOUT THE SAFETY REVERSING SENSORS The safety reversing sensors must be connected and aligned correctly before the garage door opener will not go into the sleep mode until activated...
8010 Owner s Manual - Page 20

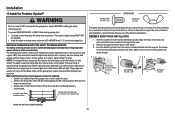
... 20 Attach the wire to the garage door opener. Twist the white/black wires together. 3. Installation 14 Wire the Safety Reversing Sensors If your garage already has wires installed for the safety reversing sensors, see page 21. Insert the white/black 3 wires into the white terminal on the garage door opener. To insert or remove the wires from the terminal, push in the tab...
8010 Owner s Manual - Page 21

... strip 7/16 inch (11 mm) of insulation from the terminal, push in the tab with wire nuts making sure there is enough wire to the white terminal on the garage door opener. 1 Safety reversing sensor wires 2 Pre-installed wires 3 Safety reversing sensor wires White White/Black 4 5 Yellow Purple 7/16" (11 mm) RED WHITE WHITE GREY 7/16" (11 mm) Not...
8010 Owner s Manual - Page 29

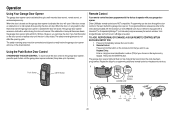
... correctly before the garage door opener will be activated through the door control or the learn button the garage door opener. Visit bridge.liftmaster.com to operate with your choice on the door control or keyless entry until the garage door opener activates (it may be necessary for programming additional remote controls or keyless entry devices. 1 Push Button LIGHT Button LEARN...
8010 Owner s Manual - Page 32

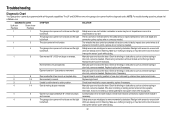
... at travel module. Inspect safety sensor wire at the logic board. Opener hums for a bulbs flash. Inspect sensor wires for 1-2 seconds no movement. necessary. 4 6 The garage door opener will not close the door. Check for binding or obstructions, such as a broken spring or door lock, correct as needed . Manually open and close and the light Safety sensors...
8010 Owner s Manual - Page 35

...garage door opener WILL NOT work until the safety reversing sensors are ordering a repair part please have the model number of the garage door opener. For installation and service information please: See your garage door opener while calling. If you have access to : LiftMaster... LiftMaster.com or Call 1-800-528-9131 Before calling, please have the following information: part number, part name, ...

Similar Questions

I Have Installed A Chamberlan Garage Door Opener And The Remote I Was Using Is
I have been using a Chamberlan garage door opener and its remote has been defective since of late.Pl...
(Posted by donweera42 7 months ago)
Garage Door Opens After Shutting.
My Lift master 8550 inside keypad is Inside wall pad is model #880LM. outside keypad Model # is 877M...
(Posted by BONNIECA92 2 years ago)
Noise From Garage Door Opener
I have a liftmaster garage door opener.  It makes a loud screeching noise when the door is lowered....
(Posted by tom19097 10 years ago)
Replacing Backup Battery In Garage Door Opener.
How do I replace the backup battery in the LiftMaster 3850 garage door opener? Are there instruction...
(Posted by melindanannin 12 years ago)
Resetting The Key Code For Garage Door Opener
How do you reset the key code for the garage door opener?
(Posted by khiggins69 12 years ago)
Ask a New Question
Use the box below to post a new question about this LiftMaster product .
Points & Prizes
  • You can earn points for nearly everything you do on HelpOwl.com
  • You can trade in those points for gift cards at leading retailers such as Amazon.com and Walmart
  • It's that simple!
See How it Works
Create a Free Account

LiftMaster Manuals

Find free LiftMaster 8010 manuals and user guides available at ManualOwl.com. Try out our unique manual viewer allowing you to interact with manuals from directly within your browser!

LiftMaster Reviews

View thousands of LiftMaster user reviews and customer ratings available at ReviewOwl.com.

Contact Information

Complete LiftMaster customer service contact information including steps to reach representatives, hours of operation, customer support links and more from ContactHelp.com.

Scoreboard Ratings

See detailed LiftMaster customer service rankings, employee comments and much more from our sister site.