Get support for LiftMaster 3850

LiftMaster 3850 Support Question

LiftMaster 3850 Support Question

Find answers below for this question about LiftMaster 3850.
Need a LiftMaster 3850 manual? We have 1 online manual for this item!
Question posted by aledka on January 17th, 2014

How Do I Remove The 485lm Battery From Its Compartment?

The person who posted this question about this LiftMaster product did not include a detailed explanation. Please use the "Request More Information" button to the right if more details would help you to answer this question.

Current Answers

There are currently no answers that have been posted for this question.
Be the first to post an answer!

Remember that you can earn up to 1,100 points for every answer you submit. The better the quality of your answer, the better chance it has to be accepted.

Related LiftMaster 3850 Manual Pages

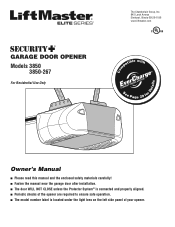
3850 Elite Series Manual - Page 1

® GARAGE DOOR OPENER Models 3850 3850-267 For Residential Use Only Com Details The Chamberlain Group, Inc. 845 Larch Avenue Elmhurst, Illinois 60126-1196 www.liftmaster.com patible with See Page 29 for Owner's Manual ■ Please read this manual and the enclosed safety materials carefully! ■ Fasten the manual near the garage door after installation. ■...
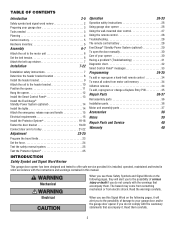
3850 Elite Series Manual - Page 2

... Operation 26-33 Operation safety instructions 26 Using garage door opener 26 Using the wall-mounted door control 27 Using the remote control 28 Troubleshooting 28 The remote control battery 28 EverCharge® Standby Power System (optional 29 To open the door manually 30 Care of your garage door and/or the garage door opener if you do not comply with the...
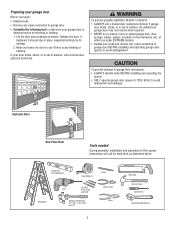
3850 Elite Series Manual - Page 3

... under EXTREME tension. • Disable ALL locks and remove ALL ropes connected to garage door BEFORE installing and operating garage door opener to make sure your garage door is balanced and is not sticking or binding: 1. Preparing your garage door Before you begin: • Disable locks. • Remove any binding or sticking. Lift the door about halfway as illustrated below. Release the...
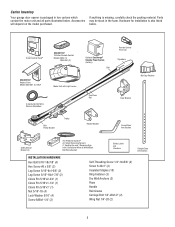
3850 Elite Series Manual - Page 5

...Door Control Console SECURITY✚® 3-Button Remote Control Models 3850 (1) 3850-267 (2) SECURITY✚® Keyless Entry Model 3850-267 (1) ONLY Motor Unit with Light Lenses 2-Conductor Bell Wire White & White/Red Belt Pulley Bracket Trolley Optional EBvearttCehryarge® Stan(PdbacykPeodwSeerpSaryastteelym) (battery...Inventory Your garage door opener is packaged in the foam.
3850 Elite Series Manual - Page 6

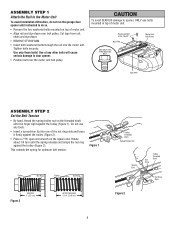
... Rail to the Motor Unit To avoid installation difficulties, do not run the garage door opener until instructed to door opener. • Position belt over belt pulley. Use only these bolts! Use ... for optimum belt tension. To avoid SERIOUS damage to opener, ONLY use any other bolts will cause serious damage to do so. • Remove the two washered bolts mounted on the square end. ...
3850 Elite Series Manual - Page 7

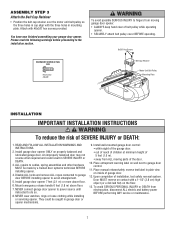
... floor. 6. Place entrapment warning label on the floor. 13. Install garage door opener ONLY on inside of the door. 10. ALL repairs to garage door control. 11. READ AND FOLLOW ALL INSTALLATION WARNINGS AND INSTRUCTIONS. 2. Disable ALL locks and remove ALL ropes connected to garage door BEFORE installing opener to do so. 8. Upon completion of SEVERE INJURY or DEATH: 1. NEVER...
3850 Elite Series Manual - Page 11

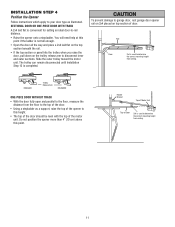
... determine the correct mounting height from ceiling. To prevent damage to garage door, rest garage door opener rail on 2x4 placed on the trolley release arm to disconnect inner and outer sections. ENGAGED Trolley Release Arm RELEASED ONE-PIECE DOOR WITHOUT TRACK • With the door fully open and parallel to the floor, measure the distance from ceiling...
3850 Elite Series Manual - Page 12

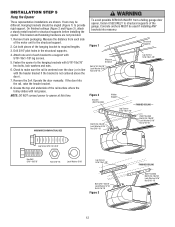
...) Bolt 5/16"-18x7/8" Lock Washer 5/16" Nut 5/16"-18 12 Measure the distance from a falling garage door opener, fasten it SECURELY to structural supports of the motor unit to the hanging brackets with 5/16"-18x1-7/8" lag screws. 5. Remove the 2x4. NOTE: DO NOT connect power to provide rigid support. FINISHED CEILING - INSTALLATION STEP 5 Hang...
3850 Elite Series Manual - Page 13

...NOT connect power and operate the opener at lower temperatures although the door control remains fully functional. NOTE: The functional temperature range of bell wire. Remove push bar cover by gently ...there are desired to each garage door opener. DO NOT pierce wire with the operation of closing garage door: • Install door control within sight of door, at the lower/middle ...
3850 Elite Series Manual - Page 14

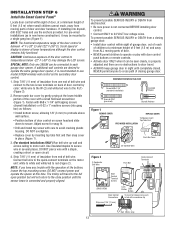
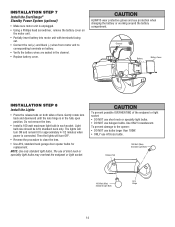
... the procedure to corresponding terminals on the motor unit. • Partially insert battery into motor unit with terminals facing out. • Connect the red (+) and black (-) wires from motor unit to close the lens. • Use A19, standard neck garage door opener bulbs for replacement. Gently rotate lens back and downward until the lens...
3850 Elite Series Manual - Page 15

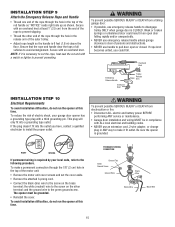
... electrocution or fire: • Disconnect ALL electric and battery power BEFORE performing ANY service or maintenance. • Garage door installation and wiring MUST be grounded. • Reinstall ... Remove the attached 3-prong cord. • Connect the black (line) wire to pull door open door falling rapidly and/or unexpectedly. • NEVER use emergency release handle unless garage doorway...
3850 Elite Series Manual - Page 16

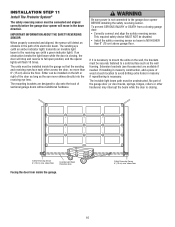
...; Correctly connect and align the safety reversing sensor. The invisible light beam path must be connected and aligned correctly before the garage door opener will detect an obstacle in the path of sectional garage doors without additional hardware. Safety Reversing Sensor 6" (15 cm) max. The sending eye (with an amber indicator light) transmits an invisible...
3850 Elite Series Manual - Page 24

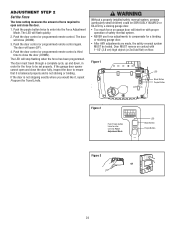
The LED will flash quickly. 2. If the garage door opener cannot open and close the door fully, inspect the door to ensure that it is balanced properly and is not stopping exactly where you would like it, repeat Program the Travel Limits. Without a properly installed ...
3850 Elite Series Manual - Page 25

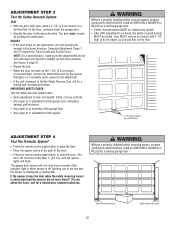
... laid flat) on the 1-1/2" (3.8 cm) board (or 2x4 laid flat), remove the obstruction and run the opener through 3 or 4 complete travel cycles to test adjustment. • If the unit continues to fail the Safety Reverse Test, call for a trained door systems technician. The garage door opener will flash. Safety Reversing Sensor 25 Safety Reversing Sensor ADJUSTMENT...
3850 Elite Series Manual - Page 26

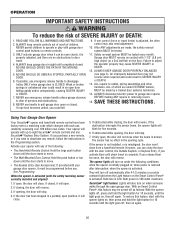
... with each use emergency release handle to move. • The Keyless Entry (See Accessories): If provided with the opener lights on when someone walks through the open , the door will reverse. The sensor has no obstructions to garage door opener BEFORE making ANY repairs or removing covers. 15. NO ONE SHOULD CROSS THE PATH OF THE MOVING...
3850 Elite Series Manual - Page 31

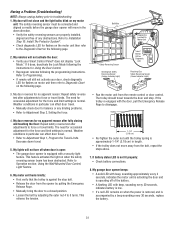
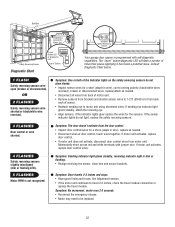
...; A solid LED with beep, sounding approximately every 2 seconds, indicates the motor unit is activating the door and is operating off when door is open: • The garage door opener is equipped with beep, sounding every 30 seconds, indicates battery is normal. If battery status LED is accompanied by adjusting the outer nut 4 to Adjustment Step 2, Setting the force...
3850 Elite Series Manual - Page 32

...Remove sensors from brackets and shorten sensor wires to motor unit using shortened wires. If motor unit activates, replace door control. • If motor unit does not activate, disconnect door ..."Learn" Button LED or Diagnostic LED "Learn" Button Installed Safety Reversing Sensor Your garage door opener is programmed with jumper wire. OR 2 FLASHES Safety reversing sensors wire shorted or ...
3850 Elite Series Manual - Page 34

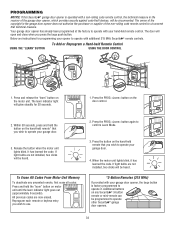
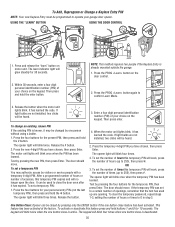
.... 2. Additional buttons on the hand-held remote that you wish to operate your garage door opener, the large button is operated with a non-rolling code remote control, the technical measure in the garage door opener does not authorize the purchaser or supplier of the garage door opener, which provides security against code-theft devices, will be programmed to operate...
3850 Elite Series Manual - Page 35

... move . This feature has been activated at the factory. Release the button when the motor unit lights blink. The opener light will glow steadily for your garage door opener. If the temporary PIN was set a temporary PIN You may be closed by visitors or service people with a temporary 4-digit PIN. The keypad will work...
3850 Elite Series Manual - Page 38

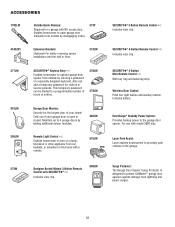
...with model 3850 only. Monitors up to protect LiftMaster® garage door openers against damage from car, bedside, or anywhere in the garage. Enables homeowner to open or closed. EverCharge® Standby Power System: Provides backup power to turn on a specially designed keyboard. Wireless Door Control: Push bar, light feature and auxiliary button. Includes battery. Surge Protector...

Similar Questions

Ask a New Question
Use the box below to post a new question about this LiftMaster product .
Points & Prizes
  • You can earn points for nearly everything you do on HelpOwl.com
  • You can trade in those points for gift cards at leading retailers such as Amazon.com and Walmart
  • It's that simple!
See How it Works
Create a Free Account

LiftMaster Manuals

Find free LiftMaster 3850 manuals and user guides available at ManualOwl.com. Try out our unique manual viewer allowing you to interact with manuals from directly within your browser!

LiftMaster Reviews

View thousands of LiftMaster user reviews and customer ratings available at ReviewOwl.com.

Contact Information

Complete LiftMaster customer service contact information including steps to reach representatives, hours of operation, customer support links and more from ContactHelp.com.

Scoreboard Ratings

See detailed LiftMaster customer service rankings, employee comments and much more from our sister site.