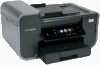
Lexmark Pinnacle Pro901 Support Question
Lexmark Pinnacle Pro901 Support Question
Find answers below for this question about Lexmark Pinnacle Pro901.Need a Lexmark Pinnacle Pro901 manual? We have 5 online manuals for this item!
Question posted by lumik93152 on November 9th, 2015
I Cannot Print A Test Page. My Main Lid Will Not Completely Close In Left Corner
The person who posted this question about this Lexmark product did not include a detailed explanation. Please use the "Request More Information" button to the right if more details would help you to answer this question.
Current Answers
Answer #1: Posted by TommyKervz on November 23rd, 2015 11:32 PM
TommyKervz

Member since:
January 10th, 2013 Points: 17,776,813

Member since:
January 10th, 2013 Points: 17,776,813
That might be happening due to a broken hinge, See a quick fix on this video https://www.youtube.com/watch?v=GaS0oKcreBo
Related Lexmark Pinnacle Pro901 Manual Pages
User's Guide - Page 9
..., copying, scanning, and faxing tasks,
depending on your printer model
• Configuring printer settings • Viewing and printing documents and photos • Setting up and configuring the printer on a network,
depending on your printer model
• Caring for and maintaining the printer • Troubleshooting and solving problems
User's Guide The User's Guide is located in the...
User's Guide - Page 25
.... 3 Select Printer Home. 4 Choose your printer does not appear in complete, restart your computer. Reinstalling the printer software
When you encountered problems while installing, or if your printer from the printer drop-down list. 5 From the Support tab, select Check for my software. 5 Click OK.
Enabling automatic software updates
1 With a document open, click File Print. 2 Click...
User's Guide - Page 27

...
Loading the paper tray
Make sure:
• You use paper designed for inkjet printers. • The paper is not used or damaged. • If you are using specialty paper, you adjust the paper guides.
1 Pull tray completely out of the printer.
2 Move the paper guides to the sides of tray. 3
1 2
Loading paper and...
User's Guide - Page 30
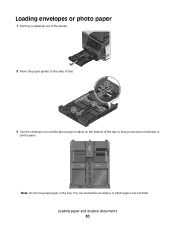
Loading paper and original documents
30 Loading envelopes or photo paper
1 Pull tray completely out of the printer.
2 Move the paper guides to the sides of tray. 3
1 2
3 Use the envelope icon and the photo paper outline on the bottom of the tray to ...
User's Guide - Page 35
...documents
35
b Touch Paper Size. c Select the default paper type for the documents and photos that you print.
1 From the home screen, touch .
2 Choose the default settings: • If you want ...Linking.
To load banner paper:
1 Pull the tray completely out of the printer. 2 Remove all
the way into the printer first. • If your printer has more than one paper tray, then load banner ...
User's Guide - Page 37
... OK to use , and how the pages should
print.
b From the Printer pop-up menu, choose the print quality, the number of copies to print, the type of paper to close any printer software dialogs. d From the print options pop-up menu, choose the printer. Printing basic documents
Printing a document
1 Load the paper in the ink cartridges. • Remove each...
User's Guide - Page 39
... first, clear the Reverse page order or Reverse option. 6 Click Print. Printing
39
Note: If two-sided printing is enabled, then you must first disable two-sided printing.
4 Click OK to close any printer software dialogs. 5 Click OK or Print.
3 From the Copies section of page images to print on one sheet
For Windows users
1 With a document open...
User's Guide - Page 40
...through a USB cable or through a network. • The printer and the computer must be connected to start printing the document.
If the printer is using a Wireless connection (selected models only)
a Select...from a memory card or flash drive (Windows only)
To enable the File Print function:
• The printer must be on. • The memory card or flash drive must contain applications...
User's Guide - Page 41
... tab, select Plain Paper. d From the Paper Size list, select the envelope size. For Macintosh users
a With a document open , click File Print. f Click OK to close any printer software dialogs. b Click Properties, Preferences, Options, or Setup. Notes:
• Most envelopes use landscape orientation. • Make sure the same orientation is also selected...
User's Guide - Page 46
...; For Macintosh users
Select Yes to view images from a memory device using the printer software
1 Load photo paper. 2 Insert a memory card or flash drive. 3 Transfer or print the photos:
If the printer is connected to print.
Follow the instructions on the computer screen to transfer the photos to the computer or to dry at...
User's Guide - Page 51

... enter a pass key.
Warning-Potential Damage: Do not touch any cables, any network adapter, any connector, the USB Bluetooth adapter, or the printer in the areas shown while actively printing, reading, or writing from your computer using a Bluetooth connection.
1 Insert a USB Bluetooth adapter into the USB port.
For more information, see "Setting...
User's Guide - Page 56
...
Restart.
• If you want to pause all print jobs in the queue, then click Printer, and then select Pause Printing.
The printer folder opens.
4 Right-click the printer, and then select Open or See what 's printing. 5 Pause the print job:
• If you want to pause a particular print job, then right-click the document name, and then...
User's Guide - Page 57

... or pop-up menu, choose the printer. 4 Click Open Print Queue or Set Up Printers, depending on the Dock. 2 From the print queue dialog, choose the job you want to cancel, and then click Delete. To cancel a print job from the printer control panel, press . Printing
57 Canceling print jobs
To cancel a print job from the computer, do the...
User's Guide - Page 59
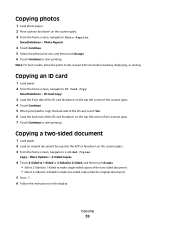
... 2-Sided to make two-sided copies (like the original document).
5 Press . 6 Follow the instructions on the top left corner of the ID card facedown on the display. Note: For best results, allow the prints to start printing. Copying photos
1 Load photo paper. 2 Place a photo facedown on the scanner glass. 3 From the home screen, navigate...
User's Guide - Page 115

...Click Close on page 114. j Click OK. The printer folder opens. b Right-click the name of the server name and the
distinctive printer name that use Mac OS X version 10.3 or later use any printer connected... bar, click Help System Preferences Help. 3 In the Search field, type sharing the printer on a network, and then press return. 4 To let other Macintosh computers on the network &#...
User's Guide - Page 137
..., navigate to Use Factory Defaults:
> Use Factory Defaults
2 Touch Yes.
The printer resets and starts the initial printer setup.
3 Complete the initial printer setup. • "Print job does not print or is missing pages" on page 139 • "Printer is printing blank pages" on page 140 • "Printer is busy or does not respond" on page 140 • "Cannot...
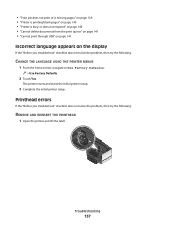
User's Guide - Page 139
... into the back of the printer.
3 Firmly plug the rectangular end of the printhead.
3 Close the printer. REMOVE AND RECONNECT THE USB CABLE CONNECTED TO YOUR PRINTER
Troubleshooting
139 Note: If you... the following:
MAKE SURE THE INK CARTRIDGES ARE INSERTED CORRECTLY
1 Turn the printer on the printer. Print job does not print or is missing pages
If the "Before you continue to a defective port....
Quick Reference - Page 15

..., choose Layout. 9 From the Two-Sided pop-up menu, choose your printer. 6 From the print options menu, choose the print quality, the number of copies to print, the type of paper
to close any printer software dialogs. 6 Click OK or Print.
Printing on both sides of the page (left edge for landscape).
For Windows users
1 With a document open , choose...
Quick Reference - Page 16
... a USB cable or through a network. • The printer and the computer must contain applications that are finished selecting the photos you want to print, touch Layout. 6 If you want to print. For more photos, then touch the left or right arrow, and then touch the photo to print. The Memory Device screen appears on page...
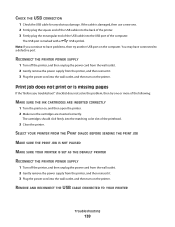
Quick Reference - Page 23
... continue to Align Printer:
> More Options > Align Printer.
23 SELECT YOUR PRINTER FROM THE PRINT DIALOG BEFORE SENDING THE PRINT JOB (MAC ONLY)
1 With a document open the printer. 2 Make sure the cartridges are inserted correctly.
The USB port is marked with a
USB symbol. You may have problems, then try either of the printhead. 3 Close the printer. The USB...
Similar Questions

Printing 'printer Won't Print Busy But Will Print Test Page Mac
(Posted by Beakimxu 9 years ago)

Cannot Print Test Page On My Lexmark Prospect Pro200
(Posted by TonyMedia 9 years ago)

Why Does My Lexmark Printer Pinnacle 901 Take So Long To Start Printing
(Posted by GIawan16 10 years ago)

Lexmark Printer Pinnacle Pro901 Will Not Print Black
(Posted by bobg1plane 10 years ago)

Lexmark Printer Pinnacle Pro901 Won't Print Color
(Posted by joetbau 10 years ago)