
Lexmark E260D Support Question
Lexmark E260D Support Question
Find answers below for this question about Lexmark E260D - Taa/gov Compliant.Need a Lexmark E260D manual? We have 5 online manuals for this item!
Question posted by akntjswa on May 1st, 2014
How To Remove Cartridge From Lexmark E260d
The person who posted this question about this Lexmark product did not include a detailed explanation. Please use the "Request More Information" button to the right if more details would help you to answer this question.
Current Answers
Answer #1: Posted by freginold on June 21st, 2014 4:51 PM
freginold

Member since:
December 20th, 2011 Points: 23,253,985

Member since:
December 20th, 2011 Points: 23,253,985
Hi, you can find the instructions for removing and replacing the toner cartridge starting on page 86 of the printer's user guide.
Related Lexmark E260D Manual Pages
Maintenance Guide - Page 2
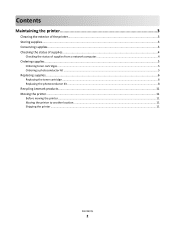
...supplies...4
Checking the status of supplies from a network computer 4
Ordering supplies...5
Ordering toner cartridges ...5 Ordering a photoconductor kit ...5
Replacing supplies...6
Replacing the toner cartridge ...6 Replacing the photoconductor kit ...8
Recycling Lexmark products...11 Moving the printer...11
Before moving the printer ...11 Moving the printer to another location...11 Shipping the...
Maintenance Guide - Page 5

... photoconductor kit by printing a network setup page. Maintaining the printer
5
Note: All life estimates for printer supplies assume printing on your area.
Note: Repeat this time, order a photoconductor kit. You can also see the status of the toner cartridge:
1 Remove the toner cartridge. 2 Firmly shake the cartridge side‑to‑side and front‑to...
User Guide - Page 27

... Saver
Increase or decrease the number of the paper by a USB or parallel cable, use the Local Printer Settings Utility for Windows or Printer Settings for accuracy.
Available settings range from the Print dialog or the Lexmark Toolbar.
For more information, see :
• The Notices chapter • The Environmental Sustainability section of the...
User Guide - Page 39

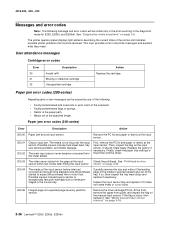
... number not supported by device - Interpreting the printer control panel lights
39 On
What you can do Replace the toner cartridge.
On - For more information, see "Replacing the toner cartridge" on page 86. Blinking - On - For more information, see "Replacing the toner cartridge" on page 86. Remove the toner cartridge and replace it with a supported toner...
User Guide - Page 89

... continue to function properly after the photoconductor kit has reached its official end-of the printer by pulling on the toner cartridge
handle. To replace the photoconductor kit:
1 Turn off the printer. 2 Pull the photoconductor kit and toner cartridge together as a unit out of -life, print quality significantly decreases. Note: The photoconductor kit and...
User Guide - Page 108

... a properly grounded outlet. 5 Turn the printer back on.
• Press to clear the message and continue printing. Try one or more of the following:
• Remove the toner cartridge, and then reinstall it. • Remove the toner cartridge, and then install a new one.
32.yy Replace unsupported cartridge
Remove the toner cartridge, and then install a supported one.
58...
User Guide - Page 110

... available on the Lexmark Web site at www.lexmark.com.
If the status is on the Software and Documentation CD to print.
CHECK TO SEE IF THE STANDARD EXIT BIN IS FULL
Remove the stack of your system support person to make sure the network is functioning correctly. MAKE SURE PRINTER CABLES ARE SECURELY...
User Guide - Page 141
... using 26
recycling Lexmark packaging 28 Lexmark products 28 toner cartridges 28 WEEE statement 127
Remove paper from standard output bin 108 reprint page
after paper jam 65
S
safety information 7, 8 separator sheet setting
Finishing menu 67 setting
paper size 40 paper type 40 Universal Paper Size 40 Setup menu 77 shipping the printer 92 Size...
Service Manual - Page 38
... and release Continue to print a photoconductor kit instruction page. • Replace the photoconductor kit.
2-12 Lexmark™ E260, E260d, E260dn
Action
Remove the toner cartridge, and install a new toner cartridge that matches the region of the installed toner cartridge. The printer will not print any more pages until the photoconductor kit is Off. Photoconductor kit life warning...
Service Manual - Page 44
...
Meaning
The media did leave the printer exit sensor. Action
Open the rear door, and clear the paper jam.
2-18 Lexmark™ E260, E260d, E260dn 4513-200, -220, -230
Secondary error ... leaves the tray and enters the printer or in the fuser area under the toner cartridge assembly.
Action
Open the front door, remove the print cartridge, and clear the paper jam.
201...
Service Manual - Page 52

... be ignored.
2-26 Lexmark™ E260, E260d, E260dn
Too many options attached
Meaning
This message indicates that to clear the message. Action
• Press and release Continue to extend the life, or replace the toner cartridge if it with a supported toner cartridge. • Turn the printer on . Unsupported toner cartridge
...
Service Manual - Page 62
...Cartridge error codes
Error 30 31 32
Description Invalid refill Missing or defective cartridge Unsupported cartridge
Action Replace the cartridge.
The media is pointed upward and out of the tray. First, remove...sensor removal" on page 3-8. See "Diagnostics mode selections" on page 4-39.
2-36 Lexmark™ E260, E260d, E260dn
Finally, check the paper size settings in the printer and...
Service Manual - Page 78
... board. • Verify pin 3 at J7.
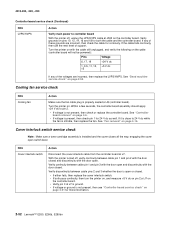
Turn the printer on page 4-16. See "Fan removal" on . Verify continuity between cable pin 1 and pin 3...Lexmark™ E260, E260d, E260dn
See "Dead machine service check" on
page 2-51 for 24 V dc as well. Cover interlock switch service check
Note: Make sure a toner cartridge assembly is properly seated at J9 (controller board). With the printer...
Service Manual - Page 84

... (approximately 10 seconds).
2. a. Blank page
FRU Toner cartridge (not a FRU)
Printhead LVPS/HVPS Controller board
Action
Remove the toner cartridge, and gently shake it to isolate problems such as light...cover. When the light stays on page 3-62.
2-58 Lexmark™ E260, E260d, E260dn Once the media exits into the output bin, the printer returns to the right of the beam or dust on )....
Service Manual - Page 86

... settings in the left and right transfer roll bearings. Variation in the printer driver.
2-60 Lexmark™ E260, E260d, E260dn Replace the transfer roll assembly if the springs or bearings show...
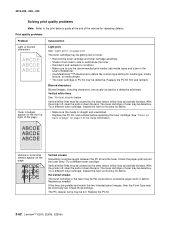
Partial blank image/white spots (no repeating pattern)
FRU Toner cartridge (not a FRU)
Paper (not a FRU)
Action
Remove the toner cartridge assembly, and gently shake the assembly to the PC drum. ...
Service Manual - Page 88
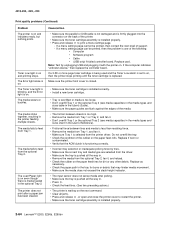
..., then the Form Type may be partially blocked.
Vertical white lines may be caused by a defective printhead. The toner cartridge or fuser may be defective. Vertical or horizontal streaks appear on page 2-61. With the printer off , clear the path or clean the lens.
Replace the PC kit.
2-62 Lexmark™ E260, E260d, E260dn
Service Manual - Page 90
...less than resisting force. • Remove the media from Tray 1 or Tray...printer cover to print a menu settings page.
-
If a menu settings page cannot be printed, then the problem is installed properly.
2-64 Lexmark™ E260, E260d...printer stops printing until the toner cartridge is installed properly. • Press and release to restart the printer. • Make sure the toner cartridge...
Service Manual - Page 94

4513-200, -220, -230
Configuration Menu printout
(sample only;
Note: The light sequences change relative to the option on the printer. Lexmark E260d, E260dn Lexmark E260d, E260dn
3-2 Lexmark™ E260, E260d, E260dn use actual sheet).
Service Manual - Page 95

Diagnostic aids 3-3 Diagnostics mode printout sample
(sample only;
use actual sheet)
4513-200, -220, -230
Lexmark E260d, E260dn
Note: The light sequences change relative to the options on the printer.
Service Manual - Page 104

... the parts in reverse order of removal. • When reinstalling a part held with several screws, start all screws before final tightening. • Remove the paper tray and print cartridge before removing other printer parts. 4513-200, -220, -230
Removal procedures
Note: • Remove the toner cartridge and media tray before proceeding with a removal.
4-2 Lexmark™ E260, E260d, E260dn
Similar Questions

Lexmark E260d Toner Cartridge Refill Won't Work
(Posted by fatetFire 10 years ago)

How To Remove Toner Cartridge From Lexmark E260d
(Posted by Stafaiyz 10 years ago)
Can You Put A Color Printer Cartridge In A E260d
(Posted by sunrape 10 years ago)

Trouble Shooting Button
I put in a new black ink cartridge,and when I tried to print a very important document,the computer...
I put in a new black ink cartridge,and when I tried to print a very important document,the computer...
(Posted by eightklapp 11 years ago)

How Do I Get Printer To Resume In Color Mode.
Won't print color. All inks are installed properly & are full. I have checked all the color opti...
Won't print color. All inks are installed properly & are full. I have checked all the color opti...
(Posted by mitchmuse 11 years ago)