Kyocera TASKalfa 820 Support Question
Kyocera TASKalfa 820 Support Question
Find answers below for this question about Kyocera TASKalfa 820.Need a Kyocera TASKalfa 820 manual? We have 24 online manuals for this item!
Question posted by lorrainebarberstock on January 10th, 2013
Menu Sceen Colour
The menu screen has changed to a very light pink colour - almost unreadable. How do we switch the screen?
Current Answers
Related Kyocera TASKalfa 820 Manual Pages
KM-NET ADMIN Operation Guide for Ver 2.0 - Page 5
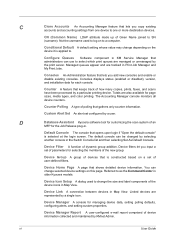
... or Editing an Account 4-6 Deleting an Account ...4-7 Editing a Printing Device ...4-7
Multi-Set ...4-8 Changing Accounting Settings on Multiple Devices 4-8
Set Polling Schedule ...4-8 Selecting the Polling Schedule 4-9
Edit Device Accounting Settings 4-9 Setting a Renewal Schedule 4-11 Viewing a Device's Counters 4-11 Viewing a Device's Account List 4-12 Adding an Account to a Printing...
KM-NET ADMIN Operation Guide for Ver 2.0 - Page 17
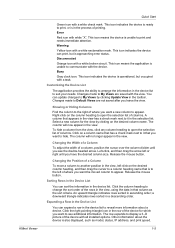
... all consoles. Deleting a Network
Deleting a network does not delete the devices on that do this network, thus suspending all polling of these devices by all consoles.
You may change.
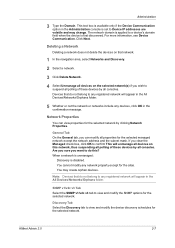
Discovery Tab Select the Discovery tab to confirm This will appear in the All Devices\Networks\Orphans folder.
5 Whether or not the network or networks...
KM-NET ADMIN Operation Guide for Ver 2.0 - Page 19
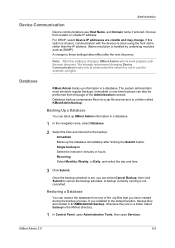
Choose from this page of the .zip files that you have created during the backup process. For DHCP, select Device IP addresses are located in a database. A change . We strongly recommend changing Device Communication mode only at night).
Backing Up a Database
You can back up KMnet Admin information in use Host Name, and Domain name if...
KM-NET ADMIN Operation Guide for Ver 2.0 - Page 98
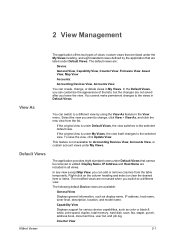
... at the login screen.
The default console can change selected device settings on the device it is applied to change depending on this page.
Device Group A group of devices that administrators can .... Conditional Default A default setting whose value may change the size and label components of the device icons in the Switch Console list and then selecting Set As Default Console...
KM-NET Viewer Operation Guide Rev-5.2-2010.10 - Page 11
.... KMnet Viewer
Quick Start
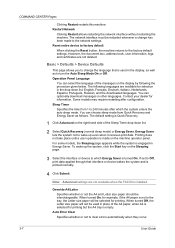
Green icon with the device. This icon indicates the device can update changes to reveal more information about the device is unable to suit your needs. This icon means...icon with white "X".
Busy
Gray clock icon. This icon indicates the device is operational, but is in the selection list. Changes made to see the double-headed arrow. You can print, but ...
KM-NET Viewer Operation Guide Rev-5.2-2010.10 - Page 13
... View, Asset View, Map View Accounts: Accounting Devices View, Accounts View You can switch to the selected default view. The default views are not saved when you leave the view. This feature is under My Views, the view itself changes to the views in the View menu. 2 View Management
View As Default Views
KMnet...
Kyocera Command Center Operation Guide Rev 6.3 - Page 14
... enters the auto sleep mode.
Override A4/Letter Specifies whether or not the A4 and Letter size paper should be restarted whenever a change the language that interface or device wakes the system and is turned On. Sleep Timer Specifies the time from Quick Recovery and Energy Saver as to Off, print data...
KM-NET for Accounting Operation Guide Rev-1.4 - Page 27
... before clicking OK.
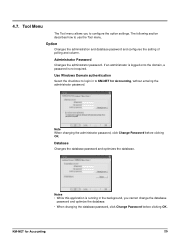
Notes • While this application is not required. Tool Menu
The Tool menu allows you cannot change the database
password and optimize the database.
• When changing the database password, click Change Password before clicking OK.
Use Windows Domain authentication
Select the checkbox to login in the background, you to use the...
620/820 Operation Guide (Advanced) - Page 141

The touch panel will return to the System Menu screen. System Settings
3-41 7 Press [Close]. 8 Press [Close].
620/820 Operation Guide (Advanced) - Page 149

Follow these steps.
1 Press the System Menu/Counter key.
2 Press [BOX Management] ([Hard Disk Management]). The HDD management mode
(HDD management) screen will return to change the management code. By default, the management code is 62006200 for the 62 cpm model and 82008200 for the 82 cpm
model. The touch panel ...
620/820 Operation Guide (Advanced) - Page 152

... management code is recommended to print the report. System Settings
3 Use the numeric keys to the System Menu screen.
3-52 By default,
the management code is printed.
The touch panel will be displayed. Refer to Changing Management Code on page 3-32. When installing the optional security kit, enter the eight-digit management code...
620/820 Operation Guide (Advanced) - Page 153

... n te r
Use r Ad ju stm e n t
3 The touch panel will return to the System Menu screen.
The touch panel will display the total
count for copying and scanning.
m Menu / Counter
D o cu m e n t Man ag e m e n t
Language
MP tray S e...loaded with 11 × 8 1/2" (or A4) paper.
1 Press the System Menu/Counter key.
2 Press [Check the counter]. Press [Close]. System Settings
Checking Total...
620/820 Operation Guide (Advanced) - Page 154

...11 × 17" (or A3) in the MP tray.
2 Press the System Menu/Counter key.
3 Press [User adjustment].
The touch panel will return to start refreshing the... drum. System Settings
Refreshing the Drum
Refreshing the drum is finished. System Menu / Counter
User adjustment
D rum re fre sh
System Menu
5 Press [On] to the System Menu screen.
3-54
Size
Job Acco u n ti n g
BOX Man ag ...
IB-23 User's Manual in PDF Format - Page 19
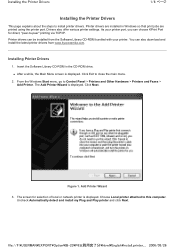
... After a while, the Main Menu screen is displayed.
Figure 1.
Printer drivers are printed using the printer port.
From the Windows Start menu, go to close the main menu.
2.
Click Exit to Control Panel... about the steps to this computer. Drivers also offer various printer settings. The screen for direct, "peer-to-peer" printing via TCP/IP. file://F:\USERMAN\EXPORT\Option...
Printing System (W) Operation Guide (Functions Edition) - Page 18

The machine enters the printer mode.
2 Press [Printer Menu].
3 Press [Print Status Page].
Printer menu PturisnPt aSgtaeInterface Emulation
Font Page Set PQruinatlity
PHaapnedrling
Hard Disk
... a status page when requesting service to the Printer menu screen.
2-2
Selecting the Printer Settings
Status Pages
This section explains the procedure for most basic machine configurations.
Printing System (W) Operation Guide (Functions Edition) - Page 22

... printer cable that of the host computer.
Item Auto Normal High Speed
Nibble (high)
Description
The printer automatically changes its communication mode to the Printer menu screen. Change # Back
2-6 Normally, this interface is used under the default setting Auto.
Interface
Default menu Send & receive mode
Setting mode Auto
5 Select the parallel interface mode. Printer...
Printing System (W) Operation Guide (Functions Edition) - Page 25

... 14 of IP Address Setting.
17 Press or to the Printer menu screen. Network
Default menu
DHCP BOOTP IP address Subnet Mask Gateway
Setting mode
On On 10. 141. 110. 204 255. 255. 248. 0 10. 181. 39. 254
Change #
18 Enter the Gateway address using the same procedure used for the IP...
Printing System (W) Operation Guide (Functions Edition) - Page 49
...of Partitions Format
Read
Data Font
Program Macro
Delete Language Data Font
Stop
RAM DISK Mode
Printing
PARTITION LIST
Device Information
TASKalfa 820
Partition Information
4 After the list of data. To activate RAM disk in the following operations on page...disk, you can use the e-MPS function. Refer to the Printer menu screen. Memory Card
Printer menu
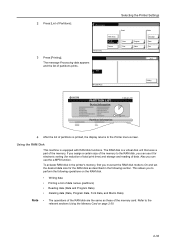
3 Press [Printing].
Printing System (W) Operation Guide (Functions Edition) - Page 57
... hard disk can be printed.
1 Press the [Printer] key. A4
Selecting the Printer Settings
Stop
Printing
VIRTUAL MAIL BOX LIST
TASKalfa 820
5 After the printing is finished, and returns to the Printer menu screen. Select item. B
The message Processing data appears
and the printing starts.
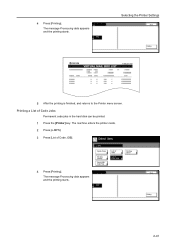
A4
Stop Printing
2-41 4 Press [Printing].
Tray
The message...
Printing System (W) Operation Guide (Functions Edition) - Page 58
... of documents that can be stored on the hard disk and the capacity assigned to the Printer menu screen. Selecting the Printer Settings
TASKalfa 820
PERMANENT CODE JOB LIST
5 After the printing is 32.
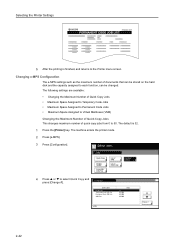
1 Press the [Printer] key. Changing e-MPS Configuration The e-MPS settings such as the maximum number of VMB LCiosdt eofJOB
Configuration
4 Press...
Similar Questions


