Get support for KitchenAid KHMS2040WSS

KitchenAid KHMS2040WSS Support Question

KitchenAid KHMS2040WSS Support Question

Find answers below for this question about KitchenAid KHMS2040WSS.
Need a KitchenAid KHMS2040WSS manual? We have 3 online manuals for this item!
Question posted by rbeasley5 on November 9th, 2011

Dented Top Panel?

During installation, the top panel got dented, can you buy a replacement panet for this. Thanks. It is model number KHMS2040WSS.

Current Answers

Answer #1: Posted by techie12330 on November 9th, 2011 7:52 PM
techie12330

Member since:
November 8th, 2011

Points: 286,200
100
points
Goto www.kitchenaid.com for father info.

Related KitchenAid KHMS2040WSS Manual Pages

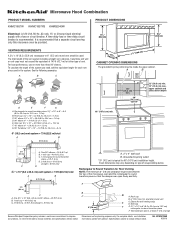
Dimension Guide - Page 1

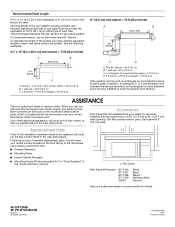
...° elbow: 6" = 10 ft (15.2 cm = 3 m) E. A time-delay fuse or time-delay circuit breaker is typical for either type of range/cooktop below. Microwave Hood Combination PRODUCT MODEL NUMBERS KHMC1857W KHMC1857XS KHMS2040W PRODUCT DIMENSIONS Electrical: A 120-Volt, 60-Hz, AC-only, 15- Grounded 3-prong outlet *30" (76.2 cm) is recommended. Vent extension piece...
Installation Guide - Page 1

... Cabinet 8 Install Damper Assembly 9 Install the Microwave Oven 9 Complete Installation 10 VENTING DESIGN SPECIFICATIONS 11 ASSISTANCE 12 Replacement Parts 12 Accessories 12 MICROWAVE HOOD COMBINATION ...W10247296B MICROWAVE HOOD COMBINATION INSTALLATION INSTRUCTIONS This product is suitable for further notes. These installation instructions cover different models. See "Installation ...
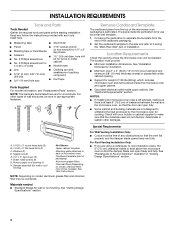
Installation Guide - Page 2

...tape Parts Supplied For reorder information, see "Replacement Parts" section. See "Venting Design Specifications" section. See "Electrical Requirements" section. For Roof Venting Installation Only: ■ If you are using a rectangular to round transition piece, the 3" (7.6 cm) clearance needs to withstand the heat produced by the microwave oven for cooking. hole drill ■ No. 2 Phillips...
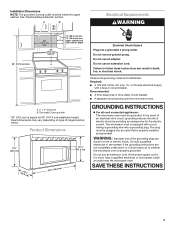
Installation Guide - Page 3

...: The grounded 3 prong outlet must be plugged into a grounded 3 prong outlet. See "Electrical Requirements" section. Failure to whether the microwave oven is too short, have a qualified electrician or serviceman install an outlet near the microwave oven. Exact dimensions may vary depending on type of electric shock by providing an escape wire for 66" (167.6 cm...
Installation Guide - Page 4

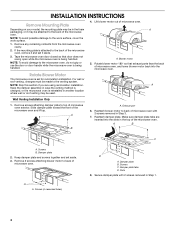
... must be made to the work surface, cover the work surface. 1. A B C A. Screws (in Step 1. 4 INSTALLATION INSTRUCTIONS Remove Mounting Plate Depending on your model, the mounting plate may be in the foam packaging, or it aside. 3. Rotate Blower Motor The microwave oven is being handled. 4. A B A. Screws B. Damper plate tabs D. Reattach damper plate. Slots 8. Tape the...
Installation Guide - Page 5

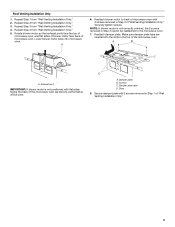
...Only." 4. Damper plate B. Repeat Step 4 from "Wall Venting Installation Only." 2. Reattach blower motor to the microwave oven. 7. Make sure damper plate tabs are inserted into microwave oven. Repeat Step 1 from "Wall Venting Installation Only." 5. Screws C. Secure damper plate with flat sides facing the back of the microwave oven (as shown), performance will be reattached to back...
Installation Guide - Page 6

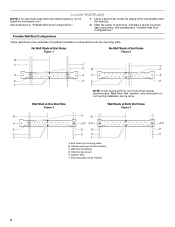
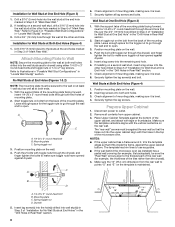
... Figure 1 No Wall Studs at Both End Holes Figure 4 B D B A A,D A,D A,D E E E E C C C C F F A. End holes (on mounting plate) B. Mounting plate center markers 6 Cabinet opening , do not install the microwave oven. 1. Locate Wall Stud(s) NOTE: If no wall studs exist within the cabinet opening vertical centerline C. See illustrations in "Possible Wall Stud Configurations...
Installation Guide - Page 7

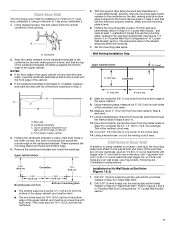
... centerline on a minimum of 1 wall stud, preferably 2, using a minimum of 1 lag screw, preferably 2. 1. Wall Venting Installation Only Upper cabinet bottom ³⁄₈" (1 cm) 4" (10.2 cm) Centerline 6" (15.2 cm) 6" (15.2... 3 of "Mark Rear Wall." 2. Mark Rear Wall The microwave oven must be installed on the wall, making sure its top is level with the...
Installation Guide - Page 8

...2. Securely tighten the lag screw(s) and bolt. Remove all lag screws and bolts. Refer to outlet. 2. If installing on bolts from upper cabinet. 3. NOTES: ■ If the upper cabinet has a frame around it fits inside ...guides. ■ If the wall behind the microwave oven (as at both end holes of the microwave oven. Installation for Wall Studs at Both End Holes (Figure 4) 1.
Installation Guide - Page 9

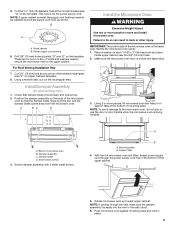
... used to secure the microwave oven to the upper cabinet. A B C D Install the Microwave Oven WARNING Excessive Weight Hazard Use two or more people, lift microwave oven and hang it on support tabs at the top, and the damper blade opens away from the microwave oven. Failure to move and install microwave oven. A. Sheet metal screws 3. Mounting plate B. Rotate microwave oven up toward upper...
Installation Guide - Page 10

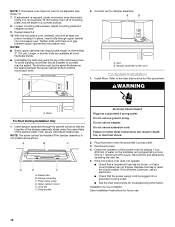
... adjustment is now complete. Loosen mounting plate screws. Vent B. Install filters. Bolts For Roof Venting Installation Only 1. A B C D E F A. Do not remove ground prong. Replace the fuse or reset the circuit breaker. Installation is required, rotate microwave oven downward. Using 2 or more people, lift microwave oven off of 1 minute at 100% power. Repeat steps 3-6. 10...
Installation Guide - Page 11

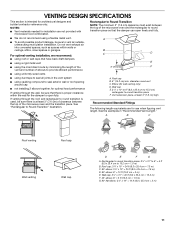
...(7.6 cm) of clearance between the top of the microwave oven and the rectangular to round transition piece so that the...installation, we recommend: ■ using recirculation installation. If venting through the wall, be sure that have back draft dampers ■ using a rigid metal vent ■ using the most direct route by minimizing the length of the vent and number of the microwave oven...
Installation Guide - Page 12

...microwave oven. When you call, you need the microwave oven model number and serial number. The filler panels come in China In addition, a rectangular 3" (7.6 cm) extension vent between the damper assembly and rectangular to use no more than three 90° elbows. If you will need , add the equivalent lengths of available replacement parts. Filler panels Filler Panel Kit Number...
Use & Care Guide - Page 1

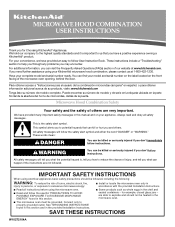
... su número de modelo completo. are able to excessive microwave energy: ■ Install or locate the microwave oven only in accordance with the provided Installation Instructions. ■ Read all safety messages. For your complete model and serial number ready. MICROWAVE HOOD COMBINATION USER INSTRUCTIONS Thank you for example, closed glass jars - See "GROUNDING INSTRUCTIONS...
Use & Care Guide - Page 2

...microwave oven outdoors. Visible bubbling or boiling when the container is removed from the microwave oven is specifically designed to microwave...microwave oven when the microwave oven is operated in convection, combination, grill or "PAN BROWN" mode (on the microwave oven...to persons: - If materials inside the oven to stand in the microwave oven for a short time before and halfway through...
Use & Care Guide - Page 3

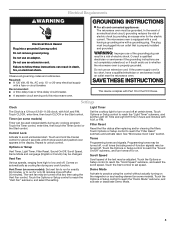
...models). Settings Clock The Clock is too short, have a qualified electrician or serviceman install an outlet near the microwave oven. and P.M. Vent Fan Various speeds, ranging from high to whether the microwave oven...Scroll Speed, Demo Mode and Language (English or French) may be turned off after replacing and/or cleaning the filters. Light Timer Set the cooktop light to reach the "...
Use & Care Guide - Page 4

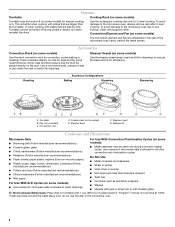
... the steamer vessel base, insert and lid for manual cooking only. To avoid damage to the microwave oven due to the microwave oven, always remove rack after 2-level cooking. Convection Element and Fan (on some models) The convection element and fan are bigger than the turntable, or when cooking with 1 cup (250 mL) of cook...
Use & Care Guide - Page 5

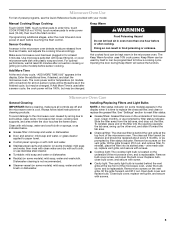
.... The cook power and/or temperature (on some models) before touching the Start control. Installing/Replacing Filters and Light Bulbs NOTE: A filter status indicator (on models with your model. To reinstall, place end of the filter into its slotted area - Add More Time At the end of microwave oven. If Add More Time is not recommended. ■...
Use & Care Guide - Page 6

... refer to cool the microwave oven. Replacement Parts Provided Accessories ■ Turntable ■ Turntable support and rollers ■ Turntable hub ■ Cooking rack (for some models) ■ Rack clip (for some models, if a packaging spacer is attached to possibly avoid the cost of the microwave oven. The microwave oven's cooling fan (on some models) is being started...
Use & Care Guide - Page 7

...WARRANTY On microwave ovens only,...model/serial numbers that is contrary to KitchenAid within 30 days from defects in a remote area where service by an authorized KitchenAid servicer is reported to published user or operator instructions and/or installation instructions. 4. Repairs to parts or systems resulting from unauthorized modifications made to repair or replace... scratches, dents, chips ...

KitchenAid Knowledge Base Results

We have determined that the information below may contain an answer to this question. If you find an answer, please remember to return to this page and add it here using the "I KNOW THE ANSWER!" button above. It's that easy to earn points!

  • My microwave oven will not run
    ... the control is the Child Lock (on some models) set correctly? Care Guides, Installation Instructions and Warranty Information. Child Lock (on some models) or Start (on other models) for service. To Lock/Unlock control: The microwave oven and Timer must be off. Superba built-in your model number. See "Child Lock" section below. Firmly close door...
  • General cleaning tips for my electric or gas range
    ...model and serial number plate because scrubbing may occur. On some models) Cleaning ceramic glass cooktop. To clean the control panel Do not use steel wool, abrasive cleansers, oven cleaner or soak the knob. Damage may remove numbers... glass cooktop - Use a solution of the drawer and pull out. To replace the warming drawer: Align the drawer glides with a soft cloth. Do...
  • When to change the water filter - Side by side refrigerator
    ...purchase replacement filters and receive a 10% discount on the dispenser control panel,...Installation Instructions and Warranty Information. The indicator will change the filter. Download available Owners Manuals/Use & Replace the water filter cartridge when the water filter status display changes to "Replace... model number in the Review Order screen when you may need to replace the...

Similar Questions

Ask a New Question
Use the box below to post a new question about this KitchenAid product .
Points & Prizes
  • You can earn points for nearly everything you do on HelpOwl.com
  • You can trade in those points for gift cards at leading retailers such as Amazon.com and Walmart
  • It's that simple!
See How it Works
Create a Free Account

KitchenAid Manuals

Find free KitchenAid KHMS2040WSS manuals and user guides available at ManualOwl.com. Try out our unique manual viewer allowing you to interact with manuals from directly within your browser!

KitchenAid Reviews

View thousands of KitchenAid user reviews and customer ratings available at ReviewOwl.com.

Contact Information

Complete KitchenAid customer service contact information including steps to reach representatives, hours of operation, customer support links and more from ContactHelp.com.

Scoreboard Ratings

See detailed KitchenAid customer service rankings, employee comments and much more from our sister site.

KitchenAid Recalls

Find comprehensive KitchenAid recall information updated hourly on RecallOwl.com.