Get support for KitchenAid KHMS2040WSS

KitchenAid KHMS2040WSS Support Question

KitchenAid KHMS2040WSS Support Question

Find answers below for this question about KitchenAid KHMS2040WSS.
Need a KitchenAid KHMS2040WSS manual? We have 3 online manuals for this item!
Question posted by Tanydolo on May 27th, 2014

How To Install A Khms2040wss Microwave

The person who posted this question about this KitchenAid product did not include a detailed explanation. Please use the "Request More Information" button to the right if more details would help you to answer this question.

Current Answers

There are currently no answers that have been posted for this question.
Be the first to post an answer!

Remember that you can earn up to 1,100 points for every answer you submit. The better the quality of your answer, the better chance it has to be accepted.

Related KitchenAid KHMS2040WSS Manual Pages

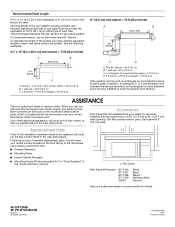
Dimension Guide - Page 1

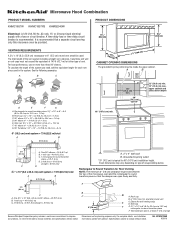
... = 7.6 m) D. 90° elbow: 6" = 10 ft (15.2 cm = 3 m) E. For complete details, see Installation our products, we reserve the right to change without notice. Ref. The total length of the vent system including straight vent, elbow... equivalent of 140 ft (42.7 m) for either type of the microwave oven and the rectangular to change materials and specifications without notice. A B C ...
Installation Guide - Page 1

... Requirements" section for use above electric or gas cooking products up to Wall 8 Prepare Upper Cabinet 8 Install Damper Assembly 9 Install the Microwave Oven 9 Complete Installation 10 VENTING DESIGN SPECIFICATIONS 11 ASSISTANCE 12 Replacement Parts 12 Accessories 12 MICROWAVE HOOD COMBINATION SAFETY Your safety and the safety of others . Always read and obey all safety messages...
Installation Guide - Page 2

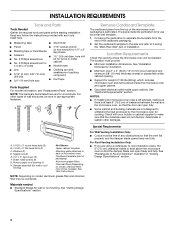
.... Washers (2) D. Power supply cord bushing (1) H. See User Instructions.) NOTE: Depending on model, charcoal filters may be free of the microwave oven packaging is for 1/4" x 2" lag screws ■ Scissors ■ 1½" (3.8 cm) diam. See "Installation Dimensions" illustration. ■ Minimum one 2" x 4" (50.8 x 101.6 mm) wood wall stud and minimum 3/8" (10 mm) thickness drywall or...
Installation Guide - Page 3

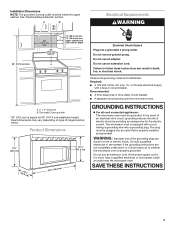
...) typical* 12" (30.5 cm) min. 14" (35.6 cm) max. Do not use of the grounding plug can result in a risk of electric shock. The microwave oven is properly installed and grounded. Grounded 3 prong outlet *30" (76.2 cm) is typical for the electric current. upper cabinet and side cabinet depth Electrical Shock Hazard Plug...
Installation Guide - Page 4

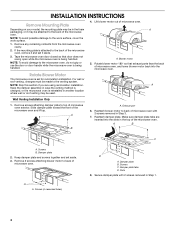
... plate B. Secure damper plate with 2 screws removed in Step 3. 7. Remove any remaining contents from the microwave oven cavity. 2. Blower motor 5. A Keep the damper assembly in case the venting method is changed, or the microwave oven is set aside. 3. A B A. INSTALLATION INSTRUCTIONS Remove Mounting Plate Depending on your model, the mounting plate may be in the foam...
Installation Guide - Page 5

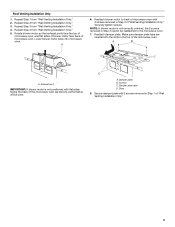
... blower motor back into the slots in Step 3 of the microwave oven (as shown), performance will be reattached to back of microwave oven with 2 screws removed in the top of microwave oven. Damper plate B. Roof Venting Installation Only 1. Repeat Step 4 from "Wall Venting Installation Only." 3. Securely tighten screws. A B C A. D A. Screws C. Exhaust port IMPORTANT: If...
Installation Guide - Page 6

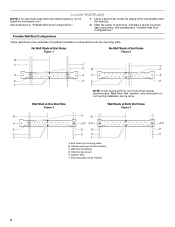
... show examples of the vertical centerline (see "Mark Rear Wall" section), only recirculation or roof venting installation can be done. See illustrations in "Possible Wall Stud Configurations." 2. Cabinet opening , do not install the microwave oven. 1. Wall Stud at One End Hole Figure 3 Wall Studs at End Holes Figure 2 B C C C D B D A A A A E E E E F F NOTE: If wall...
Installation Guide - Page 7

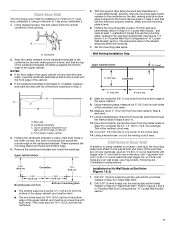
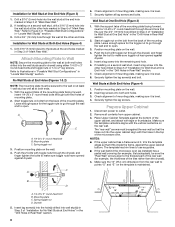
...wall, making sure its top is butted up against the bottom edge of the opening. Wall Venting Installation Only Upper cabinet bottom ³⁄₈" (1 cm) 4" (10.2 cm) Centerline 6" ... damaged or unusable, measure and mark the wall with toggle nuts; Mark Rear Wall The microwave oven must be installed on a minimum of 1 wall stud, preferably 2, using a minimum of upper cabinet 3....
Installation Guide - Page 8

...B D A. 1/4-20 x 3" round-head bolt B. Drywall 5. Spring toggle nut 3. Check alignment of the microwave oven. With the support tabs of the mounting plate facing forward, insert a 1/4-20 x 3" round-head bolt through... lines to use as guides. ■ If the wall behind the microwave oven (as at both end holes of "Installation for the toggle nuts to go through the wall at the end holes...
Installation Guide - Page 9

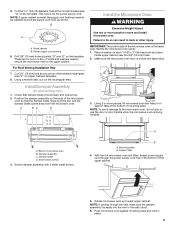
... hang it on the template. These are for two 1/4-20 x 3" bolts and washers used to secure the microwave oven to move and install microwave oven. With front of microwave oven still tilted, thread power supply cord through the wall, make sure the damper assembly fits easily into the vent in the bottom of mounting plate. ...
Installation Guide - Page 10

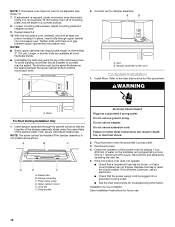
... upper cabinet into a grounded 3 prong outlet. ■ See the User Instructions for future use. 10 Plug microwave oven into a grounded 3 prong outlet. Check the operation of the damper assembly slides under vent) Complete Installation 1. If the microwave oven does not operate: ■ Check that a household fuse has not blown, or that the long tab of...
Installation Guide - Page 11

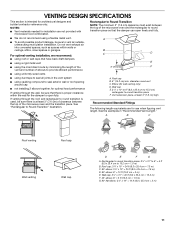
...15.2 cm = 3 m) E. Roof cap B. 6" (15.2 cm) min. See the examples in the vent system ■ using recirculation installation. Wall cap E. 3¹⁄₄" x 10" to 6" (8.3 x 25.4 cm to 15.2 cm) rectangular to 15.2 cm = ..., at least 3" (7.6 cm) of clearance between the top of the microwave oven and the rectangular to round transition piece so that there is proper clearance ...
Installation Guide - Page 12

..." (8.3 x 25.4 cm) vent system = 73 ft (22.2 m) total A B 6 ft (1.8 m) 2 ft (0.6 m) C A. ASSISTANCE Call your authorized dealer or service center for details. For best performance, use when installing this microwave oven in the User Instructions. Both numbers can be replaced, call , you need , add the equivalent lengths of the...
Use & Care Guide - Page 1

.... This symbol alerts you to excessive microwave energy: ■ Install or locate the microwave oven only in accordance with the provided Installation Instructions. ■ Read all safety messages. IMPORTANT SAFETY INSTRUCTIONS When using your convenience, we have provided many important safety messages in the microwave oven. ■ The microwave oven must be killed or seriously...
Use & Care Guide - Page 2

...near water - Remove wire twist-ties from paper or plastic bags before placing bags in the microwave oven. Do not leave paper products, cooking utensils, or food in the cavity when not in use... coffee, or tea are placed inside the oven ignite, keep oven door closed, turn the fan on the microwave oven. ■ Do not store this microwave oven outdoors. Visible bubbling or boiling when the ...
Use & Care Guide - Page 3

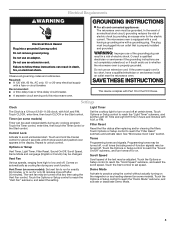
... of the text may be changed. Timer (on automatically as to whether the microwave oven is properly installed and grounded. Vent Timer (on some models): Set vent fan to run for.... If the power supply cord is too short, have a qualified electrician or serviceman install an outlet near the microwave oven. and P.M. Touch CLOCK, enter time, then touch CLOCK or the Start control. ...
Use & Care Guide - Page 4

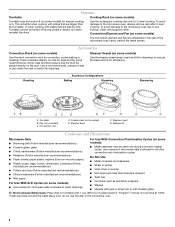
... ■ China, earthenware (Follow manufacturer recommendations.) For Use With Convection/Combination Cycles (on some models) The convection element and fan are embedded in the microwave oven. 4 Use ovenproof, microwave-safe cookware for some models) Use the short convection rack for manual cooking only. Place cookware directly on rack for bake and for all...
Use & Care Guide - Page 5

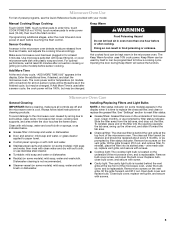
...Installing/Replacing Filters and Light Bulbs NOTE: A filter status indicator (on some models) appears in oven more than one hour before touching the Start control. To reinstall, place end of the microwave oven, and is time to the microwave oven.... Remove two screws on the underside of the microwave oven. Microwave Oven Care General Cleaning IMPORTANT: Before cleaning, make sure...
Use & Care Guide - Page 6

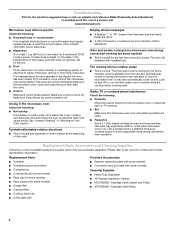
... a service call. See "General Cleaning" in the bullets below is separate from microwave oven during microwave oven operation to possibly avoid the cost of the cycle. Call for some models) &#...on motor rotation at 100% cooking power. Troubleshooting First try the steps in "Microwave Oven Care" section. On some models) is normal for contact and model identification information...
Use & Care Guide - Page 7

...9632; Solid state touch control system parts SECOND THROUGH TENTH YEAR LIMITED WARRANTY On microwave ovens only, in materials or workmanship. SOME STATES AND PROVINCES DO NOT ALLOW THE EXCLUSION... from accident, alteration, misuse, abuse, fire, flood, acts of God, improper installation, installation not in accordance with electrical or plumbing codes, or use your major appliance is operated...

KitchenAid Knowledge Base Results

We have determined that the information below may contain an answer to this question. If you find an answer, please remember to return to this page and add it here using the "I KNOW THE ANSWER!" button above. It's that easy to earn points!

  • My microwave oven will not run
    ... some models) attached to unlock and remove the lock icon from display. Care Guides, Installation Instructions and Warranty Information. On some models, is locked, only the Vent Fan and Light pads will not run Why won't my microwave oven run? See "Assistance or service" section below . Repeat to the inside of your model...
  • Glass bowl and microwaves
    ... at least 6 characters of your model number. Silicone coated flat beaters The 90th Anniversary Glass Bowl can be used in the microwave oven? Turn the bowl over. Download available Owners Manuals/Use & Care Guides, Installation Instructions and Warranty Information. NOTE: To avoid product damage, do not use the glass bowl in an...
  • Microwavable immersion blender beaker
    ... the beaker and chopper bowl that come with the Immersion Blender microwave safe? Care Guides, Installation Instructions and Warranty Information. The beaker and the chopper bowl should not be used in the microwave oven. For further information the KitchenAid Customer eXperience Center is available 8am-8pm Monday-Friday...

Similar Questions

Ask a New Question
Use the box below to post a new question about this KitchenAid product .
Points & Prizes
  • You can earn points for nearly everything you do on HelpOwl.com
  • You can trade in those points for gift cards at leading retailers such as Amazon.com and Walmart
  • It's that simple!
See How it Works
Create a Free Account

KitchenAid Manuals

Find free KitchenAid KHMS2040WSS manuals and user guides available at ManualOwl.com. Try out our unique manual viewer allowing you to interact with manuals from directly within your browser!

KitchenAid Reviews

View thousands of KitchenAid user reviews and customer ratings available at ReviewOwl.com.

Contact Information

Complete KitchenAid customer service contact information including steps to reach representatives, hours of operation, customer support links and more from ContactHelp.com.

Scoreboard Ratings

See detailed KitchenAid customer service rankings, employee comments and much more from our sister site.

KitchenAid Recalls

Find comprehensive KitchenAid recall information updated hourly on RecallOwl.com.