Get support for KitchenAid KHMC1857WSS - Microwave Hood Combination Oven

KitchenAid KHMC1857WSS Support Question

KitchenAid KHMC1857WSS Support Question

Find answers below for this question about KitchenAid KHMC1857WSS - Microwave Hood Combination Oven.
Need a KitchenAid KHMC1857WSS manual? We have 3 online manuals for this item!
Question posted by linhndp on February 11th, 2014

How To Install Kitchenaid Khmc1857wss Microwave Oven

The person who posted this question about this KitchenAid product did not include a detailed explanation. Please use the "Request More Information" button to the right if more details would help you to answer this question.

Current Answers

There are currently no answers that have been posted for this question.
Be the first to post an answer!

Remember that you can earn up to 1,100 points for every answer you submit. The better the quality of your answer, the better chance it has to be accepted.

Related KitchenAid KHMC1857WSS Manual Pages

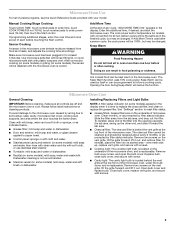
Use & Care Guide - Page 1

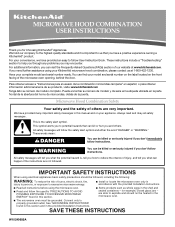
...in this section. ■ Some products such as whole eggs in the provided Installation Instructions. SAVE THESE INSTRUCTIONS W10249655A Para obtener acceso a "Instrucciones para el usuario ... in the microwave oven. ■ The microwave oven must be killed or seriously injured if you don't immediately follow instructions. Have your KitchenAid microwave hood combination, please contact...
Use & Care Guide - Page 2

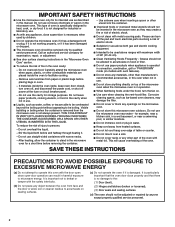
..., may create a fire or risk of the oven with metal scouring pads. IMPORTANT SAFETY INSTRUCTIONS ■ Use the microwave oven only for its intended use corrosive chemicals or vapors in the microwave oven. This type of oven is operated in convection, combination, grill or "PAN BROWN" mode (on hood or filter. ■ Do not use . ■ As with...
Use & Care Guide - Page 3

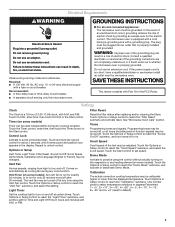
... 20-amp electrical supply with a grounding plug. Recommended: ■ A time-delay fuse or time-delay circuit breaker. ■ A separate circuit serving only this microwave oven. The microwave oven is properly installed and grounded. Consult a qualified electrician or serviceman if the grounding instructions are not completely understood, or if doubt exists as cooling fan during any...
Use & Care Guide - Page 4

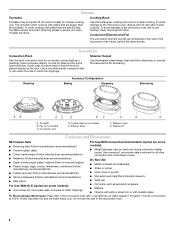
...-safe cookware to the microwave oven, always remove rack after 2-level cooking. Cookie sheet (not provided) E. Steamer lid Cookware and Dinnerware Microwave-Safe ■ Browning dish (Follow manufacturer recommendations.) ■ Ceramic glass, glass ■ China, earthenware (Follow manufacturer recommendations.) For Use With Convection/Combination Cycles (on some roast functions...
Use & Care Guide - Page 5

...minutes. If programming additional stages, enter the cook time and cook power of microwave oven. Sensor Cooking A sensor in oven more than one hour before touching the Start control. After convection cooking (on..., water and a soft cloth or sponge, or as prompted by filter status indicator. Installing/Replacing Filters and Light Bulbs NOTE: A filter status indicator (on some models): mild ...
Use & Care Guide - Page 6

... and sealing surfaces are clean. ■ Frequency Some 2.4 GHz-based cordless phones and home wireless networks may be purchased separately. www.kitchenaid.com Microwave oven will dissipate with some models) ■ Convection rack (provided with repeated use. On some models) ■ This is on during convection cooking (on some models), ...
Use & Care Guide - Page 7

... that is contrary to published user or operator instructions and/or installation instructions. 4. This warranty is used in the country in a remote area where service by an authorized KitchenAid servicer is not available. 9. The cost of the microwave oven opening, behind the door. KITCHENAID SHALL NOT BE LIABLE FOR INCIDENTAL OR CONSEQUENTIAL DAMAGES. Have your...
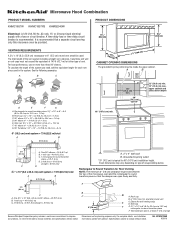
Dimension Guide - Page 1

... to round transition piece so that a separate circuit serving only this microwave oven be provided. 17 " (43.8 cm) 16 " (41.3 ...be used in the system. To calculate the length of 140 ft (42.7 m) for 66" (167.6 cm) installation height. A B D E F G A. Wall cap: 3 " x 10" = 40 ft (8.3 x 25.4... of range/cooktop below. Microwave Hood Combination PRODUCT MODEL NUMBERS KHMC1857W KHMC1857XS...
Installation Guide - Page 1

... Wall Stud(s 6 Mark Rear Wall 7 Drill Holes in these installation instructions. This symbol alerts you to Wall 8 Prepare Upper Cabinet 8 Install Damper Assembly 9 Install the Microwave Oven 9 Complete Installation 10 VENTING DESIGN SPECIFICATIONS 11 ASSISTANCE 12 Replacement Parts 12 Accessories 12 MICROWAVE HOOD COMBINATION SAFETY Your safety and the safety of your appliance...
Installation Guide - Page 2

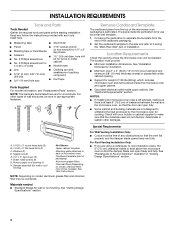
... cabinet opening where the microwave oven will not discolor, delaminate or sustain other types of installation. See "Electrical Requirements" section. A B C D E FG H A. 1/4-20 x 3" round-head bolts (2) B. 1/4-20 x 3" flat-head bolts (2) C. Power supply cord bushing (1) H. See User Instructions.) NOTE: Depending on model, charcoal filters may be combined. Cut along the perforation...
Installation Guide - Page 3

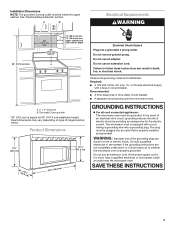
... short circuit, grounding reduces the risk of electric shock by providing an escape wire for 66" (167.6 cm) installation height. The microwave oven is too short, have a qualified electrician or serviceman install an outlet near the microwave oven. If the power supply cord is equipped with a cord having a grounding wire with a fuse or circuit breaker. Do...
Installation Guide - Page 4

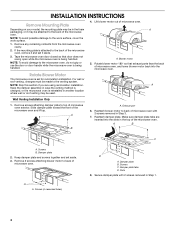
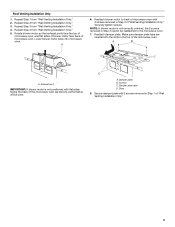
... with 2 screws removed in Step 1. 4 Rotate blower motor 180° so that door does not swing open while the microwave oven is being handled. Wall Venting Installation Only 1. Slide damper plate toward the front of microwave oven. Exhaust port 6. A B C A. Keep damper plate and screws together and set it and set aside. 3. Slots 8. NOTE: To avoid...
Installation Guide - Page 5

... 5 Damper plate tabs D. A 6. Securely tighten screws. Make sure damper plate tabs are inserted into microwave oven. Slots 8. Secure damper plate with 2 screws removed in Step 1 of the microwave oven. Reattach damper plate. Roof Venting Installation Only 1. Repeat Step 1 from "Wall Venting Installation Only." 3. Lower blower motor back into the slots in Step 3 cannot be poor...
Installation Guide - Page 6

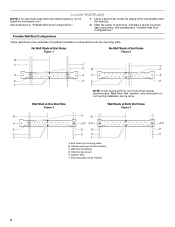
...NOTE: If wall stud is within 6" (15.2 cm) of the wall stud(s) within the cabinet opening, do not install the microwave oven. 1. Holes for lag screws E. End holes (on mounting plate) B. Wall stud centerlines D. No Wall Studs at... in "Possible Wall Stud Configurations." Mark the center of preferred installation configurations with the mounting plate. Using a stud finder, locate the...
Installation Guide - Page 7

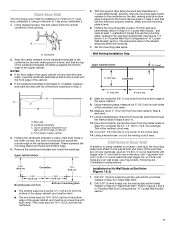
... in Step 6 of "Mark Rear Wall." Holding the mounting plate in Step 8, and mark. 11. Wall Venting Installation Only Upper cabinet bottom ³⁄₈" (1 cm) 4" (10.2 cm) Centerline 6" (15.2 cm) ... align with each other. Following are ideal hole locations. 7. Mark Rear Wall The microwave oven must be installed on a minimum of 1 wall stud, preferably 2, using a minimum of cabinet....
Installation Guide - Page 8

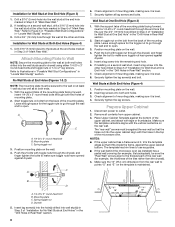
... with toggle nut through the drywall, and finger tighten the bolts to use as guides. ■ If the wall behind the microwave oven (as at least 1 wall stud as well as installed) has a partial wall covering (for example, tile backsplash), be against the rear wall so that the holes cut into wall stud...
Installation Guide - Page 9

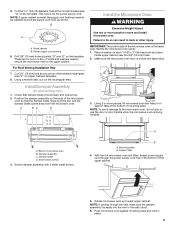
... result in back or other injury. Damper assembly C. Rotate microwave oven up toward upper cabinet. Push microwave oven against mounting plate and hold in the wall cutout. 6. These are for the power supply cord. A B C D Install the Microwave Oven WARNING Excessive Weight Hazard Use two or more people, lift microwave oven and hang it on the back of mounting plate...
Installation Guide - Page 10

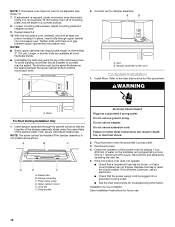
.... Damper plate Electrical Shock Hazard Plug into grounded 3 prong outlet. 3. Do not use an adapter. Failure to be installed if the damper assembly is no gap between the upper cabinet bottom and the microwave oven. Plug microwave oven into a grounded 3 prong outlet. Test vent fan and exhaust by placing 1 cup (250 mL) of water on...
Installation Guide - Page 11

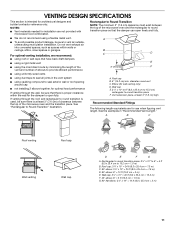
...microwave hood combination. ■ We do not recommend using a flexible metal vent. ■ To avoid possible product damage, be sure there is proper clearance within walls or ceilings, attics, crawl spaces or garages. NOTES: ■ Vent materials needed for installation... exist between the top of the microwave oven and the rectangular to Round Transition" illustration. diameter round vent C....
Installation Guide - Page 12

... dealer to use no more than three 90° elbows. See "Recommended Standard Fittings" section for either type of vent. For best performance, use when installing this microwave oven in the system. The total length of each vent piece used . All rights reserved. 461965617428 9/10 Printed in pairs. When you call us at...

KitchenAid Knowledge Base Results

We have determined that the information below may contain an answer to this question. If you find an answer, please remember to return to this page and add it here using the "I KNOW THE ANSWER!" button above. It's that easy to earn points!

  • My microwave oven will not run
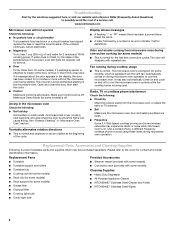
    ... Fan and Light pads will not run Why won't my microwave oven run? Child Lock (on the display. Care Guides, Installation Instructions and Warranty Information. Try to the inside of your ...microwave combination ovens Can I use of cold water for five seconds until two tones sound and a lock icon appears on some models) attached to heat one cup (250 mL) of the microwave oven...
  • Glass bowl and microwaves
    .../Use & Care Guides, Installation Instructions and Warranty Information. If you must remove the gray plastic thread ring on a stovetop, cooktop or in areas of high heat such as on the bottom of your model number. The 90th Anniversary Glass Bowl can be used in the microwave oven? If the thread ring is...
  • Whirlpool Recall Information
    ... - Dehumidifier -  All rights Reserved | KitchenAid® PRO LINE® Series Toaster -   Over The Range Microwave Hood Combination - 24-inch Washer and Gas Dryer - KitchenAid ® Coffee Maker - Free Standing range, Double Oven And Oven Microwave Combination - Copyright©2005 Whirlpool Corporation. Please click a product category for more information: Single Door, Frost-Free...

Similar Questions

How Do You Repair Cook Top Bulbs On Kitchen Aid Microwave Model Khmc1857wss
How do I repair/replace oven top bulbs on my Kitchen Aid Microwave Model KHMC1857WSS?
(Posted by schirm43 9 years ago)
Khmc1857wss Microwave Fire Safety
We had a fire in this oven, should a technician examine it before further use? It was installed in J...
(Posted by Keysave111 10 years ago)
Change Light Bulb In Microwave Oven.
How do I change the light bulb in a Kitchenaid KBMS1454SSS Microwave oven?
(Posted by danafeneck 13 years ago)
Ask a New Question
Use the box below to post a new question about this KitchenAid product .
Points & Prizes
  • You can earn points for nearly everything you do on HelpOwl.com
  • You can trade in those points for gift cards at leading retailers such as Amazon.com and Walmart
  • It's that simple!
See How it Works
Create a Free Account

KitchenAid Manuals

Find free KitchenAid KHMC1857WSS - Microwave Hood Combination Oven manuals and user guides available at ManualOwl.com. Try out our unique manual viewer allowing you to interact with manuals from directly within your browser!

KitchenAid Reviews

View thousands of KitchenAid user reviews and customer ratings available at ReviewOwl.com.

Contact Information

Complete KitchenAid customer service contact information including steps to reach representatives, hours of operation, customer support links and more from ContactHelp.com.

Scoreboard Ratings

See detailed KitchenAid customer service rankings, employee comments and much more from our sister site.

KitchenAid Recalls

Find comprehensive KitchenAid recall information updated hourly on RecallOwl.com.