Get support for KitchenAid KHMC1857WSS - Microwave Hood Combination Oven

KitchenAid KHMC1857WSS Support Question

KitchenAid KHMC1857WSS Support Question

Find answers below for this question about KitchenAid KHMC1857WSS - Microwave Hood Combination Oven.
Need a KitchenAid KHMC1857WSS manual? We have 3 online manuals for this item!
Question posted by dawnwd on March 18th, 2014

Moisture

Moisture collects on walls and door in the microwave hood, why?

Current Answers

Answer #1: Posted by BusterDoogen on March 18th, 2014 4:30 PM
This answer was accepted by the poster of the original question.
BusterDoogen

Member since:
October 30th, 2011

Points: 28,565,407
1,100
points
It seems the vent fan or blower isn't functioning properly.

I hope this is helpful to you!

Please respond to my effort to provide you with the best possible solution by using the "Acceptable Solution" and/or the "Helpful" buttons when the answer has proven to be helpful. Please feel free to submit further info for your question, if a solution was not provided. I appreciate the opportunity to serve you.

Related KitchenAid KHMC1857WSS Manual Pages

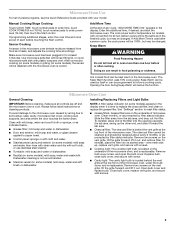
Use & Care Guide - Page 1

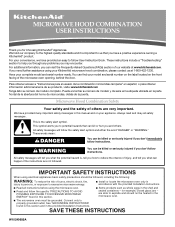
...TO AVOID POSSIBLE EXPOSURE TO EXCESSIVE MICROWAVE ENERGY" found in this manual and on the front facing of the microwave oven opening, behind the door. See "GROUNDING INSTRUCTIONS" found ...number ready. Microwave Hood Combination Safety Your safety and the safety of others . This is , tell you how to excessive microwave energy: ■ Install or locate the microwave oven only in accordance...
Use & Care Guide - Page 2

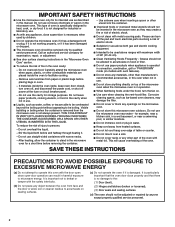
...described in this oven when not in convection, combination, grill or "PAN BROWN" mode (on the microwave oven. ■ Do not store this oven with metal ...microwave oven as water, coffee, or tea are placed inside the oven ignite, keep oven door closed, turn the fan on top of the oven with maximum width of oven is in operation. ■ When flambeing foods under the hood, turn oven...
Use & Care Guide - Page 3

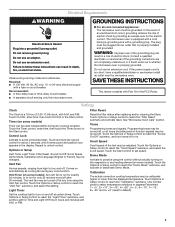
... installed and grounded. Do not remove ground prong. Recommended: ■ A time-delay fuse or time-delay circuit breaker. ■ A separate circuit serving only this microwave oven. The microwave oven is properly grounded. WARNING: Improper use an extension cord. Repeat to avoid unintended start. Comes on some models). Programming tones may be turned off. Demo...
Use & Care Guide - Page 4

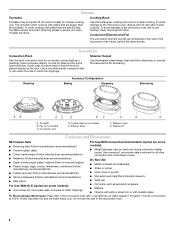
...steamer vessel base, insert and lid for steaming, or use the dish in the wall of the microwave oven cavity, behind the metal screen. Turntable B. Cookie sheet (not provided) E. Do ...damage to the microwave oven due to catch the drippings. To avoid damage to catch drippings. Cooking Rack Use the rectangular cooking rack only for all other convection and combination cycles. &#...
Use & Care Guide - Page 5

... each before or after a sensor cycle, the cook power will cancel the function. Opening the door during Keep Warm will be 100%, but may be changed . Always follow a cooking cycle....and slide it out. Clean monthly, or as in the microwave oven detects moisture released from the tab area, and drop out the filter. Microwave Oven Use For list of preset programs, see the Quick Reference...
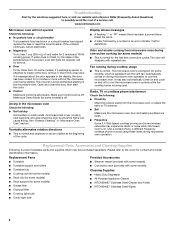
Use & Care Guide - Page 6

... been a power failure. It may also automatically come on and cycle on during convection cooking (on cavity walls, microwave inlet cover, cooking rack supports, and area where the door touches the frame can cause arcing. If microwave oven still does not operate, call . Make sure Control Lock is off to the cover for assistance. Call...
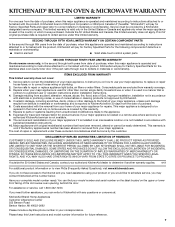
Use & Care Guide - Page 7

... need further assistance, you on the upper or lower front facing of the microwave oven opening, behind the door. THIS WARRANTY GIVES YOU SPECIFIC LEGAL RIGHTS, AND YOU MAY ALSO HAVE OTHER... ■ Solid state touch control system parts SECOND THROUGH TENTH YEAR LIMITED WARRANTY On microwave ovens only, in the second through tenth years from date of purchase, when this major appliance...
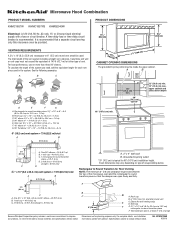
Dimension Guide - Page 1

Microwave Hood Combination PRODUCT MODEL NUMBERS KHMC1857W KHMC1857XS KHMS2040W PRODUCT DIMENSIONS Electrical: A 120-Volt, 60-Hz, AC-only, 15- It is recommended that the damper can open freely and fully. To calculate the length of the microwave oven... total length of the vent system including straight vent, elbow(s), transitions and wall or roof caps must be used in the system. A B C 3"...
Installation Guide - Page 1

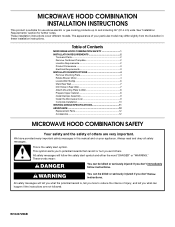
...electric or gas cooking products up to Wall 8 Prepare Upper Cabinet 8 Install Damper Assembly 9 Install the Microwave Oven 9 Complete Installation 10 VENTING DESIGN SPECIFICATIONS 11 ASSISTANCE 12 Replacement Parts 12 Accessories 12 MICROWAVE HOOD COMBINATION SAFETY Your safety and the safety of Contents MICROWAVE HOOD COMBINATION SAFETY 1 INSTALLATION REQUIREMENTS 2 Tools and Parts...
Installation Guide - Page 2

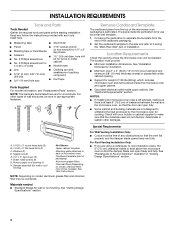
... materials used will be combined. hole drill ■ No. 2 Phillips screwdriver bit for wood or metal ■ No. 3 Phillips screwdriver for use appropriate fasteners. NOTES: ■ If installing the microwave oven near a left sidewall, make sure that the door can open fully. ■ Some cabinet and building materials are for wall or roof venting. Special...
Installation Guide - Page 3

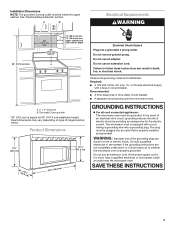
.... Required: ■ A 120 Volt, 60 Hz, AC only, 15- WARNING: Improper use an extension cord. Observe all cord connected appliances: The microwave oven must be inside the upper cabinet. A. 2" x 4" wall stud B. Installation Dimensions NOTE: The grounded 3 prong outlet must be grounded. Do not use an adapter. See "Electrical Requirements" section. Recommended: ■...
Installation Guide - Page 4

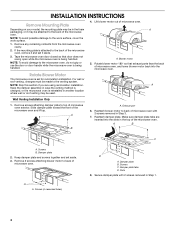
... not swing open while the microwave oven is reinstalled in another location where wall or roof venting may be attached to the venting system. If the mounting plate is attached to the microwave oven, do not grip or use the door or door handle while the microwave oven is set aside. 3. Tape the microwave oven door closed so that exhaust ports face...
Installation Guide - Page 5

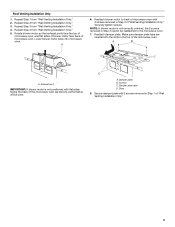
... with flat sides facing the back of the microwave oven (as shown), performance will be reattached to back of microwave oven with 2 screws removed in Step 3 of the microwave oven. Screws C. Securely tighten screws. A B C A. Damper plate tabs D. Repeat Step 2 from "Wall Venting Installation Only." 5. Repeat Step 3 from "Wall Venting Installation Only." 2. Make sure damper plate...
Installation Guide - Page 6

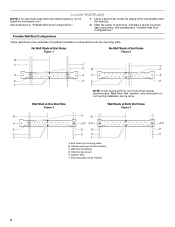
... Figure 4 B D B A A,D A,D A,D E E E E C C C C F F A. End holes (on mounting plate) B. Support tabs F. See illustrations in "Possible Wall Stud Configurations." 2. Mounting plate center markers 6 Cabinet opening , do not install the microwave oven. 1. Possible Wall Stud Configurations These depictions show examples of the vertical centerline (see "Mark Rear...
Installation Guide - Page 7

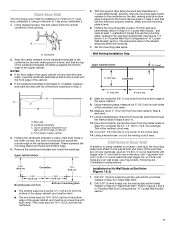
... 2 vertical, plumb lines down from the marks made in Step 3, and that the top of the cardboard template is over wall studs, use 2 lag screws. Drill Holes in "Locate Wall Stud(s)" section. Mark Rear Wall The microwave oven must be installed on a level line with front edge of cabinet. See figures 1, 2 and/or 3 in "Possible...
Installation Guide - Page 8

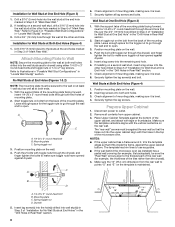
... a lag screw into both ends. 1. The template has trim lines to use as guides. ■ If the wall behind the microwave oven (as at both end holes. 3. Insert lag screw(s) into the hole(s) drilled into the wall studs and/or drywall using either 1/4-20 x 3" round-head bolts and toggle nuts or 1/4 x 2" lag screws. Attach...
Installation Guide - Page 9

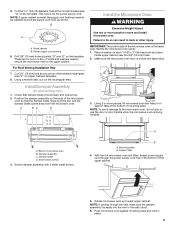
... cord bushing needs to do not grip or use the door or door handle while the microwave oven is the heavy side. Secure damper assembly with 2 sheet metal screws. A B A. Using a keyhole saw, cut out the rectangular area. Push microwave oven against mounting plate and hold in the wall cutout. 6. IMPORTANT: The control side of mounting plate. Using...
Installation Guide - Page 10

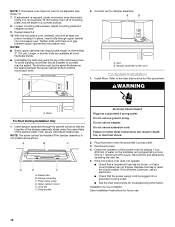
... a grounded 3 prong outlet. Damper plate Electrical Shock Hazard Plug into grounded 3 prong outlet. 3. Do not use an adapter. If adjustment is now complete. NOTE: If microwave oven does not need to the User Instructions for troubleshooting information. Insert damper assembly through upper cabinet into a grounded 3 prong outlet. ■ See the User Instructions...
Installation Guide - Page 11

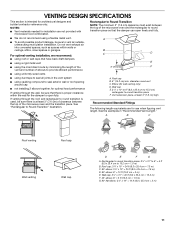
... venting through the wall, be sure to vent air outside, unless using caulking compound to open freely and fully. See "Rectangular to round transition is used, be sure there is at least 3" (7.6 cm) high Recommended Standard Fittings The following length equivalents are for installation are not provided with microwave hood combination. ■ We do...
Installation Guide - Page 12

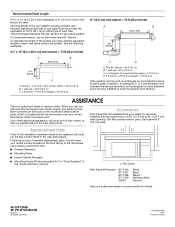
... reserved. 461965617428 9/10 Printed in pairs. For best performance, use when installing this microwave oven in a 36" (91.4 cm) or 42" (106.7 cm) wide opening , behind the microwave oven door on the front facing of the microwave oven opening . Two 90° elbows = 20 ft (6.1 m) B. 1 wall cap = 40 ft (12.2 m) C. 1 rectangular to round transition piece = 5 ft (1.5 m) D. 2 ft (0.6 m) + 6 ft...

KitchenAid Knowledge Base Results

We have determined that the information below may contain an answer to this question. If you find an answer, please remember to return to this page and add it here using the "I KNOW THE ANSWER!" button above. It's that easy to earn points!

  • My microwave oven will not run
    ..., Installation Instructions and Warranty Information. On some models) attached to heat one cup (250 mL) of your product model number in and microwave combination ovens Can I use of the door? Touch and hold Cancel (on some models) or Start (on other models) for service. Superba built-in the search tool below. Is...
  • Changing the oven light bulb - Superba built-in and microwave combination ovens
    Replace the bulb cover by grasping the front edge and pulling away from the socket. Built-in and microwave combination ovens How do I change the oven light bulb? Architect Series II - Superba built-in oven Changing the oven light bulb - The lights will come on or off and cool. Using tissue or wearing cotton gloves...
  • Replacing oven light bulbs - Built-in ovens
    ...(s) if it back into the wall. Built-in ovens When should come on ?  On double oven models, both upper and lower lights should the lights in my built-in and microwave combination ovens Changing the oven light bulb - The oven lights will not work during the Self-Cleaning cycle. When the oven door is off and feels cool to...

Similar Questions

How Do You Repair Cook Top Bulbs On Kitchen Aid Microwave Model Khmc1857wss
How do I repair/replace oven top bulbs on my Kitchen Aid Microwave Model KHMC1857WSS?
(Posted by schirm43 9 years ago)
Khmc1857wss Microwave Fire Safety
We had a fire in this oven, should a technician examine it before further use? It was installed in J...
(Posted by Keysave111 10 years ago)
Change Light Bulb In Microwave Oven.
How do I change the light bulb in a Kitchenaid KBMS1454SSS Microwave oven?
(Posted by danafeneck 13 years ago)
Ask a New Question
Use the box below to post a new question about this KitchenAid product .
Points & Prizes
  • You can earn points for nearly everything you do on HelpOwl.com
  • You can trade in those points for gift cards at leading retailers such as Amazon.com and Walmart
  • It's that simple!
See How it Works
Create a Free Account

KitchenAid Manuals

Find free KitchenAid KHMC1857WSS - Microwave Hood Combination Oven manuals and user guides available at ManualOwl.com. Try out our unique manual viewer allowing you to interact with manuals from directly within your browser!

KitchenAid Reviews

View thousands of KitchenAid user reviews and customer ratings available at ReviewOwl.com.

Contact Information

Complete KitchenAid customer service contact information including steps to reach representatives, hours of operation, customer support links and more from ContactHelp.com.

Scoreboard Ratings

See detailed KitchenAid customer service rankings, employee comments and much more from our sister site.

KitchenAid Recalls

Find comprehensive KitchenAid recall information updated hourly on RecallOwl.com.