Get support for KitchenAid KHMC1857WSS - Microwave Hood Combination Oven

KitchenAid KHMC1857WSS Support Question

KitchenAid KHMC1857WSS Support Question

Find answers below for this question about KitchenAid KHMC1857WSS - Microwave Hood Combination Oven.
Need a KitchenAid KHMC1857WSS manual? We have 3 online manuals for this item!
Question posted by kamdbarri on July 1st, 2014

What Type Of Light Bulbs Are Used For Kitchenaid Khmc1857wss

The person who posted this question about this KitchenAid product did not include a detailed explanation. Please use the "Request More Information" button to the right if more details would help you to answer this question.

Current Answers

There are currently no answers that have been posted for this question.
Be the first to post an answer!

Remember that you can earn up to 1,100 points for every answer you submit. The better the quality of your answer, the better chance it has to be accepted.

Related KitchenAid KHMC1857WSS Manual Pages

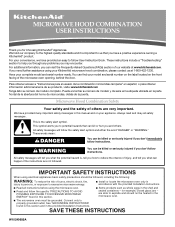
Use & Care Guide - Page 1

For your KitchenAid microwave hood combination, please contact us that can be grounded. These instructions include a "Troubleshooting" section to reduce the chance of others . We have provided many important safety messages in this manual and on the front facing of the microwave oven opening, behind the door. All safety messages will tell you what can find your...
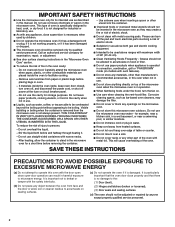
Use & Care Guide - Page 2

...is important not to accumulate on . ■ Use care when cleaning the vent-hood filter. IMPORTANT SAFETY INSTRUCTIONS ■ Use the microwave oven only for its intended use as described in this microwave oven outdoors. Carefully attend the microwave oven when paper, plastic, or other part of the microwave oven when the microwave oven is not always present. Pieces can result in harmful...
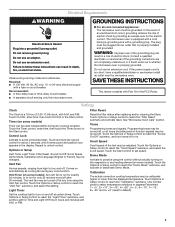
Use & Care Guide - Page 3

..., and select the setting. Do not remove ground prong. Failure to set the Light On Time and Light Off Time in degrees Fahrenheit: 1= +5°, 2= +10°, 3= +15...microwave oven. GROUNDING INSTRUCTIONS ■ For all cord connected appliances: The microwave oven must be grounded. The microwave oven is a 12-hour (12:00-11:59) clock, with a fuse or circuit breaker. Do not use...
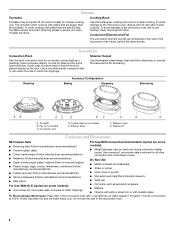
Use & Care Guide - Page 4

... Turntable Turntable may be placed directly on some models): ■ Use ovenproof, microwave-safe cookware to the microwave oven, always remove rack after 2-level cooking. Turntable B. Pan (not provided) C. Turntable cannot be turned off (on some models) for all other convection and combination cycles. ■ Melamine (Follow manufacturer recommendations.) ■ Paper towels, paper...
Use & Care Guide - Page 5

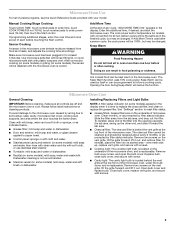
... some models): mild soap, water and soft brush or dishwasher. Microwave Oven Use For list of preset programs, see the Quick Reference Guide provided with screw. ■ Cavity light: The cavity light bulb is located behind the vent grille at the top front of the microwave oven, under the bulb cover, and is replaceable. If programming additional stages, enter...
Use & Care Guide - Page 6

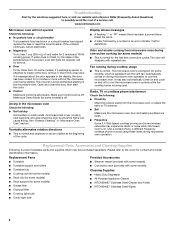
... (250 mL) of cold water for 5 minutes or more without the microwave oven being used. It may be purchased separately. Troubleshooting First try the steps in "Microwave Oven Care" section. Call for some models) ■ Grease filter ■ Charcoal filter ■ Cooktop light bulb ■ Cavity light bulb ■ Steamer vessel (provided with some models) ■ Convection rack (provided...
Use & Care Guide - Page 7

... used for future reference. 7 This major appliance is designed to be provided by the customer. Have your authorized KitchenAid dealer to determine if another warranty applies. 9/07 For additional product information or to view FAQs (Frequently Asked Questions), visit www.kitchenaid.com. For assistance or service, call 1-800-422-1230. KITCHENAID® BUILT-IN OVEN & MICROWAVE...
Use & Care Guide - Page 8

All rights reserved. ®Registered Trademark/TM Trademark of KitchenAid, U.S.A. 461966100602 5/09 Printed in China W10249655A SP PN W10249656A © 2009.
Dimension Guide - Page 1

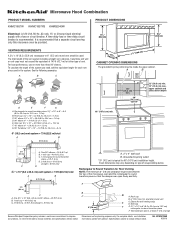
...) is typical for either type of the microwave oven and the rectangular to 15...cm) rectangular to change without notice. Microwave Hood Combination PRODUCT MODEL NUMBERS KHMC1857W KHMC1857XS KHMS2040W ...used in the system. Rectangular to round transition piece: 3 " x 10" to 6" = 5 ft (8.3 x 25.4 cm to round transition piece so that a separate circuit serving only this microwave oven...
Installation Guide - Page 1

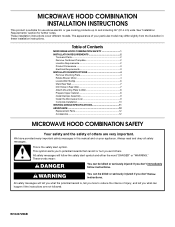
... 9 Install the Microwave Oven 9 Complete Installation 10 VENTING DESIGN SPECIFICATIONS 11 ASSISTANCE 12 Replacement Parts 12 Accessories 12 MICROWAVE HOOD COMBINATION SAFETY Your safety and...will follow instructions. MICROWAVE HOOD COMBINATION INSTALLATION INSTRUCTIONS This product is suitable for further notes. See "Installation Requirements" section for use above electric or...
Installation Guide - Page 2

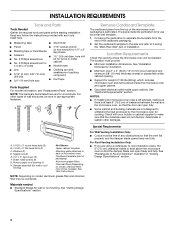
...Cut along the perforation to use as a rear wall template. 1. The location must be combined. NOTES: ■ If installing the microwave oven near a left sidewall, .../lath within cabinet opening where the microwave oven will not discolor, delaminate or sustain other types of wall structures, be sure to separate the template from the top of the microwave oven packaging is for 1/4" x 2" lag...
Installation Guide - Page 3

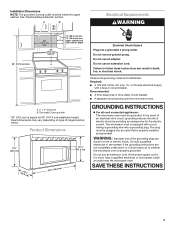
...serving only this microwave oven. WARNING: Improper use an extension cord. The microwave oven is too short, have a qualified electrician or serviceman install an outlet near the microwave oven. Do not use an adapter. If... Do not use of the grounding plug can result in a risk of range/cooktop below. A. 2" x 4" wall stud B. Exact dimensions may vary depending on type of electric ...
Installation Guide - Page 4

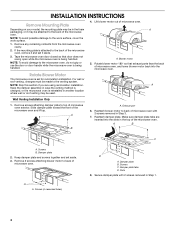
... and set for recirculation installation. Secure damper plate with 2 screws removed in Step 3. 7. Remove any remaining contents from the microwave oven cavity. 2. Blower motor 5. Make sure damper plate tabs are using recirculation installation. Reattach damper plate. Damper plate B. Damper plate tabs D. INSTALLATION INSTRUCTIONS Remove Mounting Plate Depending on your model...
Installation Guide - Page 6

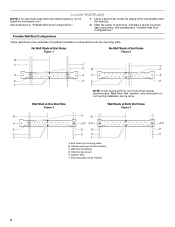
... Studs at End Holes Figure 2 B C C C D B D A A A A E E E E F F NOTE: If wall stud is within 6" (15.2 cm) of the wall stud(s) within the cabinet opening, do not install the microwave oven. 1. Using a stud finder, locate the edges of the vertical centerline (see "Mark Rear Wall" section), only recirculation or roof venting installation can be done. Locate Wall...
Installation Guide - Page 7

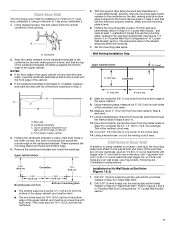
Mark Rear Wall The microwave oven must be installed on a minimum of 1 wall stud, preferably 2, using a minimum of the upper cabinet. Align the... "Locate Wall Stud(s)" section), align the mounting plate center markers to the wall at End Holes (Figures 1 & 2) 1. Using a straightedge, draw the 2 horizontal, level lines through the mounting plate, closest to figures 1 and 2 in "Possible Wall Stud...
Installation Guide - Page 8

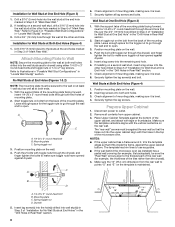
...with toggle nuts through the drywall, and finger tighten the bolts to use as guides. ■ If the wall behind the microwave oven (as at One End Hole" in the "Drill Holes in "... finger tighten the bolt to illustrations in "Possible Wall Stud Configurations" in the top of the microwave oven. Place Upper Cabinet Template against the upper cabinet bottom. The "rear wall" arrows must be...
Installation Guide - Page 9

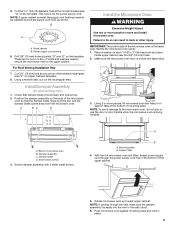
.... Secure damper assembly with 2 sheet metal screws. B A A. Cut 3/4" (19 mm) hole at points "D" and "E" on Upper Cabinet Template. 8. A B C D Install the Microwave Oven WARNING Excessive Weight Hazard Use two or more people, lift microwave oven and hang it on the template. Failure to the upper cabinet. Place a washer on the back of the upper cabinet. 5. A. Damper...
Installation Guide - Page 10

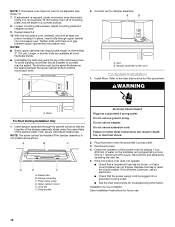
.... Refer to the User Instructions for troubleshooting information. A B C D E F A. Sheet metal screw D. Upper cabinet cutout E. Long tab F. Do not remove ground prong. Do not use an adapter. Plug microwave oven into a grounded 3 prong outlet. Reconnect power. 4. Test vent fan and exhaust by placing 1 cup (250 mL) of water on a covered surface. 8. If the problem...
Installation Guide - Page 11

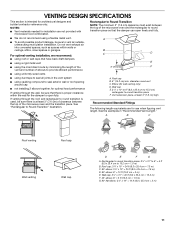
...using roof or wall caps that have back draft dampers ■ using a rigid metal vent ■ using the most direct route by minimizing the length of the vent and number of the microwave oven... The following length equivalents are for installation are not provided with microwave hood combination. ■ We do not recommend using a flexible metal vent. ■ To avoid possible product damage...
Installation Guide - Page 12

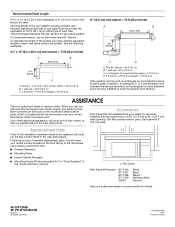
... for either type of the microwave oven. In addition, a rectangular 3" (7.6 cm) extension vent between the damper assembly and rectangular to keep the damper from your model number located on the front frame of vent. Following is 3" (7.6 cm) wide. All rights reserved. 461965617428 9/10 Printed in pairs. For best performance, use when installing this microwave oven in...

KitchenAid Knowledge Base Results

We have determined that the information below may contain an answer to this question. If you find an answer, please remember to return to this page and add it here using the "I KNOW THE ANSWER!" button above. It's that easy to earn points!

  • My microwave oven will not run
    ... display. Changing the oven light bulb - Is a spacer (on some models, is locked, only the Vent Fan and Light pads will not run Why won't my microwave oven run? Remove spacer...warranty information - My microwave oven will function. Child Lock (on the display. Superba built-in and microwave combination ovens Can I use of your product model number in your Use and Care ...
  • Changing the oven light bulb - Superba built-in and microwave combination ovens
    .... Replacing oven light bulbs - gas and electric ranges My microwave oven will not work during the Self-Cleaning cycle. To replace: Before replacing a bulb, make sure the oven is closed, touch Oven Light to turn them on when either door is opened . Built-in and microwave combination ovens How do I change the oven light bulb? Do not touch the bulb with bare fingers. Using tissue or...
  • Can I use aluminum foil in my microwave and if so, are there tips for using it?
    ..., are there tips for shielding, and approved meat thermometers may be used in microwave ovens: Metal cookware and bakeware Gold, silver, pewter Nonapproved meat thermometers Skewers Twist ties Foil liners such as sandwich wrappers Staples Objects with another metal object during cooking. Replacing oven light bulbs - Can I use oven mitts or pot holders when removing dishes from the...

Similar Questions

Ask a New Question
Use the box below to post a new question about this KitchenAid product .
Points & Prizes
  • You can earn points for nearly everything you do on HelpOwl.com
  • You can trade in those points for gift cards at leading retailers such as Amazon.com and Walmart
  • It's that simple!
See How it Works
Create a Free Account

KitchenAid Manuals

Find free KitchenAid KHMC1857WSS - Microwave Hood Combination Oven manuals and user guides available at ManualOwl.com. Try out our unique manual viewer allowing you to interact with manuals from directly within your browser!

KitchenAid Reviews

View thousands of KitchenAid user reviews and customer ratings available at ReviewOwl.com.

Contact Information

Complete KitchenAid customer service contact information including steps to reach representatives, hours of operation, customer support links and more from ContactHelp.com.

Scoreboard Ratings

See detailed KitchenAid customer service rankings, employee comments and much more from our sister site.

KitchenAid Recalls

Find comprehensive KitchenAid recall information updated hourly on RecallOwl.com.