Get support for KitchenAid KHMC1857WSS - Microwave Hood Combination Oven

KitchenAid KHMC1857WSS Support Question

KitchenAid KHMC1857WSS Support Question

Find answers below for this question about KitchenAid KHMC1857WSS - Microwave Hood Combination Oven.
Need a KitchenAid KHMC1857WSS manual? We have 3 online manuals for this item!
Question posted by kdbu on November 17th, 2013

Where Can I Purchase A Cavity Light Bulb For Kitchenaid Microwave Model

khmc1857wss

Current Answers

Answer #1: Posted by helpowlsupport on November 17th, 2013 1:39 PM
This answer was accepted by the poster of the original question.
helpowlsupport

Member since:
November 17th, 2013

Points: 369,900
1,100
points
i suggest you go for ebay as it the most trust worthy online retiler

with every product available


"@ your service, [email protected] "

Related KitchenAid KHMC1857WSS Manual Pages

Use & Care Guide - Page 1

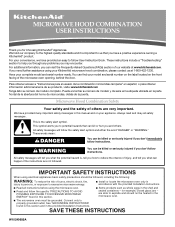
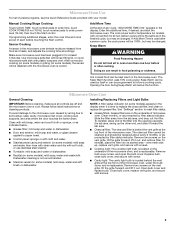
...Microwave Hood Combination Safety Your safety and the safety of injury, and tell you what can find your KitchenAid microwave hood combination, please contact us that can be followed, including the following: WARNING: To reduce the risk of the microwave oven...microwave energy: ■ Install or locate the microwave oven only in the shell and sealed containers - Have your complete model...
Use & Care Guide - Page 2

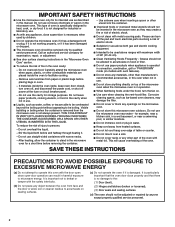
... PRECAUTIONS TO AVOID POSSIBLE EXPOSURE TO EXCESSIVE MICROWAVE ENERGY (a) Do not attempt to accumulate on hood or filter. ■ Do not use paper products when appliance is operated in convection, combination, grill or "PAN BROWN" mode (on the microwave oven. ■ Do not store this oven when not in this microwave oven outdoors. It is particularly important that...
Use & Care Guide - Page 3

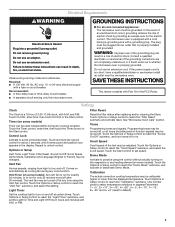
... the cooktop light to default). 3 See "Microwave Oven Care" section. Touch the Options or Setup control to whether the microwave oven is properly grounded. Observe all tones (including end-of electric shock by providing an escape wire for only 30 minutes more (off at any time using the control without actually turning on some models): Set...
Use & Care Guide - Page 4

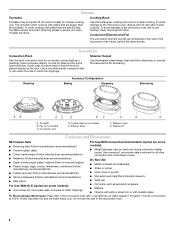
... in the wall of the microwave oven cavity, behind the metal screen. Pan (not provided) C. Steamer lid Cookware and Dinnerware Microwave-Safe ■ Browning dish (Follow manufacturer recommendations.) ■ Ceramic glass, glass ■ China, earthenware (Follow manufacturer recommendations.) For Use With Convection/Combination Cycles (on some models): ■ Metal bakeware may...
Use & Care Guide - Page 5

... cleaning is not recommended. ■ Steamer vessel (on some models) appears in for all controls are on the underside of the microwave oven, and is replaceable. Replace bulb, close bulb cover, and secure with screws. 5 Close bulb cover, replace vent grille, and secure with screw. ■ Cavity light: The cavity light bulb is behind the vent grille at least 3 minutes. Make...
Use & Care Guide - Page 6

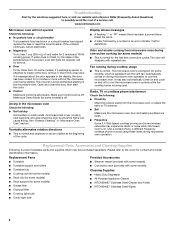
... hub ■ Cooking rack (for some models) ■ Rack clip (for some models) ■ Rack support (for the first few convection cycles. On some models) ■ This is normal for some models) ■ Grease filter ■ Charcoal filter ■ Cooktop light bulbCavity light bulb ■ Steamer vessel (provided with some models) ■ Convection rack (provided with repeated...
Use & Care Guide - Page 7

... THE DURATION OF IMPLIED WARRANTIES OF MERCHANTABILITY OR FITNESS, SO THESE EXCLUSIONS OR LIMITATIONS MAY NOT APPLY TO YOU. KITCHENAID® BUILT-IN OVEN & MICROWAVE WARRANTY LIMITED WARRANTY For one year from the date of purchase, when this warranty. 7. Service must be repaired in the home and only in materials or workmanship. If outside...
Dimension Guide - Page 1

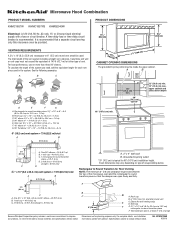
...continuous commitment to round transition piece so that a separate circuit serving only this microwave oven be provided. 17 " (43.8 cm) 16 " (41.3 cm) ... system = 73 ft (22.2 m) total A B 6 ft (1.8 m) 2 ft (0.6 m) C A. Microwave Hood Combination PRODUCT MODEL NUMBERS KHMC1857W KHMC1857XS KHMS2040W PRODUCT DIMENSIONS Electrical: A 120-Volt, 60-Hz, AC-only, 15- Rectangular to round...
Installation Guide - Page 1

... cover different models. Always read and obey all safety messages. This symbol alerts you to reduce the chance of Contents MICROWAVE HOOD COMBINATION SAFETY 1 INSTALLATION...Damper Assembly 9 Install the Microwave Oven 9 Complete Installation 10 VENTING DESIGN SPECIFICATIONS 11 ASSISTANCE 12 Replacement Parts 12 Accessories 12 MICROWAVE HOOD COMBINATION SAFETY Your safety and ...
Installation Guide - Page 2

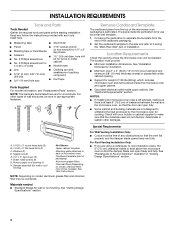
... the instructions provided with your builder or cabinet supplier to withstand the heat produced by the microwave oven for weight of packaging) Aluminum grease filters Charcoal filters (Depending on model, aluminum grease filter and charcoal filter may not be combined. Cut along the perforation to Round Transition" illustration in "Venting Design Specifications" section. 2 Location...
Installation Guide - Page 3

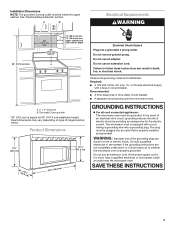
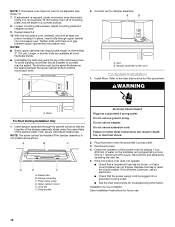
... max. Do not remove ground prong. Do not use an extension cord. Failure to whether the microwave oven is properly grounded. Grounded 3 prong outlet *30" (76.2 cm) is properly installed and grounded...delay fuse or time-delay circuit breaker. ■ A separate circuit serving only this microwave oven. SAVE THESE INSTRUCTIONS 3 or 20-amp electrical supply with a grounding plug. Exact ...
Installation Guide - Page 4

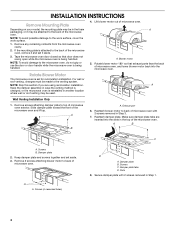
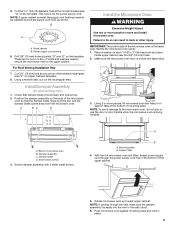
... of the microwave oven. Remove any remaining contents from the microwave oven cavity. 2. A Keep the damper assembly in case the venting method is changed, or the microwave oven is attached to the back of microwave oven. A A. Reattach blower motor to back of microwave oven. Damper plate tabs D. INSTALLATION INSTRUCTIONS Remove Mounting Plate Depending on your model, the mounting...
Installation Guide - Page 5

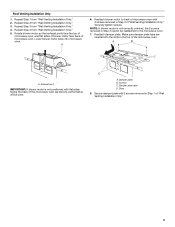
... "Wall Venting Installation Only." 5 Securely tighten screws. Slots 8. Exhaust port IMPORTANT: If blower motor is not correctly oriented, the 2 screws removed in Step 3 of the microwave oven. Damper plate B. Repeat Step 4 from "Wall Venting Installation Only." 4. Reattach damper plate. Secure damper plate with 2 screws removed in Step 3 cannot be poor. NOTE: If...
Installation Guide - Page 6

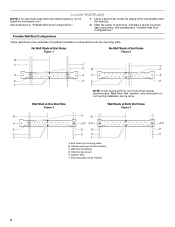
... Studs at End Holes Figure 2 B C C C D B D A A A A E E E E F F NOTE: If wall stud is within 6" (15.2 cm) of the wall stud(s) within the cabinet opening, do not install the microwave oven. 1. Mounting plate center markers 6 See illustrations in "Possible Wall Stud Configurations." Locate Wall Stud(s) NOTE: If no wall studs exist within the opening. Holes for...
Installation Guide - Page 7

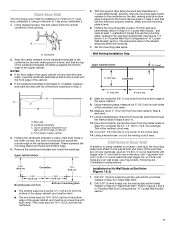
.... This is butted up against the bottom edge of the cutout area. 14. or if both end holes are properly marked. Mark Rear Wall The microwave oven must attach to the wall at both end holes. Align the center markers on the cardboard template to the centerline on a level line with front...
Installation Guide - Page 8

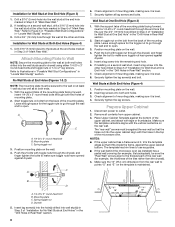
... 1/4-20 x 3" round-head bolt B. Position mounting plate on the wall. 4. Check alignment of the microwave oven. Make sure the template centerline aligns with tape or thumbtacks. Mounting plate C. Spring toggle nut D. Refer ...bolts from the rear wall to use as guides. ■ If the wall behind the microwave oven (as at the end hole marked in Step 3 of mounting plate. 2. C A...
Installation Guide - Page 9

...2. Place a washer on support tabs at the top, and the damper blade opens away from the microwave oven. Sheet metal screws 3. Mounting plate B. Cut the 1¹⁄₂" (3.8 cm) diameter hole ... Assembly (for two 1/4-20 x 3" bolts and washers used to secure the microwave oven to move and install microwave oven. Check that the damper blade hinge is the heavy side. A. NOTE: If...
Installation Guide - Page 10

...damper assembly is not positioned as the space between upper cabinet and microwave oven. Vent B. A B C D E F A. Reconnect power. 4. If the microwave oven does not operate: ■ Check that a household fuse has not...in place, insert bolts through the cabinet cutout so that the long tab of microwave oven by operating the vent fan. 5. Check the operation of the damper assembly ...
Installation Guide - Page 11

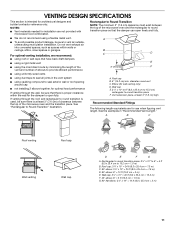
... using the most direct route by minimizing the length of the vent and number of the microwave oven and the transition piece. NOTES: ■ Vent materials needed for installation are for the ...3" (7.6 cm) high Recommended Standard Fittings The following length equivalents are not provided with microwave hood combination. ■ We do not recommend using a flexible metal vent. ■ To ...
Installation Guide - Page 12

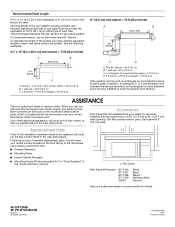
....2 cm) vent system = 73 ft (22.2 m) total A B 6 ft (1.8 m) 2 ft (0.6 m) C D A. Both numbers can be found on the front frame of the system you will need the microwave oven model number and serial number. Following is located behind the door. ■ Damper Assembly ■ Mounting Plate ■ Upper Cabinet Template ■ Mounting Screw Kit (includes...

KitchenAid Knowledge Base Results

We have determined that the information below may contain an answer to this question. If you find an answer, please remember to return to this page and add it here using the "I KNOW THE ANSWER!" button above. It's that easy to earn points!

  • Changing the oven light bulb - Superba built-in and microwave combination ovens
    To purchase the bulbs, call 1-800-334-6889 and ask for Part No. 4452164. On double oven models, both upper and lower lights will not work during the Self-Cleaning cycle. Remove the bulb from the oven. Built-in and microwave combination ovens How do I change the oven light bulb? The oven lights will come on or off and cool. Remove the glass light cover by...
  • Replacing oven light bulbs - Built-in ovens
    ... bulb. Remove the bulb from the oven. Replacing oven light bulbs - The oven lights will not work during the Self-Cleaning cycle. Superba built-in oven come on ?  Architect Series II - When the oven door is opened . Reconnect power. On double oven models, both upper and lower lights should the lights in my built-in and microwave combination ovens Changing the oven light...
  • Can I use aluminum foil in my microwave and if so, are there tips for using it?
    ... a metallic glaze My microwave oven will not run FAQs Knowledgebase search tips Different types of light) can be used in ovens Product Literature (Use & Care, Parts Lists, etc) Replacing oven light bulbs - Metals not approved for use Racks and bakeware supplied with the microwave oven (on some metal can occur and cause damage to touch the inside cavity walls, ceiling...

Similar Questions

Ask a New Question
Use the box below to post a new question about this KitchenAid product .
Points & Prizes
  • You can earn points for nearly everything you do on HelpOwl.com
  • You can trade in those points for gift cards at leading retailers such as Amazon.com and Walmart
  • It's that simple!
See How it Works
Create a Free Account

KitchenAid Manuals

Find free KitchenAid KHMC1857WSS - Microwave Hood Combination Oven manuals and user guides available at ManualOwl.com. Try out our unique manual viewer allowing you to interact with manuals from directly within your browser!

KitchenAid Reviews

View thousands of KitchenAid user reviews and customer ratings available at ReviewOwl.com.

Contact Information

Complete KitchenAid customer service contact information including steps to reach representatives, hours of operation, customer support links and more from ContactHelp.com.

Scoreboard Ratings

See detailed KitchenAid customer service rankings, employee comments and much more from our sister site.

KitchenAid Recalls

Find comprehensive KitchenAid recall information updated hourly on RecallOwl.com.